2014-10-13 10:14:42
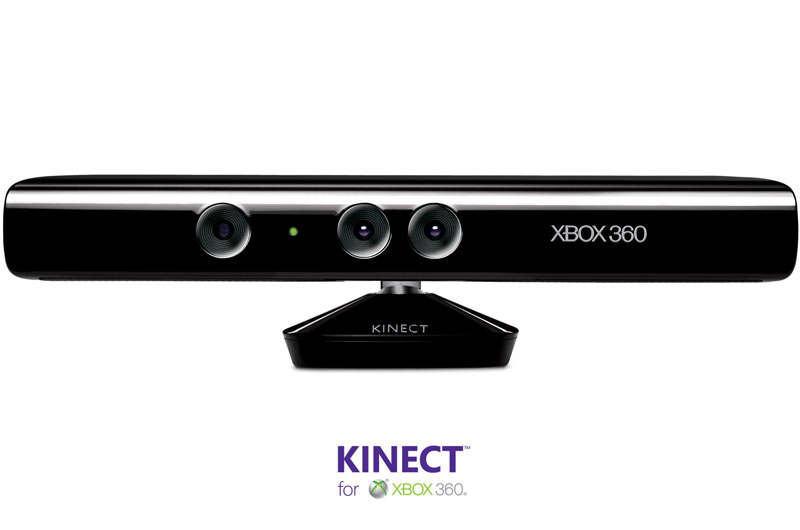
'Kinect가 있으면 컨트롤러가 필요 없습니다. 리모컨도 필요 없습니다. 바로 여러분만 있으면 됩니다. 필요한 것은 그뿐입니다.'
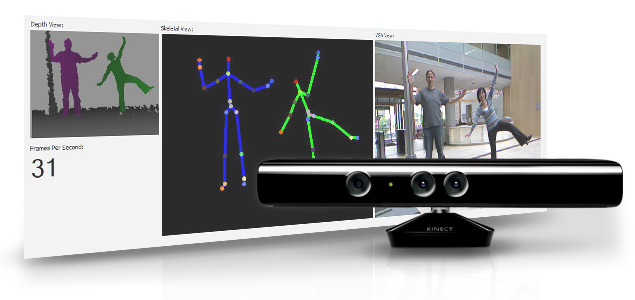
Microsoft사에서 Kinect를 소개 할 때 쓴 말입니다. 소개글과 같이 Kinect는 다른 조작 컨트롤러를 사용하지 않고 사람의 온몸을 이용하여 게임을 컨트롤 하게 합니다.
이런 놀라운 기능으로 인해 2010년 11월 Kinect가 처음 출시 되었을 때 엄청난 이슈를 불러왔고, 결국 세상에서 가장 빨리 팔린 제품으로 기네스북에 오른 전자 제품이 되었습니다.
밑의 동영상을 보시면 손동작만으로 TV를 제어 하고, 온몸을 움직여 게임을 컨트롤 하는 등 다양하게 사용되어지고 있는 것을 알 수 있습니다.
| NO | 부품명 | 수량 | 상세설명 |
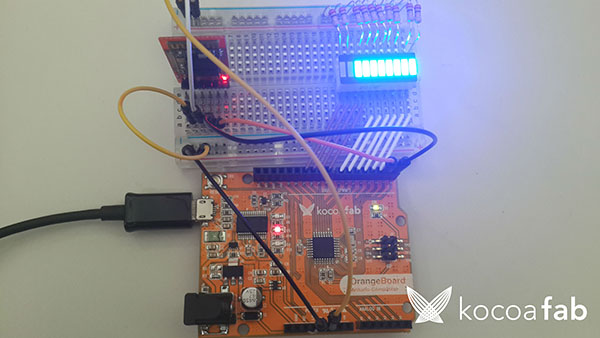
| 1 | 오렌지 보드 | 1 | 아두이노 |
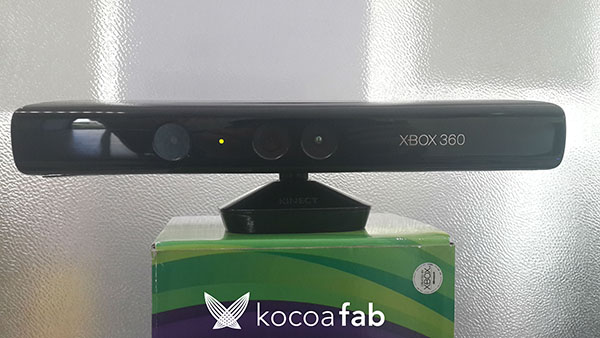
| 2 | 키넥트 | 1 | 키넥트 |
| 3 | 블루투스 모듈(HC-05) | 1 | 블루투스 |
| 4 | 바그래프 LED | 1 | LED |
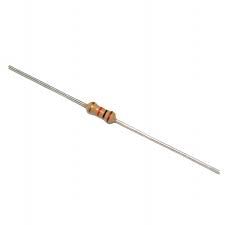
| 5 | 220Ω 저항 | 10 | 저항 |
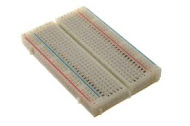
| 6 | 브레드보드 | 1 | 브레드보드 |
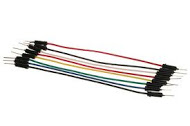
| 7 | 점퍼케이블 | 16 | 점퍼케이블 |
| 부품명 | 오렌지보드 | 키넥트 | 블루투스 모듈 |
| 파트 | 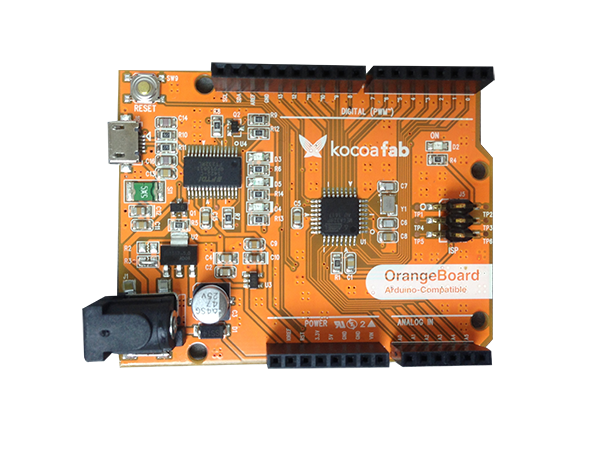 |
 |
 |
| 부품명 | 바그래프 | 220Ω저항 | 브레드보드 | 점퍼케이블 |
| 파트 | 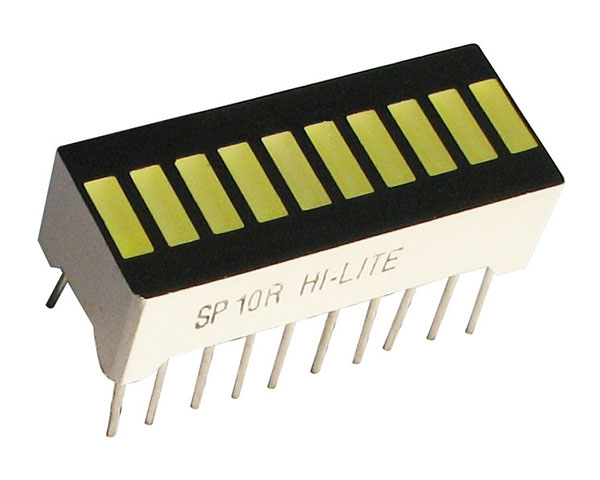 |
 |
 |
 |
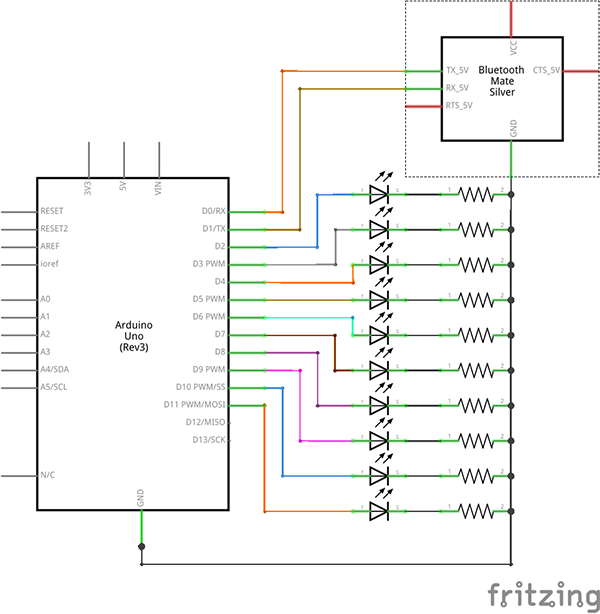
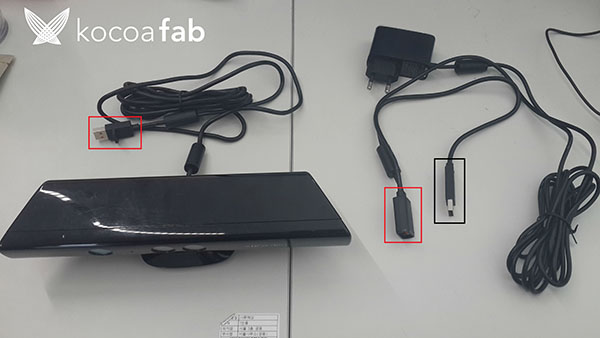
Kinect 본체와 연결된 USB와 전원에 있는 USB 단자를 연결 하시고, 따로 전원에 있는 USB를 컴퓨터와 연결해 줍니다.
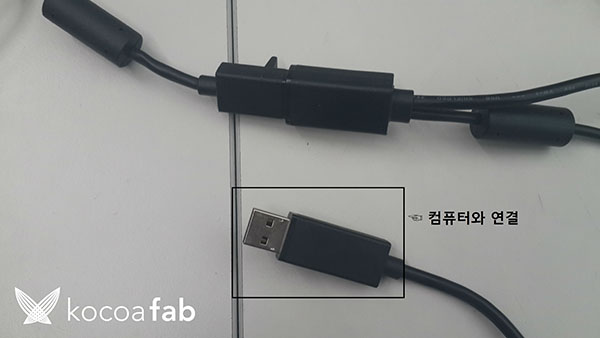
빨간 네모 안의 있는 것 끼리 연결하고, 검은 네모 안에 있는 USB를 컴퓨터와 연결합니다.(밑의 사진 참고)
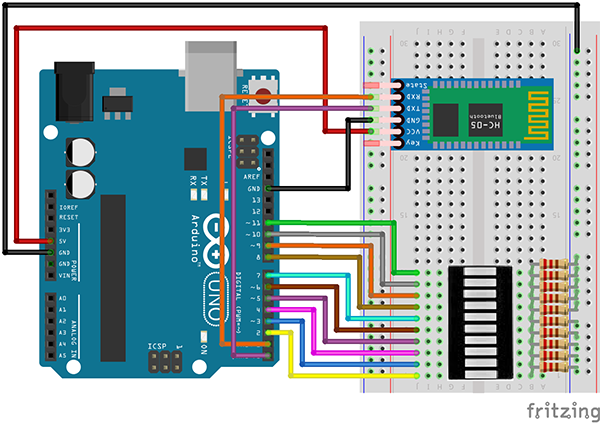
* 바그래프 LED연결하는 방법은 가변저항을 이용하여 바그래프LED 제어하기 를 참고 하시기 바랍니다.
소프트웨어 Coding
아두이노 소스
* 본 소스는 스케치를 사용하여 작성 / 업로드 합니다. 스케치에 대한 사용법은 링크를 참고 하시기 바랍니다.
* 밑의 프로세싱 소스를 작성하시기 전에 아두이노 소스를 작성, 업로드 하시기 바랍니다.
* 아두이노에 소스를 업로드 시킨 후, 아두이노와 USB가 연결되지 않아도 프로세싱 소스를 사용하실 수 있습니다..(블루투스를 사용해서 연결함)
* 본 소스를 수정 했을 경우, 밑의 프로세싱 소스도 수정해야 합니다. 수정 하실 경우 밑의 설명을 읽고 수정하시기 바랍니다.
#include <SoftwareSerial.h>

SoftwareSerial BTSerial(0, 1); //
const int ledCount = 10; // LED 바그래프에 내장된 LED 갯수를 선언합니다.

int ledPins[] = {
  2, 3, 4, 5, 6, 7, 8, 9, 10, 11 };
 // LED 바그래프의 각각의 LED와 연결된 핀번호를 배열로 선언합니다.


void setup() {
  for (int thisLed = 0; thisLed < ledCount; thisLed++) { //배열된 LED핀을 출력으로 설정합니다.
    pinMode(ledPins[thisLed], OUTPUT);
  }

  BTSerial.begin(9600);
  Serial.begin(9600);
}

void loop() {
  if(BTSerial.available()){  // 블루투스 통신이 가능하면
    byte data = BTSerial.read();
    Serial.println(data);
    // 블루투스에서 값을 받아옵니다.

     // 배열된 LED에 아래의 조건을 반복합니다.
    for (int thisLed = 0; thisLed < ledCount; thisLed++) {
      // 배열된 LED가 받아온 값보다 작으면
      // 할당된 값의 LED를 켭니다.
      if (thisLed < data) {
        digitalWrite(ledPins[thisLed], HIGH);
      }
      // 그렇지 않으면 LED를 끕니다.
      else {
        digitalWrite(ledPins[thisLed], LOW);
      }
    }
  }
}
프로세싱 소스
* 밑의 소스는 프로세싱으로 작성 / 업로드 합니다. 프로세싱에 대한 사용법은 링크 를 보고 참고 하시기 바랍니다.
/* --------------------------------------------------------------------------
 * SimpleOpenNI User Test
 * --------------------------------------------------------------------------
 * Processing Wrapper for the OpenNI/Kinect 2 library
 * http://code.google.com/p/simple-openni
 * --------------------------------------------------------------------------
 * prog:  Max Rheiner / Interaction Design / Zhdk / http://iad.zhdk.ch/
 * date:  12/12/2012 (m/d/y)
 * ----------------------------------------------------------------------------
 */
import processing.serial.*;
import java.awt.*;
import java.awt.event.KeyEvent;
import SimpleOpenNI.*;

Serial myPort;
PVector tempPos = new PVector();

SimpleOpenNI  context;
color[]       userClr = new color[] {
  color(255, 0, 0),
  color(0, 255, 0),
  color(0, 0, 255),
  color(255, 255, 0),
  color(255, 0, 255),
  color(0, 255, 255)
};
PVector com = new PVector();

void setup()
{
  println(Serial.list());

  String portName = Serial.list()[3];
  myPort = new Serial(this, portName, 9600);

  size(640, 480);

  context = new SimpleOpenNI(this);
  if (context.isInit() == false)
  {
    println("Can't init SimpleOpenNI, maybe the camera is not connected!");
    exit();
    return;
  }

  // enable depthMap generation
  context.enableDepth();

  // enable skeleton generation for all joints
  context.enableUser();

  background(200, 0, 0);

  stroke(0, 0, 255);
  strokeWeight(3);
  smooth();
}

void draw()
{
  // 카메라를 띄웁니다.
  context.update();

  image(context.userImage(), 0, 0);

  // 사람이 인식이 되면 목록에 추가합니다..
  int[] userList = context.getUsers();

  // 인식된 사람 수만큼 스켈레톤을 그려줍니다.
  for (int i=0; i<userList.length; i++)
  {
    if (context.isTrackingSkeleton(userList[i]))
    {
      stroke(userClr[ (userList[i] - 1) % userClr.length ] );
      drawSkeleton(userList[i]);
    }

    if (context.getCoM(userList[i], com))
    {
      context.convertRealWorldToProjective(com, com2d);
      stroke(100, 255, 0);
      strokeWeight(1);
      beginShape(LINES);
      vertex(com2d.x, com2d.y - 5);
      vertex(com2d.x, com2d.y + 5);

      vertex(com2d.x - 5, com2d.y);
      vertex(com2d.x + 5, com2d.y);
      endShape();

      fill(0, 255, 100);
      text(Integer.toString(userList[i]), com2d.x, com2d.y);
    }
  }
}

// 스켈레톤을 그리는 함수(인식된 사람마다 각각 스켈레톤을 그립니다.)
void drawSkeleton(int userId)
{
  try {
    // PVector를 선언해서 오른손의 관절을 저장해 둡니다.
   PVector jointRight = new PVector();
   context.getJointPositionSkeleton(userId, SimpleOpenNI.SKEL_RIGHT_HAND, jointRight);

  // PVector에 관절을 넣으면 해당 관절의 x, y, z값을 받아 올수 있습니다.
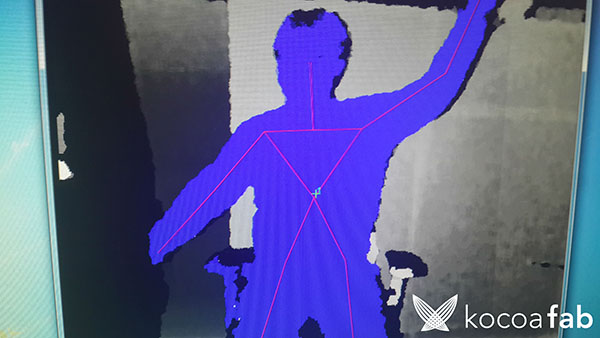
  // y값(높이)를 이용해 오른손의 높이를 측정하여 일정이상 높이위로 올렸을 경우
  // x값(좌우)를 받아 바그래프의 LED 수의 맞게(10개) 값을 재분배 하여 블루투스를 통해 아두이노로 전송합니다.
  // PVector의 좌표 값들은 float값이므로 값 재분배를 한뒤 INT값으로 바꿔 줍니다.
  if(jointRight.y > 100){
    float temp = map(jointRight.x, -400, 400, 0, 10); // PVector의 X값 재분배
    int imp = (int)temp; // INT로 변환
    println(imp);
    myPort.write(imp); // 블루투스를 통해 아두이노로 전송
  }

  }
  catch(Exception e) {
  }

  context.drawLimb(userId, SimpleOpenNI.SKEL_HEAD, SimpleOpenNI.SKEL_NECK);

  context.drawLimb(userId, SimpleOpenNI.SKEL_NECK, SimpleOpenNI.SKEL_LEFT_SHOULDER);
  context.drawLimb(userId, SimpleOpenNI.SKEL_LEFT_SHOULDER, SimpleOpenNI.SKEL_LEFT_ELBOW);
  context.drawLimb(userId, SimpleOpenNI.SKEL_LEFT_ELBOW, SimpleOpenNI.SKEL_LEFT_HAND);

  context.drawLimb(userId, SimpleOpenNI.SKEL_NECK, SimpleOpenNI.SKEL_RIGHT_SHOULDER);
  context.drawLimb(userId, SimpleOpenNI.SKEL_RIGHT_SHOULDER, SimpleOpenNI.SKEL_RIGHT_ELBOW);
  context.drawLimb(userId, SimpleOpenNI.SKEL_RIGHT_ELBOW, SimpleOpenNI.SKEL_RIGHT_HAND);

  context.drawLimb(userId, SimpleOpenNI.SKEL_LEFT_SHOULDER, SimpleOpenNI.SKEL_TORSO);
  context.drawLimb(userId, SimpleOpenNI.SKEL_RIGHT_SHOULDER, SimpleOpenNI.SKEL_TORSO);

  context.drawLimb(userId, SimpleOpenNI.SKEL_TORSO, SimpleOpenNI.SKEL_LEFT_HIP);
  context.drawLimb(userId, SimpleOpenNI.SKEL_LEFT_HIP, SimpleOpenNI.SKEL_LEFT_KNEE);
  context.drawLimb(userId, SimpleOpenNI.SKEL_LEFT_KNEE, SimpleOpenNI.SKEL_LEFT_FOOT);

  context.drawLimb(userId, SimpleOpenNI.SKEL_TORSO, SimpleOpenNI.SKEL_RIGHT_HIP);
  context.drawLimb(userId, SimpleOpenNI.SKEL_RIGHT_HIP, SimpleOpenNI.SKEL_RIGHT_KNEE);
  context.drawLimb(userId, SimpleOpenNI.SKEL_RIGHT_KNEE, SimpleOpenNI.SKEL_RIGHT_FOOT);
  // 프로세싱을 실행 시킨 화면에 각 관절을 그려줍니다.
}

// -----------------------------------------------------------------
// SimpleOpenNI events

void onNewUser(SimpleOpenNI curContext, int userId)
// 인식된 사람의 userno을 지정한 후 스켈레톤을 그려줍니다.
{
  println("onNewUser - userId: " + userId);
  println("\tstart tracking skeleton");

  curContext.startTrackingSkeleton(userId);
}

void onLostUser(SimpleOpenNI curContext, int userId)
// 인식된 사람이 화면에서 벗어 낫을 경우
{
  println("onLostUser - userId: " + userId);
}

void onVisibleUser(SimpleOpenNI curContext, int userId)
{
  //println("onVisibleUser - userId: " + userId);
}


void keyPressed()
{
  switch(key)
  {
  case ' ':
    context.setMirror(!context.mirror());
    break;
  }
}
소프트웨어 설명
아두이노
if(BTSerial.available()){  // 블루투스 통신이 가능하면
    byte data = BTSerial.read();
    Serial.println(data);
    // 블루투스에서 값을 받아옵니다.

     // 배열된 LED에 아래의 조건을 반복합니다.
    for (int thisLed = 0; thisLed < ledCount; thisLed++) {
      // 배열된 LED가 받아온 값보다 작으면
      // 할당된 값의 LED를 켭니다.
      if (thisLed < data) {
        digitalWrite(ledPins[thisLed], HIGH);
      }
      // 그렇지 않으면 LED를 끕니다.
      else {
        digitalWrite(ledPins[thisLed], LOW);
      }
    }
  }
블루투스 통신이 되면 받아온 값을 이용해 LED바의 LED를 키거나 끄는 소스입니다. 자세한 내용은 튜토리얼 가변저항을 이용하여 바그래프LED를 제어하기 를 참고 하시기 바랍니다.
(블루투스 통신으로 넘어온 값은 프로세싱에서 LED의 숫자에 맞게 값을 수정하여 보냅니다. 아두이노 스케치에서 따로 수정하실 필요 없습니다.)
프로세싱
- OpenNI 설치 및 예제 사용방법
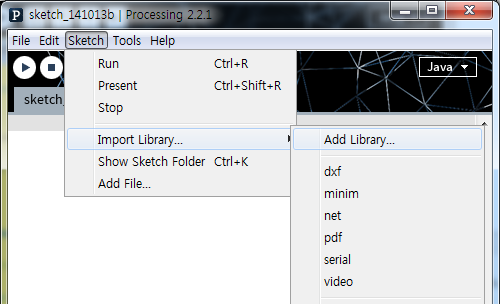
메뉴바에 Sketch -> Import Library... -> Add Library 를 선택하시면 밑의 화면과 같은 창이 나옵니다.
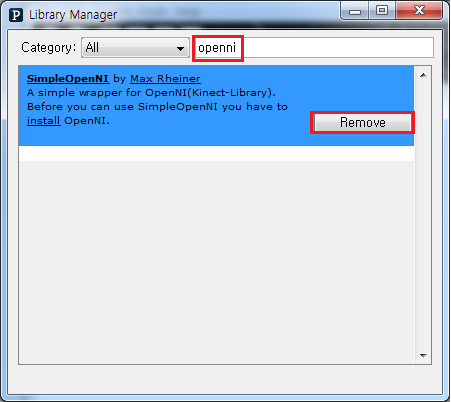
검색창에 openni를 검색하시면 위와 같이 하나가 나오는데 이것을 Install 하시면됩니다.
(현재는 설치가 되어서 Remove가 나오는데 Remove버튼이 있는 자리에 Install이 나옵니다.)
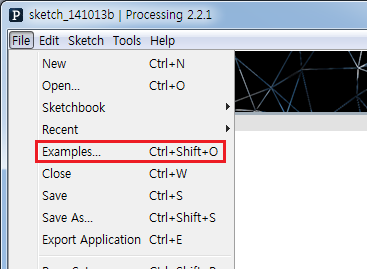
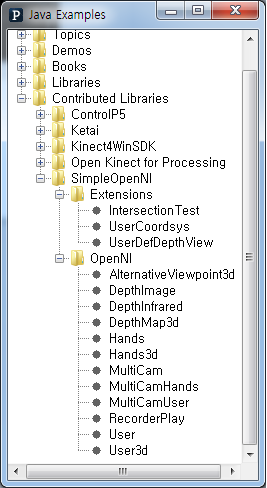
설치 후 File -> Examples.. 를 선택하시고 Contributed Libraries -> SimpleOpenNI 안에 있는 예제를 실행 하시면 프로세싱에서 가능한 키넥트 예제들을 사용하실 수 있습니다.
(이 컨텐츠에 있는 프로세싱 코드도 SimpleOpenNI 라이브러리를 설치 하셔야 실행이 됩니다.(예제는 안하셔도 됩니다. 이 컨텐츠에서 사용한 예제는 User 입니다.)
소스 설명
  println(Serial.list());

  String portName = Serial.list()[3];
  myPort = new Serial(this, portName, 9600);
현재 연결된 시리얼 포트 번호를 출력하고, 나열된 포트 번호중 3번과 연결하여 9600bps 속도로 시리얼 통신을 합니다.
(포트번호는 0번부터 시작, 3번 포트는 4번째 있는 포트 입니다 COM31)

   // PVector를 선언해서 오른손의 관절을 저장해 둡니다.
   PVector jointRight = new PVector();
   context.getJointPositionSkeleton(userId, SimpleOpenNI.SKEL_RIGHT_HAND, jointRight);

  // PVector에 관절을 넣으면 해당 관절의 x, y, z값을 받아 올수 있습니다.
  // y값(높이)를 이용해 오른손의 높이를 측정하여 일정이상 높이위로 올렸을 경우
  // x값(좌우)를 받아 바그래프의 LED 수의 맞게(10개) 값을 재분배 하여 블루투스를 통해 아두이노로 전송합니다.
  // PVector의 좌표 값들은 float값이므로 값 재분배를 한뒤 INT값으로 바꿔 줍니다.
  if(jointRight.y > 100){
    float temp = map(jointRight.x, -400, 400, 0, 10); // PVector의 X값 재분배
    int imp = (int)temp; // INT로 변환
    println(imp);
    myPort.write(imp); // 블루투스를 통해 아두이노로 전송
  context.drawLimb(userId, SimpleOpenNI.SKEL_HEAD, SimpleOpenNI.SKEL_NECK);

  context.drawLimb(userId, SimpleOpenNI.SKEL_NECK, SimpleOpenNI.SKEL_LEFT_SHOULDER);
  context.drawLimb(userId, SimpleOpenNI.SKEL_LEFT_SHOULDER, SimpleOpenNI.SKEL_LEFT_ELBOW);
  context.drawLimb(userId, SimpleOpenNI.SKEL_LEFT_ELBOW, SimpleOpenNI.SKEL_LEFT_HAND);

  context.drawLimb(userId, SimpleOpenNI.SKEL_NECK, SimpleOpenNI.SKEL_RIGHT_SHOULDER);
  context.drawLimb(userId, SimpleOpenNI.SKEL_RIGHT_SHOULDER, SimpleOpenNI.SKEL_RIGHT_ELBOW);
  context.drawLimb(userId, SimpleOpenNI.SKEL_RIGHT_ELBOW, SimpleOpenNI.SKEL_RIGHT_HAND);

  context.drawLimb(userId, SimpleOpenNI.SKEL_LEFT_SHOULDER, SimpleOpenNI.SKEL_TORSO);
  context.drawLimb(userId, SimpleOpenNI.SKEL_RIGHT_SHOULDER, SimpleOpenNI.SKEL_TORSO);

  context.drawLimb(userId, SimpleOpenNI.SKEL_TORSO, SimpleOpenNI.SKEL_LEFT_HIP);
  context.drawLimb(userId, SimpleOpenNI.SKEL_LEFT_HIP, SimpleOpenNI.SKEL_LEFT_KNEE);
  context.drawLimb(userId, SimpleOpenNI.SKEL_LEFT_KNEE, SimpleOpenNI.SKEL_LEFT_FOOT);

  context.drawLimb(userId, SimpleOpenNI.SKEL_TORSO, SimpleOpenNI.SKEL_RIGHT_HIP);
  context.drawLimb(userId, SimpleOpenNI.SKEL_RIGHT_HIP, SimpleOpenNI.SKEL_RIGHT_KNEE);
  context.drawLimb(userId, SimpleOpenNI.SKEL_RIGHT_KNEE, SimpleOpenNI.SKEL_RIGHT_FOOT);
  // 프로세싱을 실행 시킨 화면에 각 관절을 그려줍니다.

kocoafabeditor 
항상 진취적이고, 새로운 것을 추구하는 코코아팹 에디터입니다!
 키넥트, 아두이노, 오렌지보드