
네오픽셀링 안경 만들기
2014-09-17 13:23:34
개요
개요
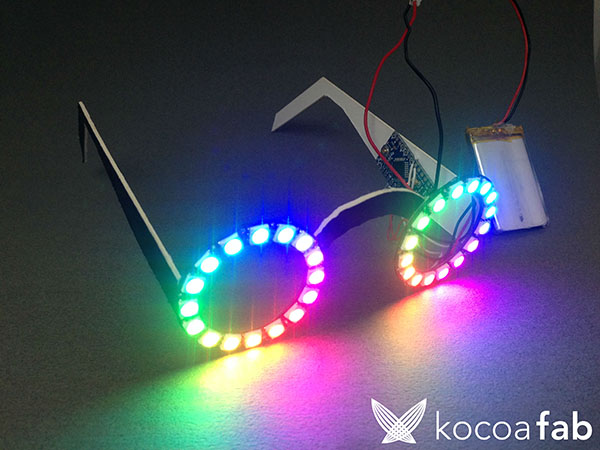
신발에 이어서 LED로 빛나는 안경을 만들어 보자.준비물 또한 간단하고 소스코드 또한 adafruit에서 제공해주는 라이브러리 안의 예제소스를 사용하기 때문에 쉽게 제작이 가능하다.

쓰고 다니기에는 부담스럽지만 보기에는 나름(?) 이쁘다. 그리고 막상 써보면 정말 눈부셔서 사람들이 쳐다볼 수가 없을 정도이다:D
이번 프로젝트를 진행한다면 아두이노로 이런 패션아이템 또한 제작이 가능하다는 것을 배울 수 있을 것이라고 생각한다.
동영상
필요한 사전지식
NeoPixel부품 목록
| NO | 부품명 | 수량 | 상세설명 |
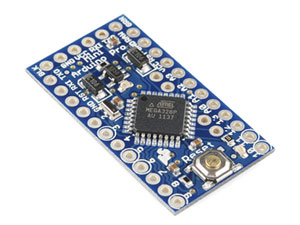
| 1 | 아두이노 미니(mini) | 1 | 아두이노 |
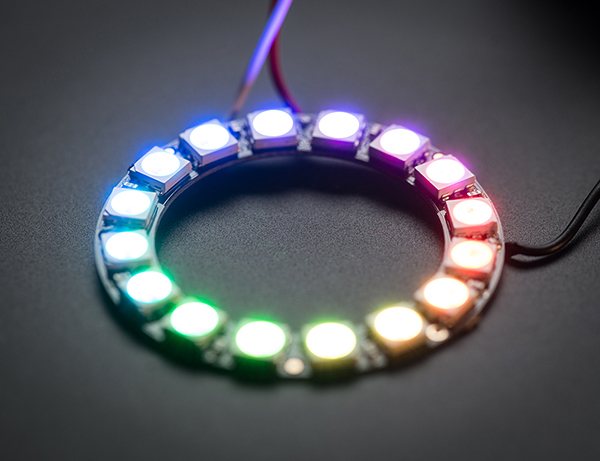
| 2 | NeoPixel링 | 2 | Adafruit |
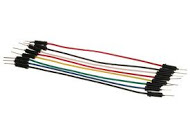
| 3 | 케이블 | 10 | |
| 4 | 철사나 하드보드지 | ||
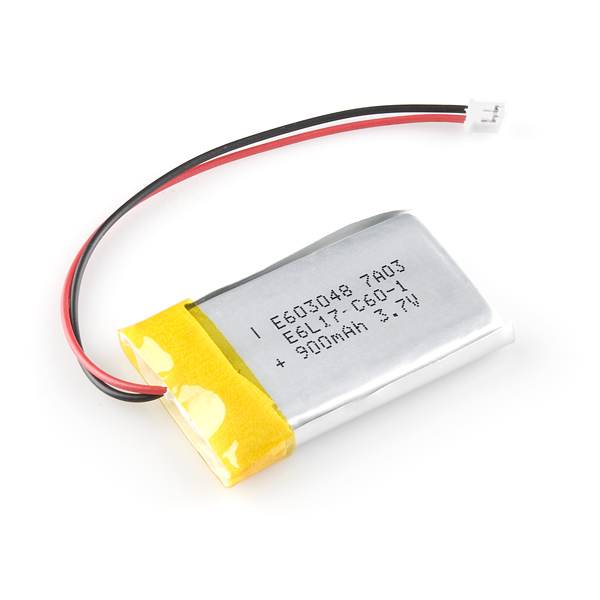
| 5 | 리튬 배터리 | 1 | 3.7v |
| 부품명 | 아두이노 미니(mini) | NeoPixel링 | 케이블 | 철사or 하드보드지 | 리튬 배터리 |
| 부품 사진 |
 |
 |
 |
 |
 |
하드웨어 making
브레드보드
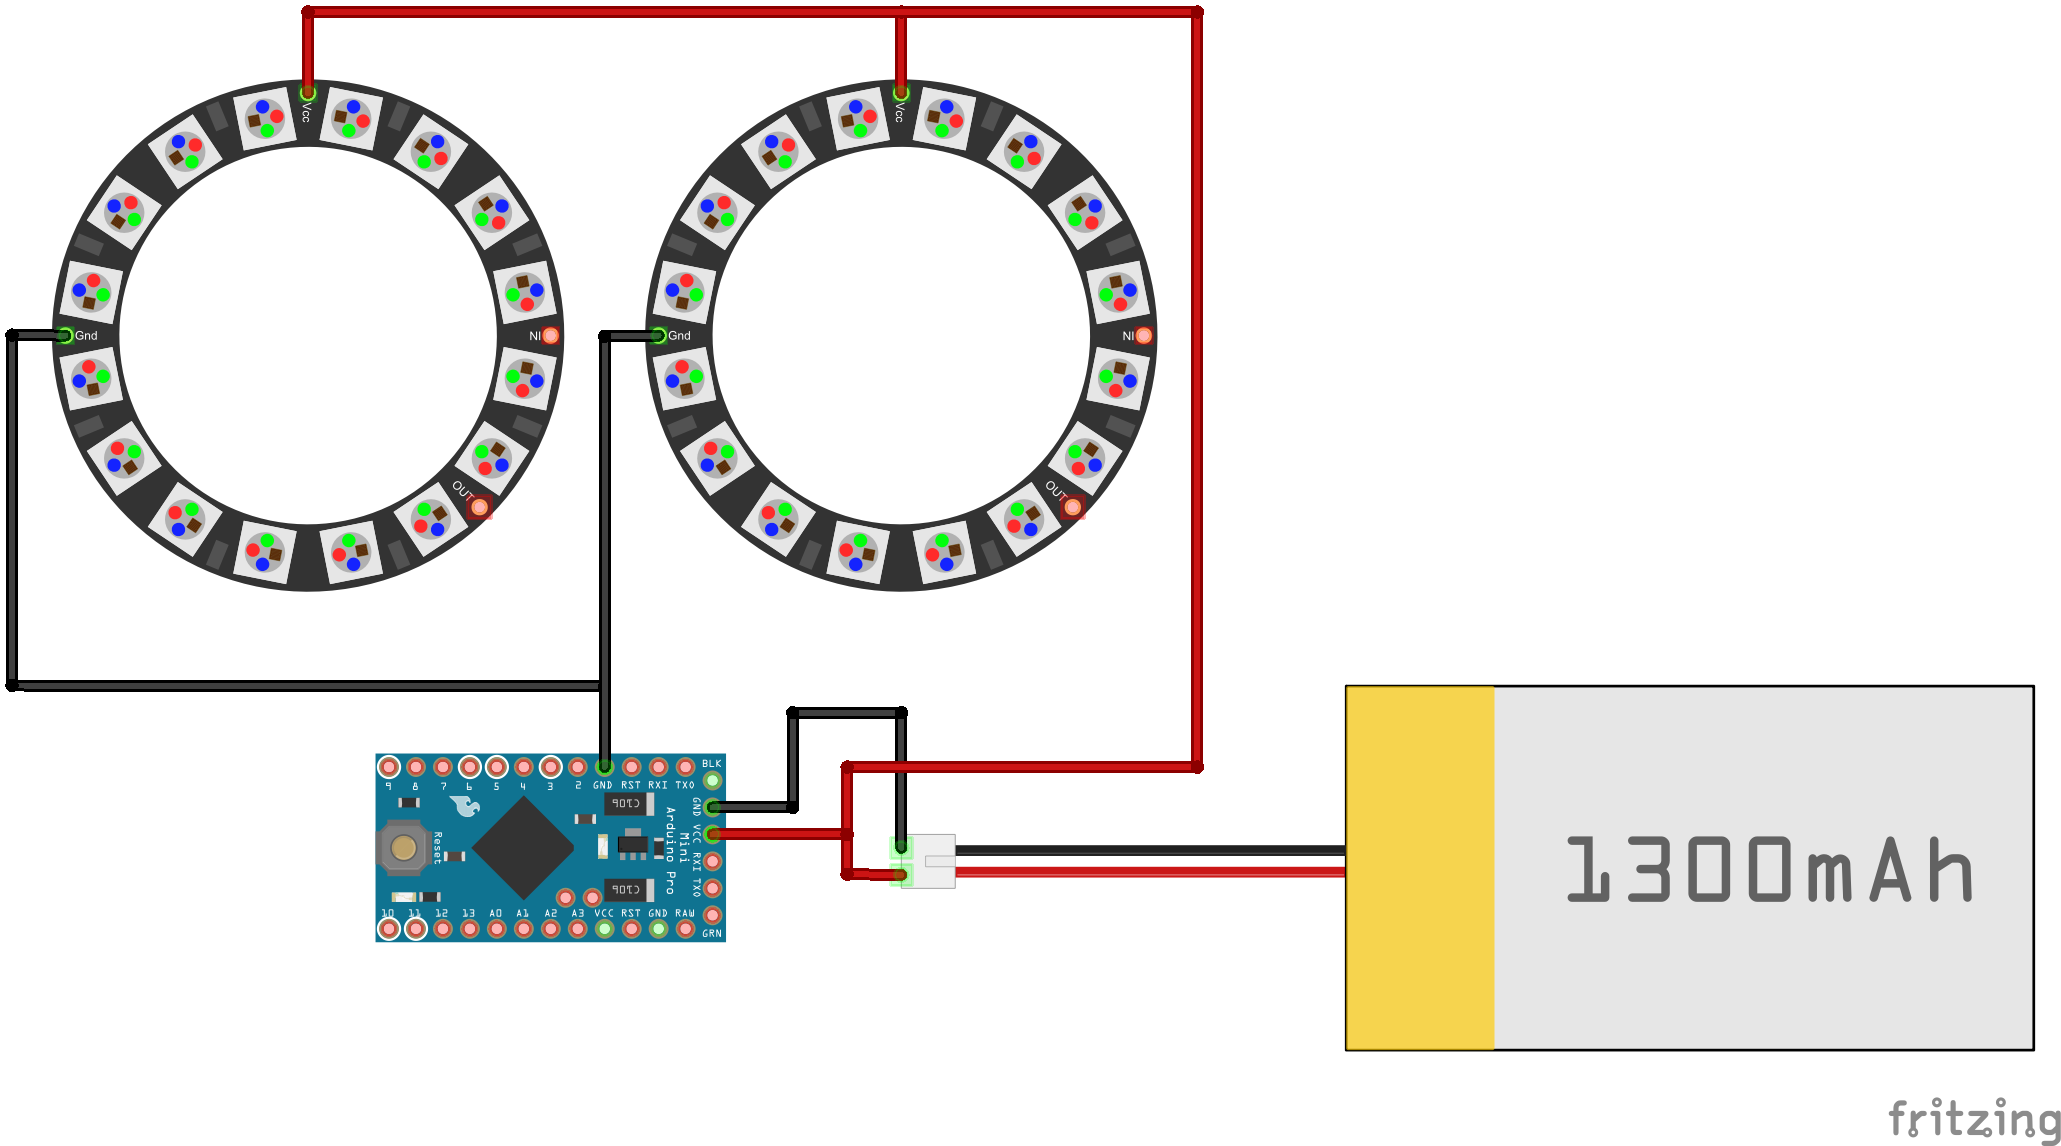
전자회로도
소프트웨어 coding
#include <Adafruit_NeoPixel.h>

#define PIN 6

// Parameter 1 = number of pixels in strip
// Parameter 2 = Arduino pin number (most are valid)
// Parameter 3 = pixel type flags, add together as needed:
//   NEO_KHZ800  800 KHz bitstream (most NeoPixel products w/WS2812 LEDs)
//   NEO_KHZ400  400 KHz (classic 'v1' (not v2) FLORA pixels, WS2811 drivers)
//   NEO_GRB     Pixels are wired for GRB bitstream (most NeoPixel products)
//   NEO_RGB     Pixels are wired for RGB bitstream (v1 FLORA pixels, not v2)
Adafruit_NeoPixel strip = Adafruit_NeoPixel(60, PIN, NEO_GRB + NEO_KHZ800);

// IMPORTANT: To reduce NeoPixel burnout risk, add 1000 uF capacitor across
// pixel power leads, add 300 - 500 Ohm resistor on first pixel's data input
// and minimize distance between Arduino and first pixel.  Avoid connecting
// on a live circuit...if you must, connect GND first.

void setup() {
  strip.begin();
  strip.show(); // Initialize all pixels to 'off'
}

void loop() {
  // Some example procedures showing how to display to the pixels:
  colorWipe(strip.Color(255, 0, 0), 50); // Red
  colorWipe(strip.Color(0, 255, 0), 50); // Green
  colorWipe(strip.Color(0, 0, 255), 50); // Blue
  // Send a theater pixel chase in...
  theaterChase(strip.Color(127, 127, 127), 50); // White
  theaterChase(strip.Color(127,   0,   0), 50); // Red
  theaterChase(strip.Color(  0,   0, 127), 50); // Blue

  rainbow(20);
  rainbowCycle(20);
  theaterChaseRainbow(50);
}

// Fill the dots one after the other with a color
void colorWipe(uint32_t c, uint8_t wait) {
  for(uint16_t i=0; i<strip.numPixels(); i++) {
      strip.setPixelColor(i, c);
      strip.show();
      delay(wait);
  }
}

void rainbow(uint8_t wait) {
  uint16_t i, j;

  for(j=0; j<256; j++) {
    for(i=0; i<strip.numPixels(); i++) {
      strip.setPixelColor(i, Wheel((i+j) & 255));
    }
    strip.show();
    delay(wait);
  }
}

// Slightly different, this makes the rainbow equally distributed throughout
void rainbowCycle(uint8_t wait) {
  uint16_t i, j;

  for(j=0; j<256*5; j++) { // 5 cycles of all colors on wheel
    for(i=0; i< strip.numPixels(); i++) {
      strip.setPixelColor(i, Wheel(((i * 256 / strip.numPixels()) + j) & 255));
    }
    strip.show();
    delay(wait);
  }
}

//Theatre-style crawling lights.
void theaterChase(uint32_t c, uint8_t wait) {
  for (int j=0; j<10; j++) {  //do 10 cycles of chasing
    for (int q=0; q < 3; q++) {
      for (int i=0; i < strip.numPixels(); i=i+3) {
        strip.setPixelColor(i+q, c);    //turn every third pixel on
      }
      strip.show();

      delay(wait);

      for (int i=0; i < strip.numPixels(); i=i+3) {
        strip.setPixelColor(i+q, 0);        //turn every third pixel off
      }
    }
  }
}

//Theatre-style crawling lights with rainbow effect
void theaterChaseRainbow(uint8_t wait) {
  for (int j=0; j < 256; j++) {     // cycle all 256 colors in the wheel
    for (int q=0; q < 3; q++) {
        for (int i=0; i < strip.numPixels(); i=i+3) {
          strip.setPixelColor(i+q, Wheel( (i+j) % 255));    //turn every third pixel on
        }
        strip.show();

        delay(wait);

        for (int i=0; i < strip.numPixels(); i=i+3) {
          strip.setPixelColor(i+q, 0);        //turn every third pixel off
        }
    }
  }
}

// Input a value 0 to 255 to get a color value.
// The colours are a transition r - g - b - back to r.
uint32_t Wheel(byte WheelPos) {
  if(WheelPos < 85) {
   return strip.Color(WheelPos * 3, 255 - WheelPos * 3, 0);
  } else if(WheelPos < 170) {
   WheelPos -= 85;
   return strip.Color(255 - WheelPos * 3, 0, WheelPos * 3);
  } else {
   WheelPos -= 170;
   return strip.Color(0, WheelPos * 3, 255 - WheelPos * 3);
  }
}
Adafruit의 NeoPixel을 사용하기 위해서는 별도의 라이브러리가 필요하다.
아래 링크에서 받아서 사용이 가능하다.
NeoPixel 라이브러리 받기
외부라이브러리 설치하는 법
위의 소스코드는 NeoPixel을 설치하면 찾을 수 있는 예제 strandtest이다.
예제부분에서 조금만 수정하여 만들었기 때문에 손쉽게 작성하여 만들 수 있다.
동영상을 찍을 때의 안경은 이 예제의 NeoPixel패턴을 그대로 사용하였기 때문에 예제의 패턴대로 작동한다.
loop문을 보면 패턴은 LED가 차례대로 빨간색, 초록색, 파란색으로 켜지게 되고
그 다음에 흰색, 빨간색, 파란색이 자연스럽게 페이드인, 페이드아웃으로 켜졌다 꺼진다. 그 후에는 무지개색으로 각 픽셀이 돌아가며 켜지게 된다.
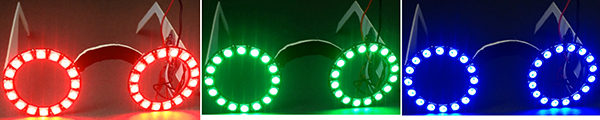
사진으로 보면 아래와 같은 순서대로 켜지고 꺼지는것을 반복하게 된다.

예제에서는 네오픽셀을 하나만 사용했기 때문에 아래와 같이 객체를 하나만 생성했지만 안경을 만들때는 링 두개를 사용하기 때문에 strip1이라는 객체를 추가하여 두개의 네오픽셀링이 동일하게 작동할 수 있게 해주어야한다.
또 객체를 만들 때 네오픽셀 스트라이프는 LED의 개수가 60개이지만 이번에 사용하는 네오픽셀 링은 LED의 개수가 16개이기 때문에 60을 16으로 수정해준다.
strip1이라는 객체를 하나 더 추가했으면 strip1또한 strip과 같이 움직여야 하기 때문에 strip1또한 strip과 같이 멤버함수를 동일하게 선언해 준다.
아래와 같이 strip. 으로 시작하는 함수가 있다면 strip1. 으로 동일하게 밑에 작성하면 된다.
함수에서도 strip.을 사용하는 함수가 있다면 strip1으로도 동일하게 작성한다.
NeoPixel 라이브러리 받기
외부라이브러리 설치하는 법
위의 소스코드는 NeoPixel을 설치하면 찾을 수 있는 예제 strandtest이다.
예제부분에서 조금만 수정하여 만들었기 때문에 손쉽게 작성하여 만들 수 있다.
void loop() {
  // Some example procedures showing how to display to the pixels:
  colorWipe(strip.Color(255, 0, 0), 50); // Red
  colorWipe(strip.Color(0, 255, 0), 50); // Green
  colorWipe(strip.Color(0, 0, 255), 50); // Blue
  // Send a theater pixel chase in...
  theaterChase(strip.Color(127, 127, 127), 50); // White
  theaterChase(strip.Color(127,   0,   0), 50); // Red
  theaterChase(strip.Color(  0,   0, 127), 50); // Blue

  rainbow(20);
  rainbowCycle(20);
  theaterChaseRainbow(50);
}
loop문을 보면 패턴은 LED가 차례대로 빨간색, 초록색, 파란색으로 켜지게 되고
그 다음에 흰색, 빨간색, 파란색이 자연스럽게 페이드인, 페이드아웃으로 켜졌다 꺼진다. 그 후에는 무지개색으로 각 픽셀이 돌아가며 켜지게 된다.
사진으로 보면 아래와 같은 순서대로 켜지고 꺼지는것을 반복하게 된다.
예제에서는 네오픽셀을 하나만 사용했기 때문에 아래와 같이 객체를 하나만 생성했지만 안경을 만들때는 링 두개를 사용하기 때문에 strip1이라는 객체를 추가하여 두개의 네오픽셀링이 동일하게 작동할 수 있게 해주어야한다.
또 객체를 만들 때 네오픽셀 스트라이프는 LED의 개수가 60개이지만 이번에 사용하는 네오픽셀 링은 LED의 개수가 16개이기 때문에 60을 16으로 수정해준다.
Adafruit_NeoPixel strip = Adafruit_NeoPixel(60, PIN, NEO_GRB + NEO_KHZ800); //첫번째 변수 60을 16으로 수정
//Adafruit_NeoPixel strip1 = Adafruit_NeoPixel(60, PIN, NEO_GRB + NEO_KHZ800); 위 strip외에 strip1이라는 객체를 하나 더 생성
strip1이라는 객체를 하나 더 추가했으면 strip1또한 strip과 같이 움직여야 하기 때문에 strip1또한 strip과 같이 멤버함수를 동일하게 선언해 준다.
아래와 같이 strip. 으로 시작하는 함수가 있다면 strip1. 으로 동일하게 밑에 작성하면 된다.
void setup() {
  strip.begin();
  strip.show();
  strip1.begin(); //예제에서 추가해야 할 줄
  strip1.show();  //예제에서 추가해야 할 줄
}
함수에서도 strip.을 사용하는 함수가 있다면 strip1으로도 동일하게 작성한다.
void colorWipe(uint32_t c, uint8_t wait) {
  for(uint16_t i=0; i<strip.numPixels(); i++) {
      strip.setPixelColor(i, c);
      strip1.setPixelColor(i, c); //위 strip.setPixelColor()와 같이 동일하게 strip1으로 작성
      strip.show();
      strip1.show(); //strip1. 추가
      delay(wait);
  }
}


수박쨈
 아두이노미니, NeoPixel링
