2014-08-21 15:59:28
SD카드는 휴대폰, 노트북, PDA와 같은 휴대용 장치에 사용하기 위해 개발된 플래시(비휘발성) 메모리 카드 입니다.

SD카드는 노트북이나 핸드폰에 장착하여 메모리를 추가 할 수 있고, 착탈이 가능하여 기기간의 사진이나 음악 등 컨텐츠의 이동/복사가 쉽습니다.
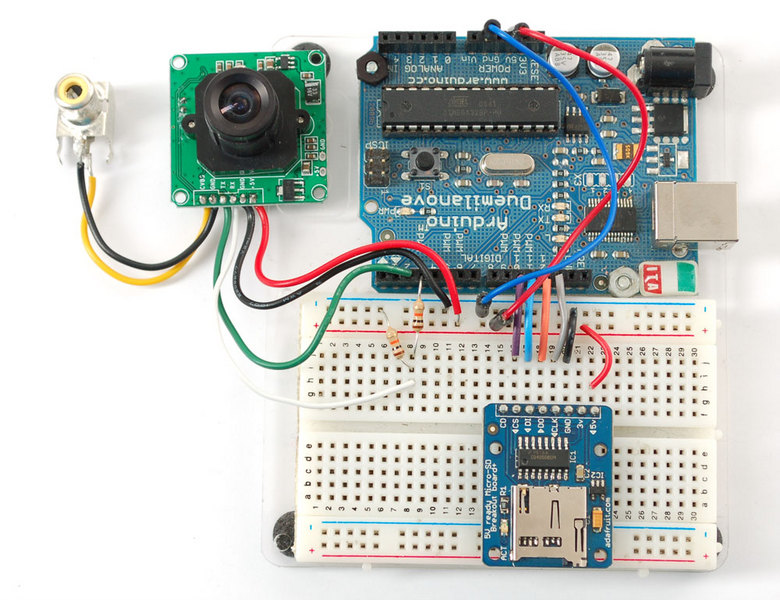
또한 아두이노 자체에서는 파일 보관이 불가능 하므로, SD카드 모듈을 사용하면 더 편하게 프로젝트들을 만드실 수 있습니다.
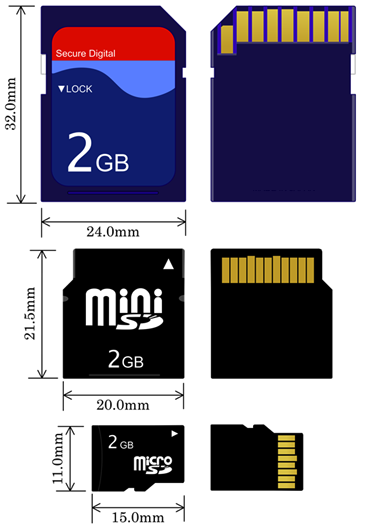
SD카드는 크기별로 SD카드, Mini SD카드, Micro SD카드로 구분이 되는데, 이 컨텐츠 에서는 SD카드(제일 큰 사이즈)를 사용하였습니다.
SD카드의 용량과 저장된 파일 목록을 출력해 보고, SD카드에 텍스트 파일을 쓰고, 읽어 보겠습니다.
| NO | 부품명 | 수량 | 상세설명 |
| 1 | 아두이노 우노 R3 | 1 | 아두이노 |
| 2 | SD카드 모듈 | 1 | SD카드 모듈 |
| 3 | SD카드 | 1 | SD카드 |
| 4 | 브레드보드 | 1 | 브레드보드 |
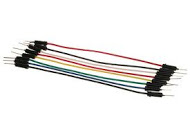
| 5 | 점퍼케이블 | 6 | 점퍼케이블 |
| 부품명 | 아두이노 우노 R3 | SD카드 모듈 | SD카드 | 브레드보드 | 점퍼케이블 |
| 파트 | 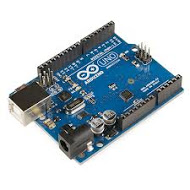 |
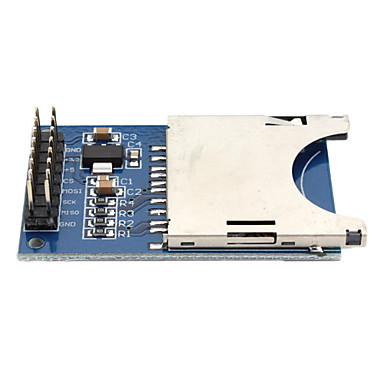 |
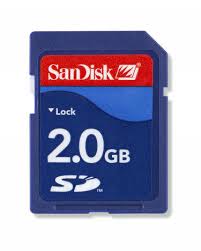 |
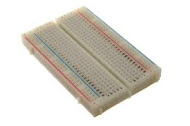 |
 |
/*
        SD card test

        This example shows how use the utility libraries on which the'
        SD library is based in order to get info about your SD card.
        Very useful for testing a card when you're not sure whether its working or not.

        The circuit:
        * SD card attached to SPI bus as follows:
        ** MOSI - pin 11 on Arduino Uno/Duemilanove/Diecimila
        ** MISO - pin 12 on Arduino Uno/Duemilanove/Diecimila
        ** CLK - pin 13 on Arduino Uno/Duemilanove/Diecimila
        ** CS - depends on your SD card shield or module.
        Pin 4 used here for consistency with other Arduino examples

        created  28 Mar 2011
        by Limor Fried
        modified 9 Apr 2012
        by Tom Igoe
*/

// SD카드를 사용하기 위한 SD라이브러리를 불러온다.
#include <SD.h>

Sd2Card card;
SdVolume volume;
SdFile root;

const int chipSelect = 4;

void setup() {
        // Open serial communications and wait for port to open:
        Serial.begin(9600);

        Serial.print("\nInitializing SD card...");

        // SD카드를 사용하기 위해서는 꼭 10번 핀을 출력모드로 설정해야 한다.
        // 아두이노 mega를 쓰시는분은 53번핀으로 바꿔준다.
        pinMode(10, OUTPUT);

        // SD카드가 인식이 안되면 오류 메시지를 출력
        if (!card.init(SPI_HALF_SPEED, chipSelect)) {
                Serial.println("initialization failed. Things to check:");
                Serial.println("* is a card is inserted?");
                Serial.println("* Is your wiring correct?");
                Serial.println("* did you change the chipSelect pin to match your shield or module?");
                return;

        // SD카드가 인식 됬을 경우 확인 메시지를 출력
        } else {
                Serial.println("Wiring is correct and a card is present.");
        }

        // SD카드의 종류를 출력한다.
        Serial.print("\nCard type: ");
        switch (card.type()) {
        case SD_CARD_TYPE_SD1:
                Serial.println("SD1");
                break;
        case SD_CARD_TYPE_SD2:
                Serial.println("SD2");
                break;
        case SD_CARD_TYPE_SDHC:
                Serial.println("SDHC");
                break;
        default:
                Serial.println("Unknown");
        }

        if (!volume.init(card)) {
                Serial.println("Could not find FAT16/FAT32 partition.\nMake sure you've formatted the card");
                return;
        }

        // SD카드의 voilume type과 size 를 출력한다.
        uint32_t volumesize;
        Serial.print("\nVolume type is FAT");
        Serial.println(volume.fatType(), DEC);
        Serial.println();

        volumesize = volume.blocksPerCluster();
        volumesize *= volume.clusterCount();
        volumesize *= 512;
        Serial.print("Volume size (bytes): ");
        Serial.println(volumesize);
        Serial.print("Volume size (Kbytes): ");
        volumesize /= 1024;
        Serial.println(volumesize);
        Serial.print("Volume size (Mbytes): ");
        volumesize /= 1024;
        Serial.println(volumesize);

        Serial.println("\nFiles found on the card (name, date and size in bytes): ");
        root.openRoot(volume);

        // SD카드 안에 있는 파일들의 이름, 날짜, 크기를 출력한다.
        root.ls(LS_R | LS_DATE | LS_SIZE);
}

void loop(void) {

}
/*
        SD card read/write

        This example shows how to read and write data to and from an SD card file
        The circuit:
        * SD card attached to SPI bus as follows:
        ** MOSI - pin 11
        ** MISO - pin 12
        ** CLK - pin 13
        ** CS - pin 4

        created   Nov 2010
        by David A. Mellis
        modified 9 Apr 2012
        by Tom Igoe

        This example code is in the public domain.
*/

#include <SD.h>

File myFile;

void setup() {
        // Open serial communications and wait for port to open:
        Serial.begin(9600);

        Serial.print("Initializing SD card...");
        pinMode(10, OUTPUT);

        // SD카드를 사용하기 위해서는 꼭 10번 핀을 출력모드로 설정해야 한다.
        // 아두이노 mega를 쓰시는분은 53번핀으로 바꿔준다.
        if (!SD.begin(4)) {
                Serial.println("initialization failed!");
                return;
        }
        Serial.println("initialization done.");

        // test.txt파일을 읽기모드로 연다.(한번에 한파일만 열수 있다.)
        myFile = SD.open("test.txt", FILE_WRITE);

        // 파일을 여는데 성공했으면 testing 1,2,3 이라는 텍스트를 저장
        if (myFile) {
                Serial.print("Writing to test.txt...");
                myFile.println("testing 1, 2, 3.");

                // 파일을 닫아준다.
                myFile.close();
                Serial.println("done.");

        // 파일이 열리지 않았다면 오류 메시지를 출력
        } else {
                Serial.println("error opening test.txt");
        }

        // test파일을 다시 열어준다.
        myFile = SD.open("test.txt");

        if (myFile) {
                Serial.println("test.txt:");
                // test 파일의 내용을 시리얼 모니터에 출력한다.
                while (myFile.available()) {
                Serial.write(myFile.read());
        }

        //파일을 닫아준다.
        myFile.close();

        } else {
                // 파일이 열리지 않았다면 오류 메시지를 출력
                Serial.println("error opening test.txt");
        }
}

void loop() {

}
소프트웨어 설명
* 위의 두 소스는 스케치를 사용하여 작성 / 업로드 합니다. 스케치에 대한 사용법은 링크를 참고하시기 바랍니다.
위의 두 소스는 아두이노에서 직접 제공하는 예제 소스입니다. (파일 -> 예제 -> SD -> CardInfo, ReadWrite)
- SD카드 라이브러리는 스케치 설치 시 기본으로 설치되어 있습니다.
- 라이브러리 사용법은 링크를 참고하시기 바랍니다.
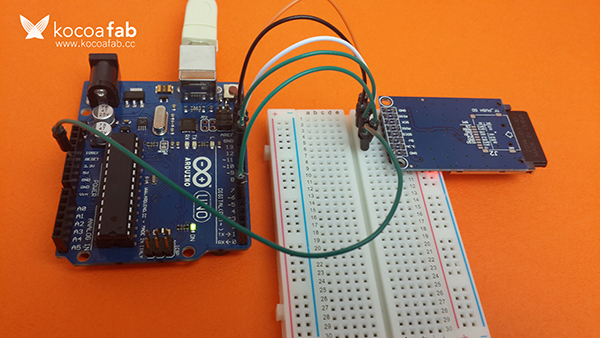
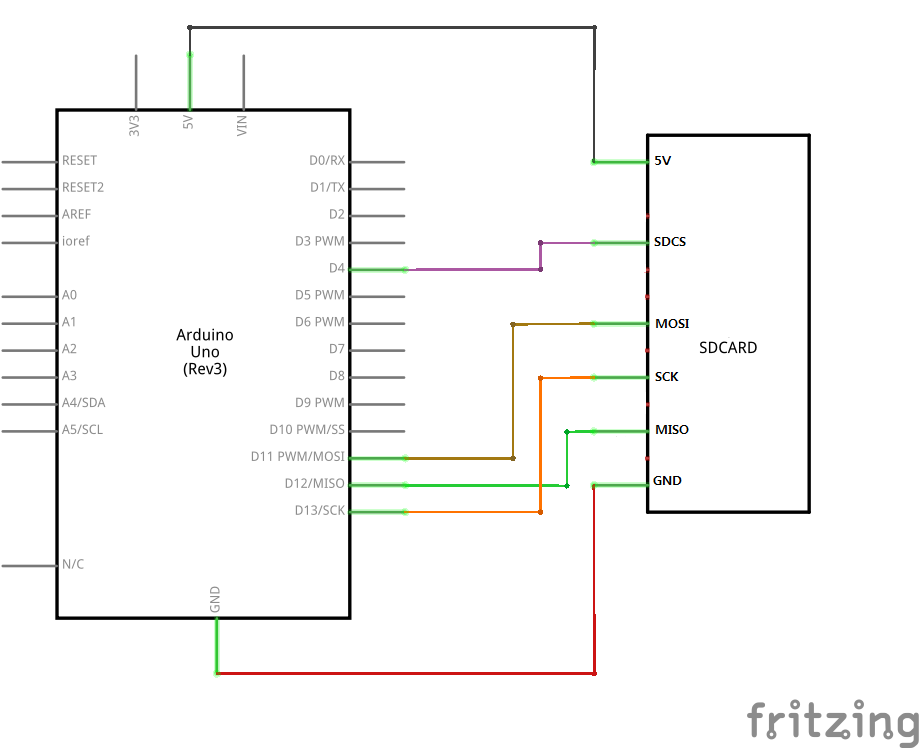
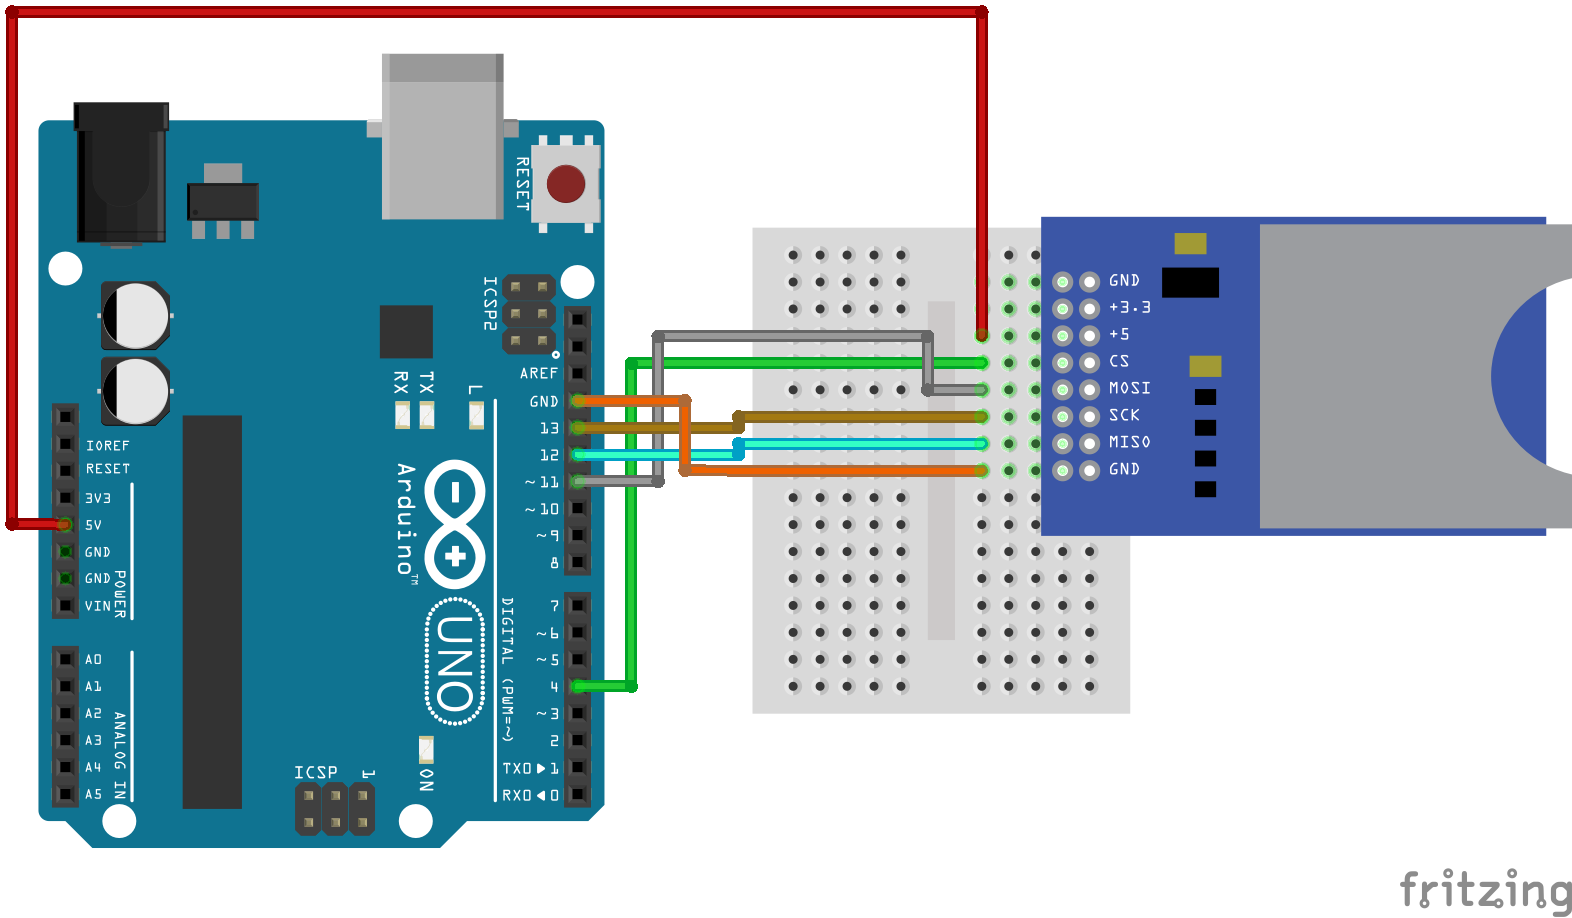
위의 소스들은 SD카드 모듈과 연결시 SDCS는 디지털 4번핀, MOSI는 디지털 10번핀, SCK는 디지털 12번핀, MISO는 디지털 11번핀에 연결을 했습니다.
SD카드의 정보를 출력
 // SD카드를 사용하기 위한 SD라이브러리를 불러온다.
#include <SD.h>
SD카드를 사용하기 위해서는 SD라이브러리를 사용해야 합니다. (사용하지 않았을 경우 컴파일이 되지 않습니다.)
  // SD카드를 사용하기 위해서는 꼭 10번 핀을 출력모드로 설정해야 한다.
  pinMode(10, OUTPUT);     // 아두이노 mega를 쓰시는분은 53번핀으로 바꿔준다.
SD카드를 사용하기 위해서는 10번핀을 출력 핀으로 설정해야 합니다.(아두이노 mega를 쓰시는분은 53번 핀)
  // SD카드가 인식이 안되면 오류 메시지를 출력
  if (!card.init(SPI_HALF_SPEED, chipSelect)) {
    Serial.println("initialization failed. Things to check:");
    Serial.println("* is a card is inserted?");
    Serial.println("* Is your wiring correct?");
    Serial.println("* did you change the chipSelect pin to match your shield or module?");
    return;
  } else {  // SD카드가 인식 됬을 경우 확인 메시지를 출력
   Serial.println("Wiring is correct and a card is present.");
  }
SD카드를 인식합니다. 인식이 되었을 경우 확인 메시지를 출력하고 다음으로 넘어가고, 인식이 되지 않았을 경우 오류 메시지를 출력하면서 프로그램을 끝냅니다.
// SD카드의 종류를 출력한다.
  Serial.print("\nCard type: ");
  switch(card.type()) {
    case SD_CARD_TYPE_SD1:
      Serial.println("SD1");
      break;
    case SD_CARD_TYPE_SD2:
      Serial.println("SD2");
      break;
    case SD_CARD_TYPE_SDHC:
      Serial.println("SDHC");
      break;
    default:
      Serial.println("Unknown");
  }

  if (!volume.init(card)) {
    Serial.println("Could not find FAT16/FAT32 partition.\nMake sure you've formatted the card");
    return;
  }


  // SD카드의 voilume type과 size 를 출력한다.
  uint32_t volumesize;
  Serial.print("\nVolume type is FAT");
  Serial.println(volume.fatType(), DEC);
  Serial.println();

  volumesize = volume.blocksPerCluster();
  volumesize *= volume.clusterCount();
  volumesize *= 512;
  Serial.print("Volume size (bytes): ");
  Serial.println(volumesize);
  Serial.print("Volume size (Kbytes): ");
  volumesize /= 1024;
  Serial.println(volumesize);
  Serial.print("Volume size (Mbytes): ");
  volumesize /= 1024;
  Serial.println(volumesize);
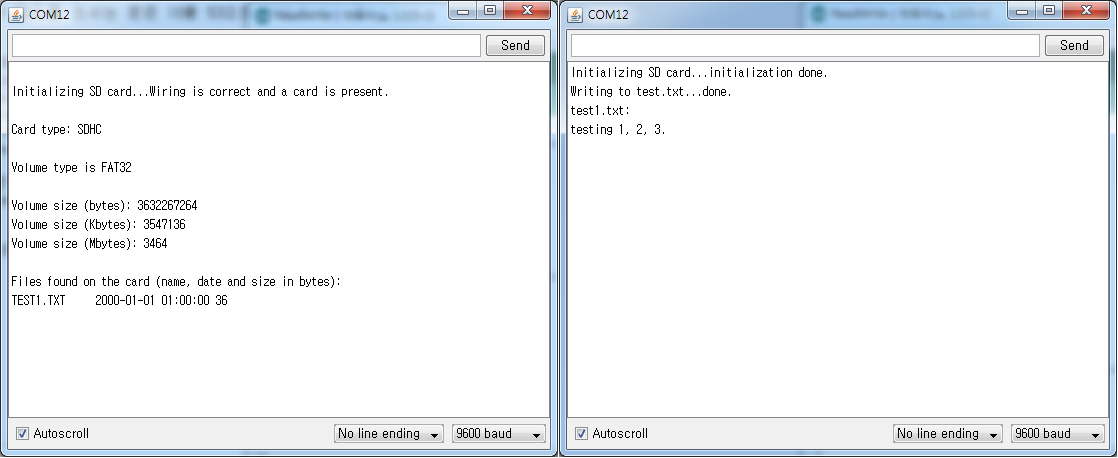
SD카드 인식이 됬을 경우, SD카드의 종류와 volume 종류, 크기를 출력합니다.
  Serial.println("\nFiles found on the card (name, date and size in bytes): ");
  root.openRoot(volume);

  // SD카드 안에 있는 파일들의 이름, 날짜, 크기를 출력한다.
  root.ls(LS_R | LS_DATE | LS_SIZE);
SD카드 안에 있는 파일들의 이름, 날짜, 크기를 출력합니다.
SD카드의 텍스트 파일을 쓰고, 읽기
#include <SD.h>
SD카드를 사용하기 위해서는 SD라이브러리를 사용해야 합니다. (사용하지 않았을 경우 컴파일이 되지 않습니다.)
 // test1.txt파일을 읽기모드로 연다.(한번에 한파일만 열수 있다.)
  myFile = SD.open("test1.txt", FILE_WRITE);

  // 파일을 여는데 성공했으면 testing 1, 2, 3 이라는 텍스트를 저장.
  if (myFile) {
    Serial.print("Writing to test.txt...");
    myFile.println("testing 1, 2, 3.");
    // 파일을 닫는다.
    myFile.close();
    Serial.println("done.");
  } else {
    // 파일을 열지 못했으면 오류 메시지를 출력
    Serial.println("error opening test1.txt");
  }
이부분은 파일에 텍스트를 추가하기 위한 소스입니다. (쓰기) test1.txt파일을 읽기모드로 열고, 읽는데 성공했을 경우 파일에 testing 1, 2, 3 을 적고 파일을 닫습니다.
불러올 파일 명은 myFile = SD.open("파일명", FILE_WRITE); 에서 파일명 부분을 고쳐 주면 자신이 원하는 파일을 읽어 올수가 있고, 파일 안에 작성할 텍스트는
myFile.println("텍스트"); 텍스트 부분을 수정하면 자신이 원하는 텍스트를 작성 할수 있습니다.
파일을 읽어 올 수 없을 경우 오류 메시지를 출력합니다.
  // test1.txt파일을 연다.
  myFile = SD.open("test1.txt");
  if (myFile) {
    Serial.println("test1.txt:");

    // 파일에 내용이 있을 경우 파일을 읽어서 시리얼 모니터에 출력
    while (myFile.available()) {
    	Serial.write(myFile.read());
    }
    // 파일을 닫는다.
    myFile.close();
  } else {
  	// 파일이 열리지 않았다면 오류 메시지를 출력
    Serial.println("error opening test1.txt");
  }
파일을 읽어 오는 부분입니다. test1.txt 파일을 열고, 그 파일안에 내용이 있을 경우 내용을 읽어와서 시리얼 모니터에 출력해 줍니다.
내용을 전부 출력 했을 경우 파일을 닫아 줍니다. 파일이 열리지 않았다면 오류 메시지를 출력합니다.

kocoafabeditor 
항상 진취적이고, 새로운 것을 추구하는 코코아팹 에디터입니다!
 SD카드, 아두이노