코코아팹은 누구나 창의적 아이디어를 현실로 만들어 낼 수 있도록
만들고, 공유하고, 배울 수 있는 터전이
되고자 합니다.
아이디와 비밀번호를 잊으셨나요?아이디 / 비밀번호 찾기
코코아팹 회원이 아니신가요? 회원가입
2022-01-25 13:48:47
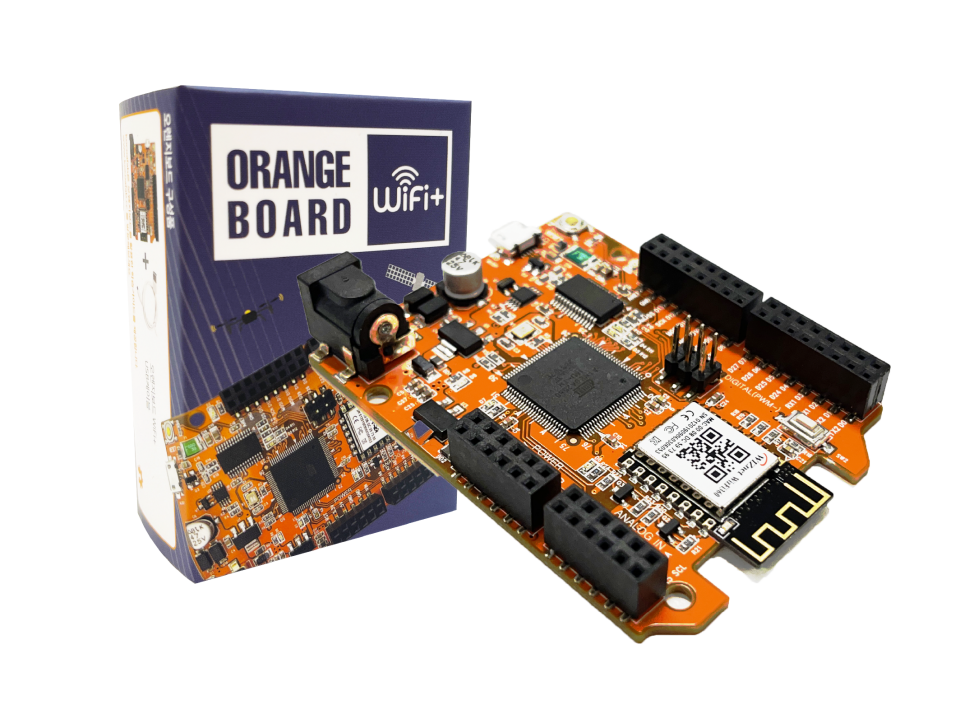
OrangeBoard WiFi+는 기존 OrangeBoard WiFi의 성능을 보완하여 유저들이 더 쉽게 사용하고 다양한 프로젝트로 확장할 수 있도록 개선한 보드입니다.
WiFi모듈은 WizFi250대신 WizFi360으로 변경되었고 MCU또한 Uno에서 쓰이던 ATmega328p대신 Mega에서 쓰이는 ATmega2560을 사용합니다.
이번 튜토리얼에서는 경량 메시지 프로토콜인 MQTT를 Publish하고 Subscribe하는 예제를 사용해 보겠습니다.

MQTT는 Message Queuing Telemetry Transport의 약자로 IoT시스템이나 M2M(machine-to-machine)으로 경량 통신할 수 있는 프로토콜입니다.
가볍게 통신하기 때문에 저전력 배터리나 네트워크가 좋지 않은 상태에서도 사용할 수 있으며 전송 계층 위에서 동작합니다.
MQTT는 클라이언트의 요청이 있을때만 서버에서 데이터를 전달해주는 HTTP와는 다르게
발행(Publish)-구독(Subscriber)방식으로 브로커(Broker)를 통해 통신을 진행합니다.
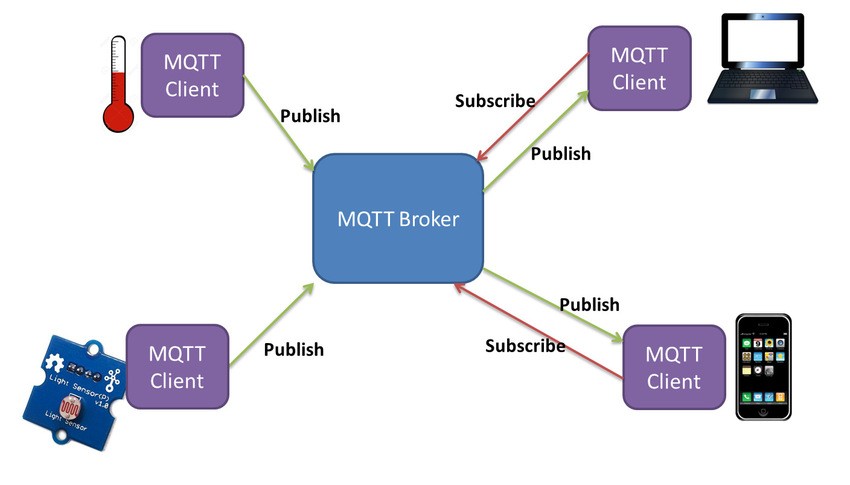
브로커는 가운데서 여러 토픽과 데이터를 중개하는 역할을 하며, 토픽을 구독(Subscribe)하는 구독자에게 데이터를 전달합니다.
발행자(Publisher)가 토픽과 데이터를 발행하면 브로커는 그 토픽과 데이터를 받아 토픽 구독자(Subscriber)에게 전달하는데 여러 구독자가 토픽을 받아볼 수 있으므로 1:N구조의 통신이 가능합니다.
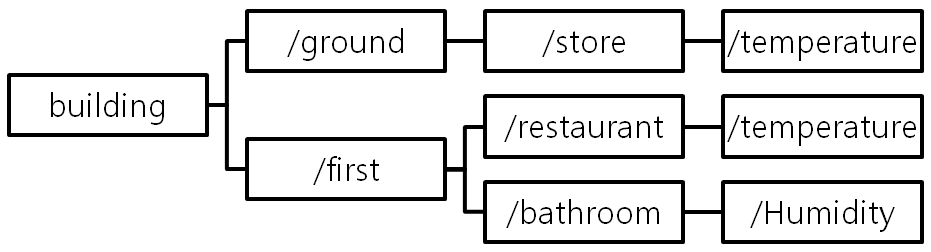
토픽(Topic)은 일종의 데이터 채널로 토픽을 구독하는 모든 구독자에게 데이터를 전달합니다.
또한 토픽은 슬래시(/)를 사용해 계층적으로 구성할 수 있어서 다양한 기기들을 효율적으로 관리할 수 있습니다.
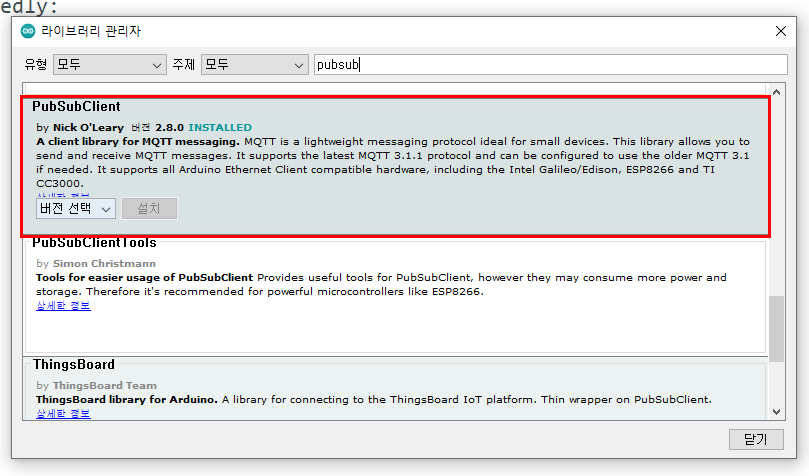
아두이노IDE에서 MQTT사용을 위한 라이브러리를 설치할 수 있습니다.
좌측상단 메뉴에서 스케치 - 라이브러리 추가 - 라이브러리 관리를 클릭합니다.
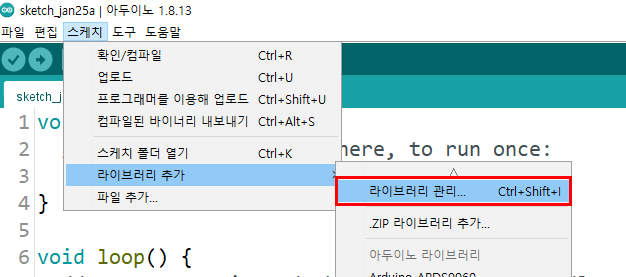
pubsubclient를 검색하여 라이브러리를 설치합니다.
아래의 코드를 사용하여 오렌지보드 WiFi+에 업로드합니다.
#include <SPI.h>
#include <WizFi360.h>
#include <PubSubClient.h>

#define SERIAL_BAUDRATE   115200
#define SERIAL3_BAUDRATE  115200

// Update these with values suitable for your network.

const char* ssid = "ssid";
const char* password = "pass";
const char* mqtt_server = "broker.mqtt-dashboard.com";

WiFiClient WizFi360Client;
PubSubClient client(WizFi360Client);
long lastMsg = 0;
char msg[50];
int value = 0;

void setup_wifi();
void callback(char* topic, byte* payload, unsigned int length);
void reconnect();

void setup() {
  pinMode(13, OUTPUT);     // Initialize the BUILTIN_LED pin as an output
  Serial.begin(SERIAL_BAUDRATE);
  setup_wifi();
  client.setServer(mqtt_server, 1883);
  client.setCallback(callback);
}

void setup_wifi() {

  delay(10);
  // We start by connecting to a WiFi network
  Serial.println();
  Serial.print("Connecting to ");
  Serial.println(ssid);
  Serial3.begin(SERIAL3_BAUDRATE);
  WiFi.init(&Serial3);
  WiFi.begin((char*)ssid, password);

  while (WiFi.status() != WL_CONNECTED) {
    delay(500);
    Serial.print(".");
  }

  Serial.println("");
  Serial.println("WiFi connected");
  Serial.println("IP address: ");
  Serial.println(WiFi.localIP());
}

void callback(char* topic, byte* payload, unsigned int length) {
  Serial.print("Message arrived [");
  Serial.print(topic);
  Serial.print("] ");
  for (int i = 0; i < length; i++) {
    Serial.print((char)payload[i]);
  }
  Serial.println();

  // Switch on the LED if an 1 was received as first character
  if ((char)payload[0] == '1') {
    digitalWrite(13, LOW);   // Turn the LED on (Note that LOW is the voltage level
    // but actually the LED is on; this is because
    // it is acive low on the ESP-01)
  } else {
    digitalWrite(13, HIGH);  // Turn the LED off by making the voltage HIGH
  }
}

void reconnect() {
  // Loop until we're reconnected
  while (!client.connected()) {
    Serial.print("Attempting MQTT connection...");
    // Attempt to connect
    if (client.connect("WizFi360Client")) {
      Serial.println("connected");
      // Once connected, publish an announcement...
      client.publish("outTopic", "WizFi360 hello world");
      // ... and resubscribe
      client.subscribe("inTopic");
    } else {
      Serial.print("failed, rc=");
      Serial.print(client.state());
      Serial.println(" try again in 5 seconds");
      // Wait 5 seconds before retrying
      delay(5000);
    }
  }
}
void loop() {

  if (!client.connected()) {
    reconnect();
  }
  client.loop();

  long now = millis();
  if (now - lastMsg > 2000) {
    lastMsg = now;
    ++value;
    snprintf (msg, 75, "WizFi360 hello world #%ld", value);
    Serial.print("Publish message: ");
    Serial.println(msg);
    client.publish("outTopic", msg);
  }
}
아래의 항목에는 WiFi의 ssid와 password, 그리고 브로커 서버를 입력합니다.
여기서는 broker.mqtt-dashboard.com를 사용합니다.
const char* ssid = "ssid";
const char* password = "pass";
const char* mqtt_server = "broker.mqtt-dashboard.com";
setCallback()함수를 통해 MQTT broker로부터 메시지를 수신하였을 때 처리하기 위한 내용을 정의합니다.
예제코드의 callback함수는 broker로부터 메시지를 수신하면 "Topic"을 출력하고 "Topic"에 대한 Payload 값을 출력 합니다.
그리고 모든 "Topic"에 대하여 Payload 값이 ‘1’이면 13번 핀에 연결되어 있는 LED를 ON하고 ‘0’이면 LED를 OFF 합니다.
client.setServer(mqtt_server, 1883);
client.setCallback(callback);


void callback(char* topic, byte* payload, unsigned int length) {
  Serial.print("Message arrived [");
  Serial.print(topic);
  Serial.print("] ");
  for (int i = 0; i < length; i++) {
    Serial.print((char)payload[i]);
  }
  Serial.println();

  // Switch on the LED if an 1 was received as first character
  if ((char)payload[0] == '1') {
    digitalWrite(13, LOW);   // Turn the LED on (Note that LOW is the voltage level
    // but actually the LED is on; this is because
    // it is acive low on the ESP-01)
  } else {
    digitalWrite(13, HIGH);  // Turn the LED off by making the voltage HIGH
  }
}
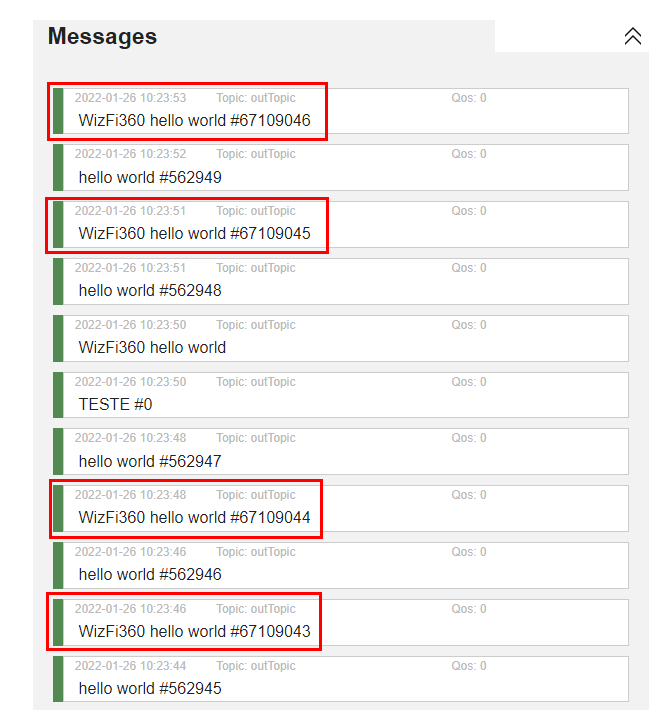
loop()에서는 MQTT broker와 연결이 끊어지면 다시 연결을 시도하고 연결이 됐을 경우 2초마다 outTopic이라는 Topic으로 "WizFi360 hello world xxxx" 메시지를 보냅니다.
void loop() {

  if (!client.connected()) {
    reconnect();
  }
  client.loop();

  long now = millis();
  if (now - lastMsg > 2000) {
    lastMsg = now;
    ++value;
    snprintf (msg, 75, "WizFi360 hello world #%ld", value);
    Serial.print("Publish message: ");
    Serial.println(msg);
    client.publish("outTopic", msg);
  }
}
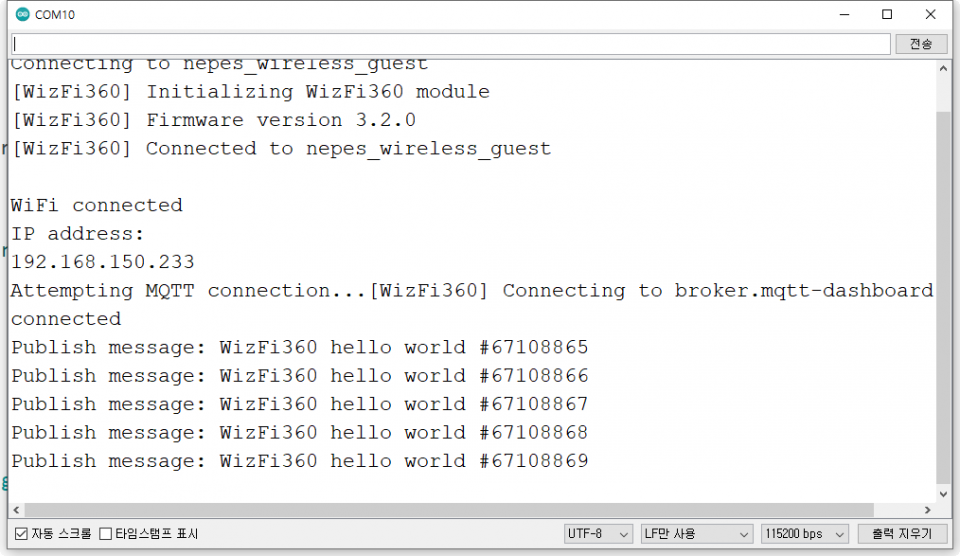
코드를 업로드 한 뒤 아두이노IDE의 시리얼모니터를 열면 아래와 같은 화면을 볼 수 있습니다.
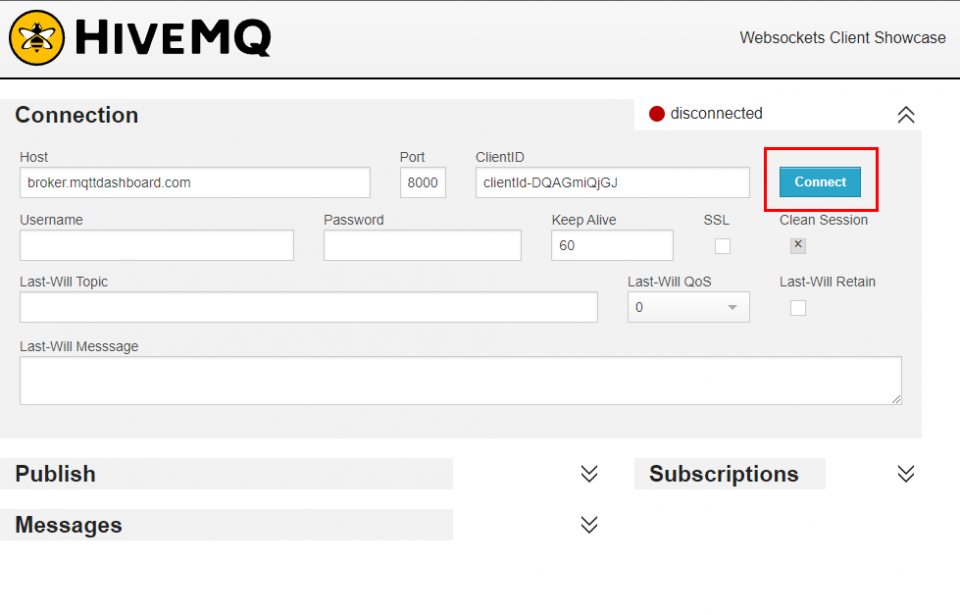
http://www.hivemq.com/demos/websocket-client/ 에 접속한 다음 broker호스트를 확인 후 Connect를 클릭합니다.
(http://broker.mqtt-dashboard.com/는 무료로 사용이 가능한 대신 토픽과 메시지가 전부 공개됩니다.)
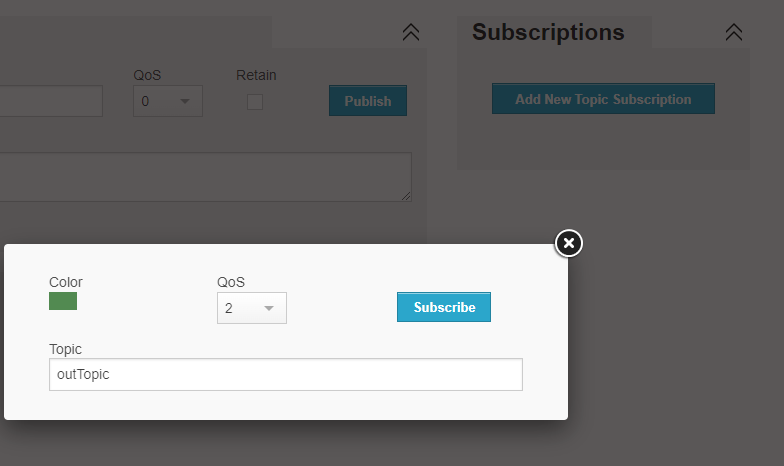
Add New Topic Subscription를 클릭 한 뒤 Topic에는 코드에서 사용하는 outTopic을 입력합니다.
그 다음 Subscribe를 클릭합니다.
메시지가 2초 간격으로 제대로 전달되는 것을 확인할 수 있습니다.

kocoafabeditor 
항상 진취적이고, 새로운 것을 추구하는 코코아팹 에디터입니다!


