
Weather Cube [PART2]
2015-07-20 14:57:38
안녕하세요~ SABO 입니다.
초 대형?! 프로젝트 Weather Cube 만들기 1에 이어 이번엔 전자파트를 구성해 보도록 하겠습니다.
일단 늘 하던대로! 이번 프로젝트에서 응용하는 내용에 대해 사전 필요지식을 꼭 숙지하고 오시기 바랍니다!
Weather Cube 프로젝트의 전자파트는 정말 간단한 원리이기 때문에 튜토리얼 정독 한번이면 완파하실 수 있을거에요 ^^
<사전 필요 지식>
<필요한 부품>
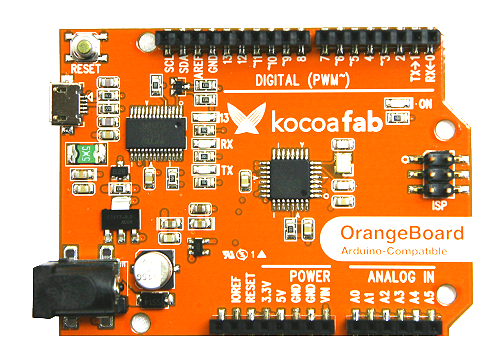
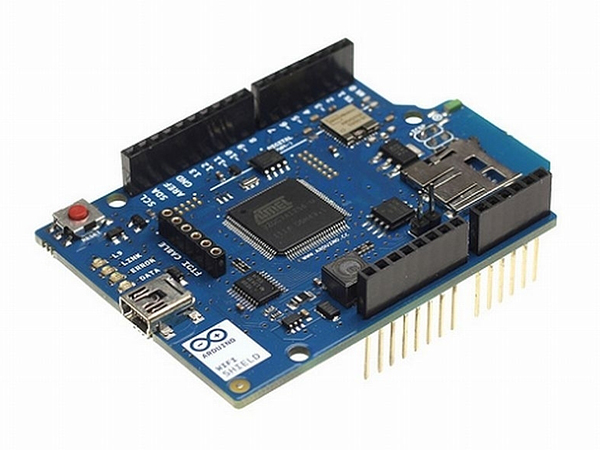
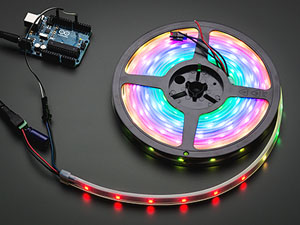
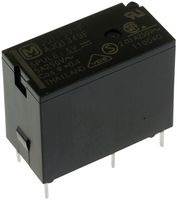
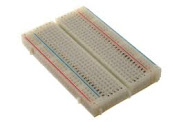
| OrangeBoard | WIFI SHIELD | STRIP LED | RELAY | BREAD BOARD |
 |
 |
 |
 |
 |
이번 프로젝트에서는 오렌지보드와 WIFI Shield, Strip LED 그리고 24V릴레이 외 특별한 것들이 필요합니다.
<구름 이펙트를 만들기 위한 가습기 모듈>
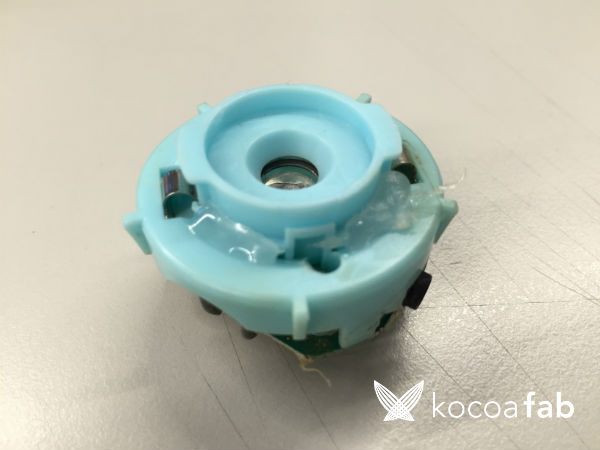
오픈마켓에서 판매하는 USB 가습기를 구매하여 분해하였습니다. 초음파 진동자를 이용한 가습모듈로 5v로 동작하는 녀석입니다.
다만 아두이노 입출력핀으로는 전류가 부족하여 별도로 5V 외부전원을 주어 릴레이로 제어해야 합니다.
<빗물을 천장으로 끌어올리기 위한 펌프>
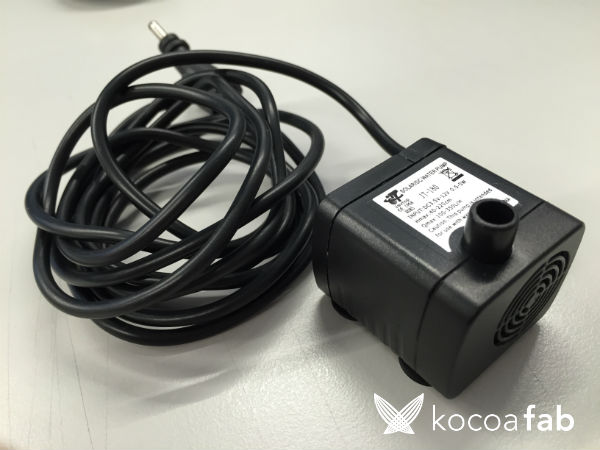
DFrobot 사의 펌프 입니다. 펌프 옆면의 (원형으로 된)홈으로 물을 빨아들여 윗면의 구멍으로 배출합니다.
큐브의 천장까지 이어주는 고무 튜브도 마련해주셔야 합니다. 이 제품은 12V 동작전원이 필요하기 때문에
역시나 릴레이 모듈을 사용하여 외부전원을 제어해 주어야 합니다.
<하드웨어 메이킹>
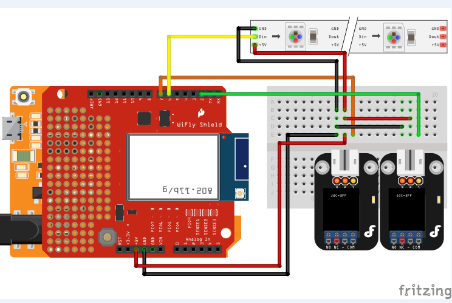
회로도는 정말 간단합니다. 오렌지 보드에 와이파이 쉴드를 결합해주고 두개의 릴레이 모듈과 하나의 스트립 LED를 연결해주면 됩니다.
스트립 LED는 외부전원을 사용하지 않아도 되기 때문에 더 수월해 졌습니다.
릴레이의 경우 위 회로도에서 왼쪽에 있는 릴레이에 가습기 모듈을, 오른쪽에 있는 릴레이에 펌프를 연결해주시면 됩니다.
각 모듈을 릴레이에 연결하는 방법은 '릴레이소자 사용하기' 튜토리얼을 참고하시길 바랍니다.
<프로젝트 사진>
PART1에서 기구부 설계에 대한 내용을 포스팅 했었는데, 막상 전자파트를 구현하고나니 기구부에 문제가 상당히 많았습니다.
특정 부위는 수정하여 다시 3D Printer 출력을 해야하는 불상사가 발생하였지요.....
기구부에 연결하기 전에 Part1에서 정리했던 전체적인 개요도를 한번 보고 가야겠습니다.
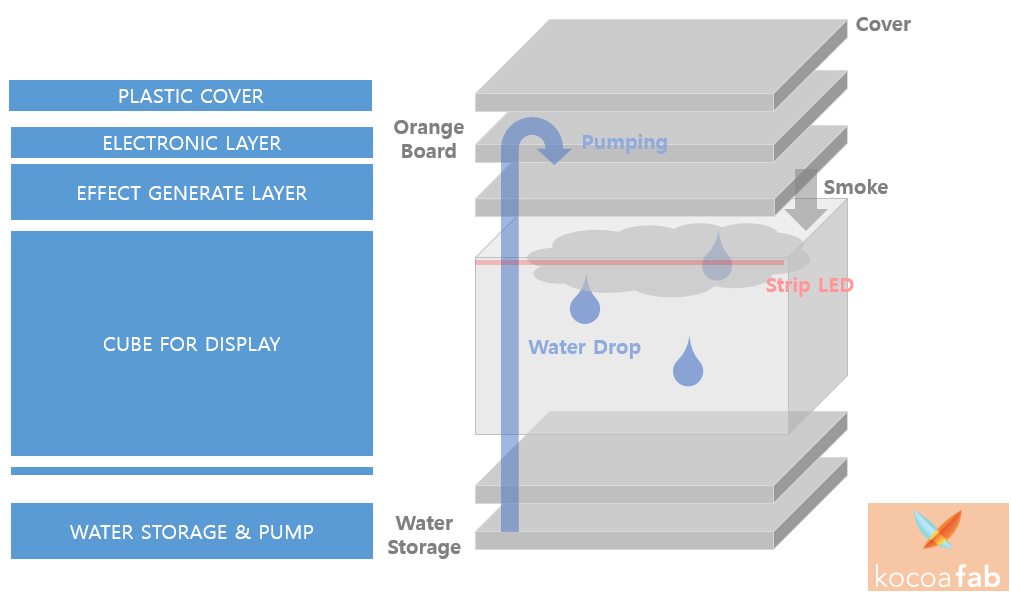
사실 여기서 한가지 달라진 점은 구름 이펙트(Smoke)가 Water Storage로 배치되었다는 점 입니다. 저는 전자공학도라
기구부 설계에는 영 소질이 없나봐요.....
나머지는 개요도와 동일한 구성으로 조립을 해보았습니다.
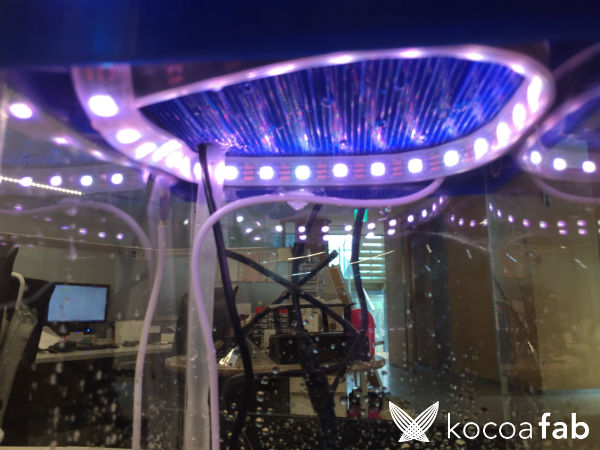
천장 쪽에 달아둔 Neopixel LED입니다. 실리콘?! 튜브로 감싸져서 나오기 때문에 천장에서 떨어지는 물에도 끄떡 없습니다.
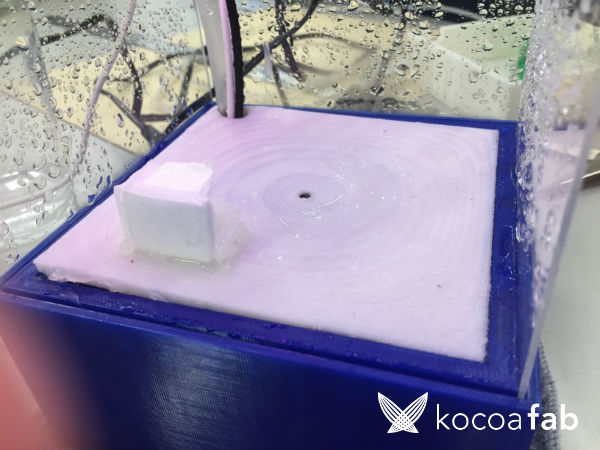
물이 떨어지는 부분입니다. 흰색 박스는 구름이 나오는 구멍에 빗물이 들어가지 않도록 하기 위한 지붕 역할입니다.
가운데 구멍은 빗물을 하단 물 받이 통으로 빼기 위한 구멍입니다. 구석진 곳엔 가습기 전원과 펌프 전원, 펌프 튜브가
통과하기 위한 구멍을 마련하여 천장까지 빼주어야 합니다.
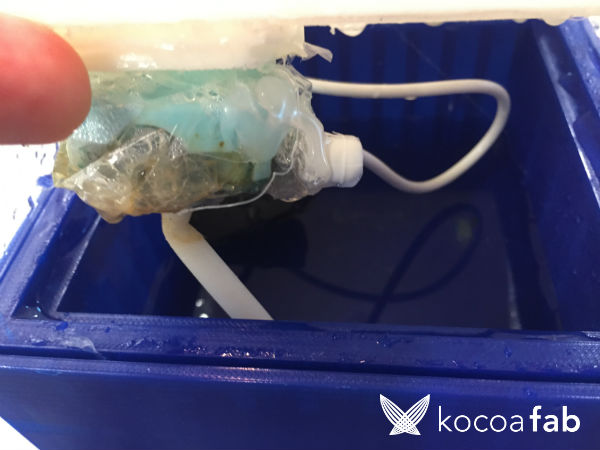
가장 중요한 부분입니다. 비닐로 꽁꽁 감싸져 판에 붙어있는게 가습기 모듈입니다. 아무래도 물받이 통에 있다보니
완벽한 방수가 가장 중요합니다. 잘 안보이지만 뒤에 작은 검정 상자가 펌프 모터 입니다. 펌프 모터는 물에 푹! 담가주어야 합니다.

위에서 찍은 사진입니다. 모든 전자 파트는 물에서 되도록 멀리 떨어트려줘야 하기 때문에 가장 꼭대기 층으로 배치하였습니다.
오렌지보드가 있는 꼭대기층 바로 밑에는 펌프로 물을 끌어와 빗물로 내리기 위한 수조입니다. 가장 꼭대기 층은
Neo Pixel LED에 연결된 케이블과 펌프, 가습기 전원 케이블이 통과 되어야 합니다.(펌프 튜브는 꼭대기 층 바로 밑인 빗물 수조에 고정됩니다.)
<프로젝트 구동 영상>
<아두이노 코드>
이번 소스코드는 다소 복잡한 부분이 있습니다. 효과생성을 위한 펌프 및 모터 제어 자체는 단순한 디지털 출력 On/Off 로 제어하지만
와이파이를 이용하여 데이터를 가져오는 부분이 복잡합니다. 날씨 데이터는 OpenweatherMap.org 로부터 무료로 제공하는 샘플데이터를 추출합니다.
날씨데이터를 가져오는 소스코드는 Kocoafab Project 구름 조명 만들기 에 자세한 내용이 나와있으니 참고하시면 되겠습니다.
#include "SPI.h"
#include "WiFi.h"
#include <Adafruit_NeoPixel.h>
#define PIN 6                     // 네오픽셀 할당 핀(Digital 6)
#define N_LEDS 30                 // 사용 LED 개수

Adafruit_NeoPixel strip = Adafruit_NeoPixel(N_LEDS, PIN, NEO_GRB + NEO_KHZ800);
WiFiServer server(80);
WiFiClient client;
IPAddress hostIp;

char ssid[] = "wifiname";       // 와이파이 SSID
char pass[] = "wifipassword";         // 와이파이 password
char ON, OFF;

const unsigned long requestInterval = 60000;  // 요구 시간 딜레이(1 min)
unsigned long lastAttemptTime = 0;            // 마지막으로 서버에서 데이터를 전송받은 시간

String currentLine = "";
String weatherString = "";
String timeString = "";
String location = "Gangnam";

boolean readingWeather = false;
boolean readingTime = false;
boolean stringComplete = false;

int weather;
int temp = 0;
int PUMP = 2;
int Cloud = 7;

uint8_t ret;

void setup()
{
  // 와이파이 접속
  Serial.begin(115200);
  delay(10);
  Serial.println("Connecting to WiFi....");
  WiFi.begin(ssid, pass);
  server.begin();
  Serial.println("Connect success!");
  Serial.println("Waiting for DHCP address");  //DHCP주소를 기다린다
  while(WiFi.localIP() == INADDR_NONE)
  {
    Serial.print(".");
    delay(300);
  }
  Serial.println("\n");
  printWifiData();
  connectToServer();

  // 기타 초기 설정
  pinMode(Cloud,OUTPUT);// 가습기 핀 출력 설정
  pinMode(PUMP,OUTPUT); // 펌프 핀 출력 설정
  strip.begin();        // 네오픽셀 초기 값
  strip.show();         // 네오픽셀 출력 함수
  Rain_PUMP(0);         // 펌프 출력 LOW
  Cloud_PUMP(0);        // 가습기(구름) 출력 LOW
}

void loop()
{
  Data_Phasing();       // 와이파이로 부터 데이터 파싱 함수
  Animation();          // 파싱받은 데이터에 따라 이펙트 출력 함수
}

void Animation()        // 파싱해오는 weather값에 따라 이펙트 출력 함수
{
  /*Lightening Rain*/
  if(weather <= 232 && weather >= 200)
  {
    Rain_PUMP(1);
    Lightening_LED();
    Cloud_PUMP(1);//Cloud Effect
  }
  /*Light Rain*/
  else if(weather <= 321 && weather >= 300)
  {
    Rain_PUMP(1);
    Light_Rainy_LED();
    Cloud_PUMP(0);
  }
  /*White Snow*/
  else if(weather <= 622 && weather >= 600)
  {
    Rain_PUMP(1);
    Snowy_LED();
  }
  /*Fog*/
  else if(weather <= 721 && weather >= 701 || (weather == 741))
  {
    Rain_PUMP(0);
    Cloud_PUMP(1);//Cloud Effect
    //No LED
  }
  /*Dark Cloudy*/
  else if((weather == 731) || (weather == 751) || (weather == 761) || (weather == 781))
  {
    Rain_PUMP(0);
    Cloudy_LED();
    Cloud_PUMP(1);// Cloud Effect
  }
  /*General Cloud*/
  else if(weather <= 804 && weather >= 800)
  {
    Rain_PUMP(0);
    Fine_LED();
    Cloud_PUMP(1);// Cloud Effect
  }
  // Extreme Weather ---> Storm : Fast Dimming LED and Rain
}


void Data_Phasing()               // 데이터 파싱 함수(WIFI)
{
  if (client.connected())
  {
    while (client.available())
    {
      char inChar = client.read();
      currentLine += inChar;
      if (inChar == '\n')
      {
        //Serial.print("clientReadLine = ");
        //Serial.println(currentLine);
        currentLine = "";
      }
      if ( currentLine.endsWith(""))
      {
        delay(100);
        client.stop();
        connectToServer();
      }
    }
  }
  else if (millis() - lastAttemptTime > requestInterval)
  {
    connectToServer();
  }
}

void connectToServer()               // 서버 접속 함수
{
  Serial.println("");
  Serial.println("connecting to server...");
  String content = "";
  if (client.connect(hostIp, 80))
  {
    Serial.println("Connected! Making HTTP request to api.openweathermap.org for "+location+"...");
    client.println("GET /data/2.5/weather?q="+location+"&mode=xml");
    client.print("HOST: api.openweathermap.org\n");
    client.println("User-Agent: launchpad-wifi");
    client.println("Connection: close");
    client.println();
    Serial.println("Weather information for "+location);
  }
  lastAttemptTime = millis();
}


void printHex(int num, int precision)
{
  char tmp[16];
  char format[128];
  sprintf(format, "%%.%dX", precision);
  sprintf(tmp, format, num);
  Serial.print(tmp);
}

void printWifiData()
{
  // Wifi쉴드의 IP주소를 출력
  Serial.println();
  Serial.println("IP Address Information:");
  IPAddress ip = WiFi.localIP();
  Serial.print("IP Address: ");
  Serial.println(ip);

  byte mac[6];
  WiFi.macAddress(mac);
  Serial.print("MAC address: ");
  printHex(mac[5], 2);
  Serial.print(":");
  printHex(mac[4], 2);
  Serial.print(":");
  printHex(mac[3], 2);
  Serial.print(":");
  printHex(mac[2], 2);
  Serial.print(":");
  printHex(mac[1], 2);
  Serial.print(":");
  printHex(mac[0], 2);
  Serial.println();
  IPAddress subnet = WiFi.subnetMask();
  Serial.print("NetMask: ");
  Serial.println(subnet);

  IPAddress gateway = WiFi.gatewayIP();
  Serial.print("Gateway: ");
  Serial.println(gateway);

  Serial.print("SSID: ");
  Serial.println(WiFi.SSID());

  ret = WiFi.hostByName("api.openweathermap.org", hostIp);

  Serial.print("ret: ");
  Serial.println(ret);

  Serial.print("Host IP: ");
  Serial.println(hostIp);
  Serial.println("");
}

int getInt(String input)
{
  int i = 2;
  while(input[i] != '"')
  {
    i++;
  }
  input = input.substring(2,i);
  char carray[20];
  input.toCharArray(carray, sizeof(carray));
  temp = atoi(carray);
  return temp;
}


void Cloud_PUMP(byte state)           // 구름(가습기)구동 함수
{
  if(state == 1){digitalWrite(Cloud,HIGH);}
  else if(state == 0){digitalWrite(Cloud,LOW);}
}
void Rain_PUMP(byte state)            // 펌프 구동 함수
{
  if(state == 0){digitalWrite(PUMP,HIGH);}
  else if(state == 1){digitalWrite(PUMP,LOW);}
}

void Fine_LED()                       // '맑은 날' LED 출력
{
  int i;
  for(i=0;i<201;i++)
  {
    LED_ON(strip.Color(255,i,0));
  }
  for(i=0;i<47;i++)
  {
    LED_ON(strip.Color(255,200,i));
  }
  for(i=0;i<56;i++)
  {
    LED_ON(strip.Color(255,200+i,46));
  }
  for(i=0;i<210;i++)
  {
    LED_ON(strip.Color(255,255,46+i));
  }
  for(i=0;i<256;i++)
  {
    LED_ON(strip.Color(255,255-i,255-i));
  }
}

void Cloudy_LED()                     // '구름 낀 날' LED 출력
{
  int i,j;
  for(j=30;j<255;j++)
  {
    LED_ON(strip.Color(j, j, j));
  }
  for(j=255;j>30;j--)
  {
    LED_ON(strip.Color(j, j, j));

  }
  delay(3000);
}

void Snowy_LED()                      // '눈 오는 날' LED 출력
{
  LED_ON(strip.Color(150, 150, 150));
  delay(2000);
  LED_ON(strip.Color(0,0,0));
  delay(10);
  LED_ON(strip.Color(150, 150, 150));
}
void Light_Rainy_LED()                // '약한 비' LED 출력
{
  int i;
  for(i=0;i<201;i++)
  {
    LED_ON(strip.Color(0,234-i,234-i));
  }
  for(i=0;i<201;i++)
  {
     LED_ON(strip.Color(0,34+i,34+i));
  }
}

void Lightening_LED()                  // '뇌우' LED 출력
{
  int i,j,k;
    for(i=0;i<15;i++)
  {
    LED_ON(strip.Color(80, 80, 250));
    delay(10);
    LED_ON(strip.Color(0, 0, 0));
    delay(5);
  }
  for(i=0;i<5;i++)
  {
    LED_ON(strip.Color(80, 80, 250));
    delay(500);
    LED_ON(strip.Color(0, 0, 0));
    delay(100);
  }
  for(i=0;i<8;i++)
  {
    LED_ON(strip.Color(80, 80, 250));
    delay(1000);
    LED_ON(strip.Color(0, 0, 0));
    delay(50);
  }
}

void LED_ON(uint32_t c)            // String LED 출력 함수
{
  for(uint16_t i=0; i<strip.numPixels(); i++) {
      strip.setPixelColor(i, c);
      strip.show();
  }
}


SaBo
 ////
////
