
2.8'' Touch LCD Shield 터치쉴드
2014-10-02 11:37:38
개요
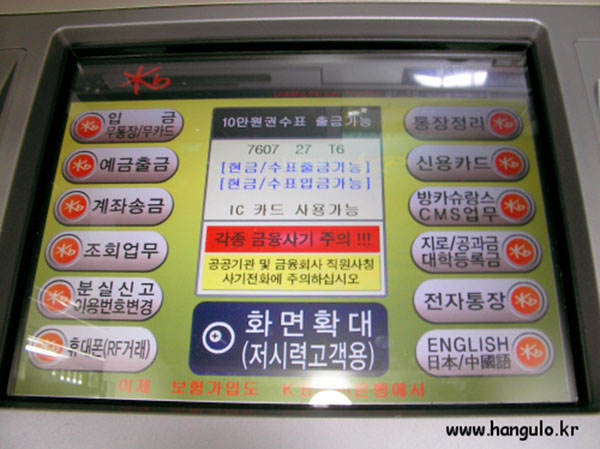
은행에서 현금을 입금하거나 출력하실 때 현금 입출력기을 사용해 보셨을 겁니다. 이외에도 생활 여려군데에서 터치형 LCD를 사용되고 있습니다.
이 LCD를 아두이노와 연결하여 사용하면 간단한 입출력기를 만들거나, 그림판등을 만들 수도 있습니다.
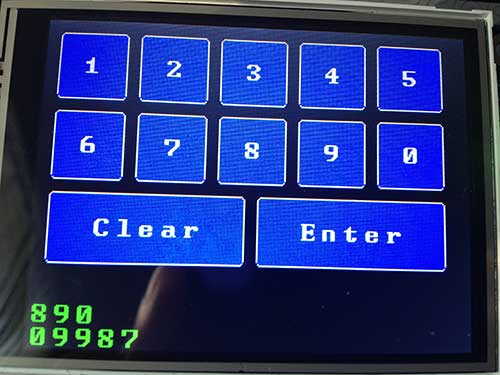

사진 출처 : Lincomatic's DIY Blog / adafruit
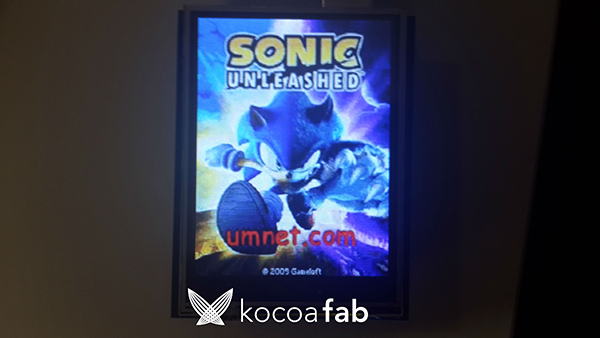
이번 컨텐츠에서는 TFT LCD Shiled를 사용해서 SD카드 안에 있는 bmp파일을 열어보겠습니다.
(2번에서는 터치를 이용한 그림판을 만들어 보고. 이 둘을 합쳐서 터치로 그림들을 넘겨 보도록 하겠습니다.)
부품 목록
| NO | 부품명 | 수량 | 상세설명 |
| 1 | 아두이노 우노 R3 | 1 | 아두이노 |
| 2 | 2.8'' Touch LCD Shield | 1 | 쉴드 |
| 부품명 | 아두이노 우노 R3 | 2.8'' Touch LCD Shield |
| 파트 |  |
 |
하드웨어 making
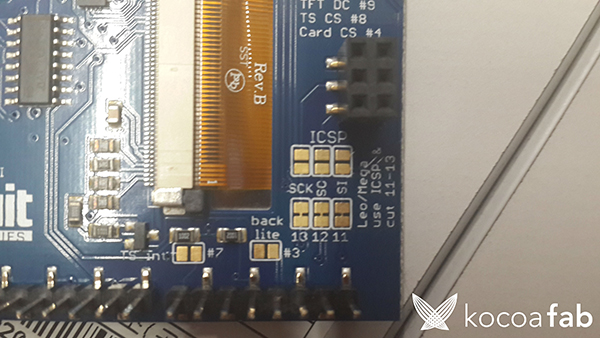
쉴드 연결 방법
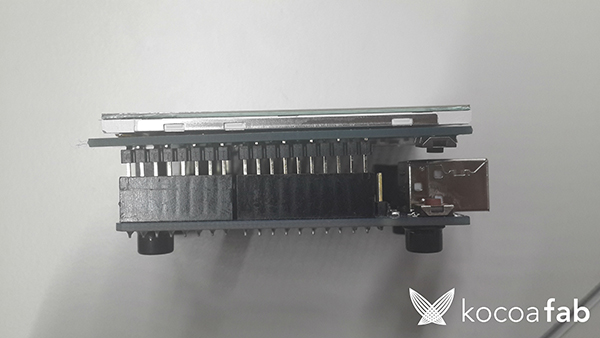
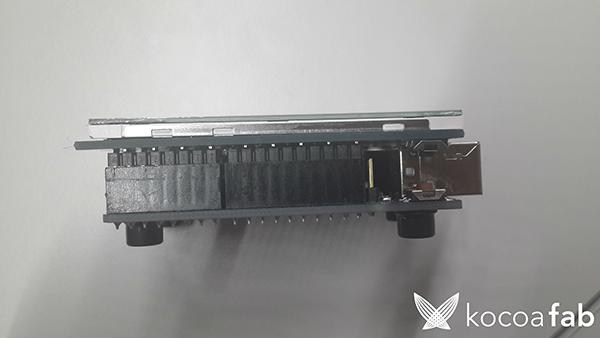
아두이노 우노와는 크기가 같고 핀도 같기 때문에 바로 위에 올리시면 됩니다. 그러나 아두이노 메가나 레오나르도를 쓰시는분은 밑에 ICSP점퍼를 납땜하여 닫고, 13 12 11 있는 부분에 따로 납땜을 해서 연결 하셔야 됩니다.
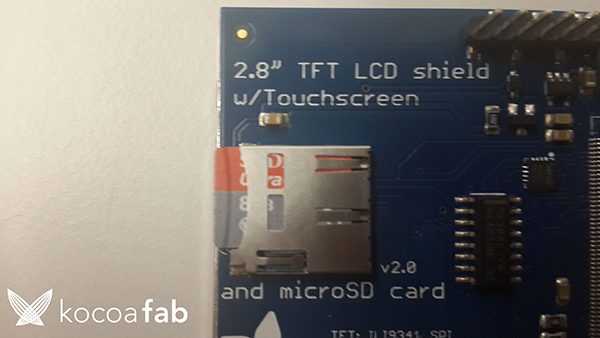
SD카드는 쉴드 밑면에 SD카드 넣는 곳이 있습니다. (microSD 사이즈 입니다.)
소프트웨어 Coding
* 이 소스는 스케치를 이용하여 작성 / 업로드 합니다. 스케치에 대한 사용법은 링크를 참고하시기 바랍니다.
/***************************************************
  This is our Bitmap drawing example for the Adafruit ILI9341 Breakout and Shield
  ----> http://www.adafruit.com/products/1651

  Check out the links above for our tutorials and wiring diagrams
  These displays use SPI to communicate, 4 or 5 pins are required to
  interface (RST is optional)
  Adafruit invests time and resources providing this open source code,
  please support Adafruit and open-source hardware by purchasing
  products from Adafruit!

  Written by Limor Fried/Ladyada for Adafruit Industries.
  MIT license, all text above must be included in any redistribution
 ****************************************************/

#include <Adafruit_GFX.h>    // Core graphics library
#include "Adafruit_ILI9341.h" // Hardware-specific library
#include <SPI.h>
#include <SD.h>

// TFT display and SD card will share the hardware SPI interface.
// Hardware SPI pins are specific to the Arduino board type and
// cannot be remapped to alternate pins.  For Arduino Uno,
// Duemilanove, etc., pin 11 = MOSI, pin 12 = MISO, pin 13 = SCK.

#define TFT_DC 9
#define TFT_CS 10
Adafruit_ILI9341 tft = Adafruit_ILI9341(TFT_CS, TFT_DC);

#define SD_CS 4

void setup(void) {
  Serial.begin(9600);

  tft.begin();
  tft.fillScreen(ILI9341_BLUE);

  Serial.print("Initializing SD card...");
  if (!SD.begin(SD_CS)) {
    Serial.println("failed!");
  }
  Serial.println("OK!");

  bmpDraw("purple.bmp", 0, 0);  // puple.bmp 파일을 LCD화면에 그립니다.
}

void loop() {
}

// This function opens a Windows Bitmap (BMP) file and
// displays it at the given coordinates.  It's sped up
// by reading many pixels worth of data at a time
// (rather than pixel by pixel).  Increasing the buffer
// size takes more of the Arduino's precious RAM but
// makes loading a little faster.  20 pixels seems a
// good balance.

#define BUFFPIXEL 20

void bmpDraw(char *filename, uint8_t x, uint16_t y) { // bmp파일을 읽어와서 LCD화면에 그리는 함수

  File     bmpFile;
  int      bmpWidth, bmpHeight;   // W+H in pixels
  uint8_t  bmpDepth;              // Bit depth (currently must be 24)
  uint32_t bmpImageoffset;        // Start of image data in file
  uint32_t rowSize;               // Not always = bmpWidth; may have padding
  uint8_t  sdbuffer[3*BUFFPIXEL]; // pixel buffer (R+G+B per pixel)
  uint8_t  buffidx = sizeof(sdbuffer); // Current position in sdbuffer
  boolean  goodBmp = false;       // Set to true on valid header parse
  boolean  flip    = true;        // BMP is stored bottom-to-top
  int      w, h, row, col;
  uint8_t  r, g, b;
  uint32_t pos = 0, startTime = millis();

  if((x >= tft.width()) || (y >= tft.height())) return;

  Serial.println();
  Serial.print(F("Loading image '"));
  Serial.print(filename);
  Serial.println('\'');

  // Open requested file on SD card
  if ((bmpFile = SD.open(filename)) == NULL) {
    Serial.print(F("File not found"));
    return;
  }

  // Parse BMP header
  if(read16(bmpFile) == 0x4D42) { // BMP signature
    Serial.print(F("File size: ")); Serial.println(read32(bmpFile));
    (void)read32(bmpFile); // Read & ignore creator bytes
    bmpImageoffset = read32(bmpFile); // Start of image data
    Serial.print(F("Image Offset: ")); Serial.println(bmpImageoffset, DEC);
    // Read DIB header
    Serial.print(F("Header size: ")); Serial.println(read32(bmpFile));
    bmpWidth  = read32(bmpFile);
    bmpHeight = read32(bmpFile);
    if(read16(bmpFile) == 1) { // # planes -- must be '1'
      bmpDepth = read16(bmpFile); // bits per pixel
      Serial.print(F("Bit Depth: ")); Serial.println(bmpDepth);
      if((bmpDepth == 24) && (read32(bmpFile) == 0)) { // 0 = uncompressed

        goodBmp = true; // Supported BMP format -- proceed!
        Serial.print(F("Image size: "));
        Serial.print(bmpWidth);
        Serial.print('x');
        Serial.println(bmpHeight);

        // BMP rows are padded (if needed) to 4-byte boundary
        rowSize = (bmpWidth * 3 + 3) & ~3;

        // If bmpHeight is negative, image is in top-down order.
        // This is not canon but has been observed in the wild.
        if(bmpHeight < 0) {
          bmpHeight = -bmpHeight;
          flip      = false;
        }

        // Crop area to be loaded
        w = bmpWidth;
        h = bmpHeight;
        if((x+w-1) >= tft.width())  w = tft.width()  - x;
        if((y+h-1) >= tft.height()) h = tft.height() - y;

        // Set TFT address window to clipped image bounds
        tft.setAddrWindow(x, y, x+w-1, y+h-1);

        for (row=0; row= sizeof(sdbuffer)) { // Indeed
              bmpFile.read(sdbuffer, sizeof(sdbuffer));
              buffidx = 0; // Set index to beginning
            }

            // Convert pixel from BMP to TFT format, push to display
            b = sdbuffer[buffidx++];
            g = sdbuffer[buffidx++];
            r = sdbuffer[buffidx++];
            tft.pushColor(tft.color565(r,g,b));
          } // end pixel
        } // end scanline
        Serial.print(F("Loaded in "));
        Serial.print(millis() - startTime);
        Serial.println(" ms");
      } // end goodBmp
    }
  }

  bmpFile.close();
  if(!goodBmp) Serial.println(F("BMP format not recognized."));
}

// These read 16- and 32-bit types from the SD card file.
// BMP data is stored little-endian, Arduino is little-endian too.
// May need to reverse subscript order if porting elsewhere.

uint16_t read16(File &f) {
  uint16_t result;
  ((uint8_t *)&result)[0] = f.read(); // LSB
  ((uint8_t *)&result)[1] = f.read(); // MSB
  return result;
}

uint32_t read32(File &f) {
  uint32_t result;
  ((uint8_t *)&result)[0] = f.read(); // LSB
  ((uint8_t *)&result)[1] = f.read();
  ((uint8_t *)&result)[2] = f.read();
  ((uint8_t *)&result)[3] = f.read(); // MSB
  return result;
}

// 출처 : Adafruit_ILI9341 - spitftbitmap 예제
위의 소스를 사용하기 위해서는 ILI9341라이브러리와, GFX라이브러리가 추가로 필요합니다.
(라이브러리 사용법은 링크를 참고하시기 바랍니다.)
SD카드에 저장되어 있는 bmp파일을 여는 예제 입니다. 지금 사용하고 있는 Touch LCD는 240X320, 24bit 비트맵(bmp) 파일을 출력할 수가 있습니다.
(화면 출력시 가로 세로 길이가 초과되면 그림파일이 잘려서 나옵니다.)
void setup(void) {
  Serial.begin(9600);

  tft.begin();
  tft.fillScreen(ILI9341_BLUE);

  Serial.print("Initializing SD card...");
  if (!SD.begin(SD_CS)) {
    Serial.println("failed!");
  }
  Serial.println("OK!");

  bmpDraw("purple.bmp", 0, 0); // purple.bmp파일을 LCD화면에 그립니다.
}
SD카드에 240X320의 크기와 24bit 비트맵(bmp)파일을 넣으시고(위의 소스를 따로 수정하시지 않으시면 파일이름을 purple.bmp 로 저장하시면 됩니다.)
다른 이름의 파일을 불러오고 싶으시면 setup() 안에 bmpDraw 함수 호출에 있는 이름을 바꿔주시면 됩니다.
이미지를 출력하는 부분은 bmpDraw() 함수 부분입니다.
void bmpDraw(char *filename, uint8_t x, uint16_t y) {  // bmp파일을 읽어와서 LCD화면에 그리는 함수
  File     bmpFile;
  int      bmpWidth, bmpHeight;   // W+H in pixels
  uint8_t  bmpDepth;              // Bit depth (currently must be 24)
  uint32_t bmpImageoffset;        // Start of image data in file
  uint32_t rowSize;               // Not always = bmpWidth; may have padding
  uint8_t  sdbuffer[3*BUFFPIXEL]; // pixel buffer (R+G+B per pixel)
  uint8_t  buffidx = sizeof(sdbuffer); // Current position in sdbuffer
  boolean  goodBmp = false;       // Set to true on valid header parse
  boolean  flip    = true;        // BMP is stored bottom-to-top
  int      w, h, row, col;
  uint8_t  r, g, b;
  uint32_t pos = 0, startTime = millis();

  if((x >= tft.width()) || (y >= tft.height())) return;

  Serial.println();
  Serial.print(F("Loading image '"));
  Serial.print(filename);
  Serial.println('\'');

  // Open requested file on SD card
  if ((bmpFile = SD.open(filename)) == NULL) {
    Serial.print(F("File not found"));
    return;
  }

  // Parse BMP header
  if(read16(bmpFile) == 0x4D42) { // BMP signature
    Serial.print(F("File size: ")); Serial.println(read32(bmpFile));
    (void)read32(bmpFile); // Read & ignore creator bytes
    bmpImageoffset = read32(bmpFile); // Start of image data
    Serial.print(F("Image Offset: ")); Serial.println(bmpImageoffset, DEC);
    // Read DIB header
    Serial.print(F("Header size: ")); Serial.println(read32(bmpFile));
    bmpWidth  = read32(bmpFile);
    bmpHeight = read32(bmpFile);
    if(read16(bmpFile) == 1) { // # planes -- must be '1'
      bmpDepth = read16(bmpFile); // bits per pixel
      Serial.print(F("Bit Depth: ")); Serial.println(bmpDepth);
      if((bmpDepth == 24) && (read32(bmpFile) == 0)) { // 0 = uncompressed

        goodBmp = true; // Supported BMP format -- proceed!
        Serial.print(F("Image size: "));
        Serial.print(bmpWidth);
        Serial.print('x');
        Serial.println(bmpHeight);

        // BMP rows are padded (if needed) to 4-byte boundary
        rowSize = (bmpWidth * 3 + 3) & ~3;

        // If bmpHeight is negative, image is in top-down order.
        // This is not canon but has been observed in the wild.
        if(bmpHeight < 0) {
          bmpHeight = -bmpHeight;
          flip      = false;
        }

        // Crop area to be loaded
        w = bmpWidth;
        h = bmpHeight;
        if((x+w-1) >= tft.width())  w = tft.width()  - x;
        if((y+h-1) >= tft.height()) h = tft.height() - y;

        // Set TFT address window to clipped image bounds
        tft.setAddrWindow(x, y, x+w-1, y+h-1);

        for (row=0; row= sizeof(sdbuffer)) { // Indeed
              bmpFile.read(sdbuffer, sizeof(sdbuffer));
              buffidx = 0; // Set index to beginning
            }

            // Convert pixel from BMP to TFT format, push to display
            b = sdbuffer[buffidx++];
            g = sdbuffer[buffidx++];
            r = sdbuffer[buffidx++];
            tft.pushColor(tft.color565(r,g,b));
          } // end pixel
        } // end scanline
        Serial.print(F("Loaded in "));
        Serial.print(millis() - startTime);
        Serial.println(" ms");
      } // end goodBmp
    }
  }

  bmpFile.close();
  if(!goodBmp) Serial.println(F("BMP format not recognized."));
}
위에서 정한 파일명을 가지고 SD카드에서 확인 한 후 있을 경우 SD카드에서 파일을 불러와서 LCD에 띄웁니다.
* 참고 24bit 비트맵 파일 만들기.
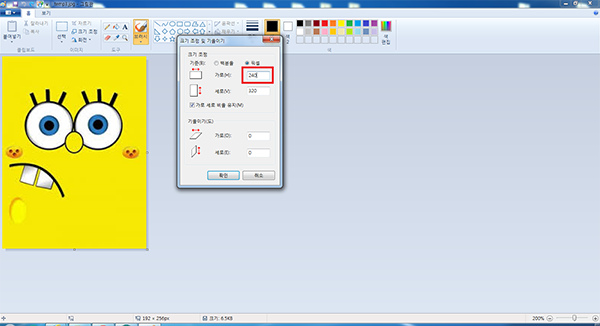
그림판을 실행 시키고 비트맵 파일로 바꿀 그림을 엽니다.(240X320 가로 세로 비율에 맞는 그림을 하시는게 좋습니다.)
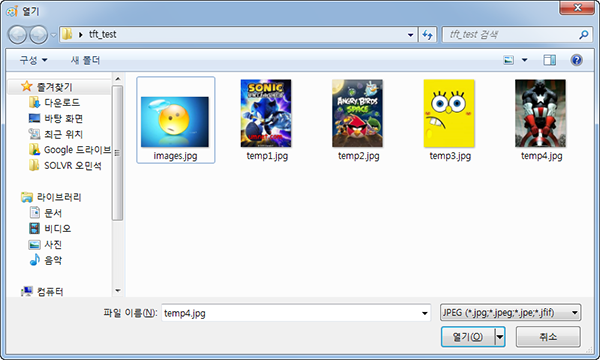
그림을 열었으면 크기 조정 버튼을(빨간 네모) 눌러서 픽셀 부분에 가로를 240으로 바꾸어 줍니다.
(가로 세로 비율 유지를 선택 하셧으면 가로만 240으로 바꿔도 세로가 저절로 바뀝니다.)

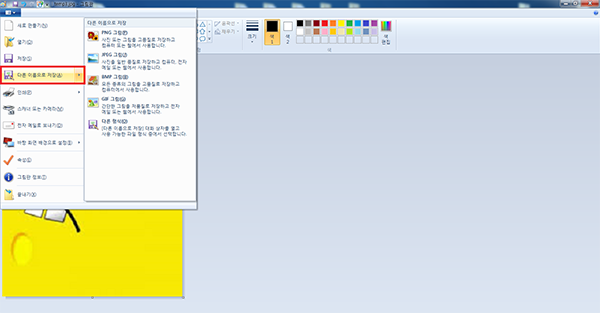
다하셧으면 다른이름으로 저장하기를 누릅니다.
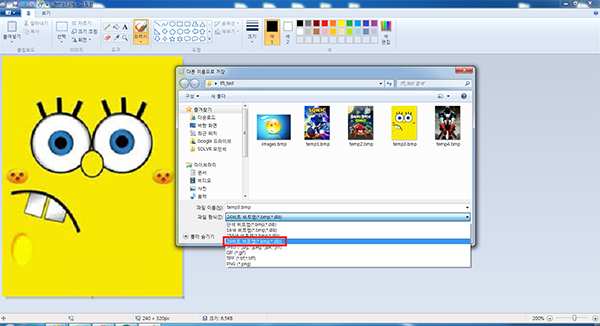
저장하실 파일명을 적어주시고 파일 형식을 24비트 비트맵으로 선택하신 후 저장하시면 24비트 비트맵 파일이 됩니다.
다음 내용은 2.8'' Touch LCD Shield를 사용해 봅시다.(2)에서 이어집니다.


kocoafabeditor 
항상 진취적이고, 새로운 것을 추구하는 코코아팹 에디터입니다!
 2.8'' Touch LCD Shield, 아두이노
