
크리스마스 멜로디 볼 만들기
2014-12-24 13:14:54
개요
2014의 마지막이 얼마 남지 않은 요즘,기다렸던 크리스마스가 내일로 다가왔습니다 !

출처 : 크리스마스 트리 - google
크리스마스에는 역시 트리가 빠질수 없겠죠 ?
이번 프로젝트에서는 크리스마스 트리를 좀더 멋지게 꾸며줄
크리스마스 멜로디 볼을 만들어 보겠습니다.

피에조부저와 LED를 이용하여 알록달록 조명 효과와 캐롤 멜로디를 재생할수 있습니다.
직접 만들어 지인들에게 크리스마스 선물로 주거나,
가족들과 함께 집에서 만들어 트리를 장식해 보세요 !
미리보기 동영상
부품목록
| NO | 부품명 | 수량 | 상세설명 |
| 1 | 아두이노 미니 | 1 | 아두이노 미니 |
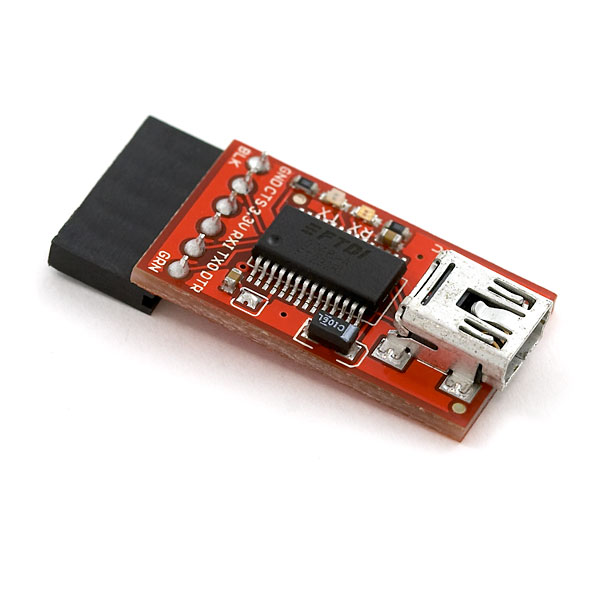
| 2 | FTDI 232r USB | 1 | TTL Serial to USB |
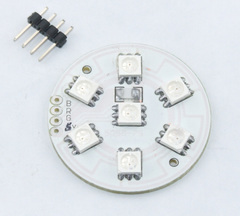
| 3 | RGB LED | 1 | 7 SMD RGB LED - DF Robot |
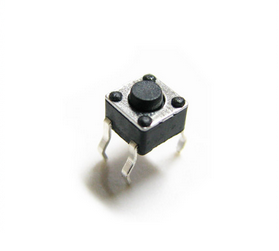
| 4 | 피에조부저 | 1 | 피에조부저 |
| 5 | 슬라이드 스위치 | 1 | 3핀 스위치 |
| 6 | 가변저항 | 1 | 가변저항 |
| 7 | 푸시버튼 | 1 | 푸시버튼 |
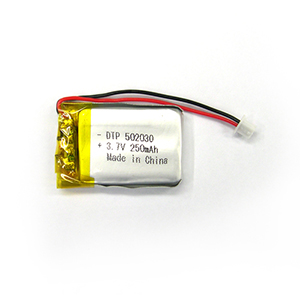
| 8 | 리튬전지 | 1 | 3.7v |
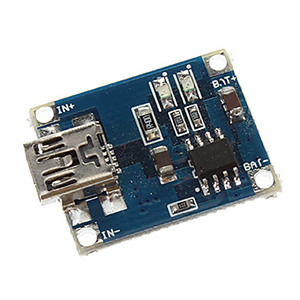
| 9 | 리튬전지 충전모듈 | 1 | TP4056 |
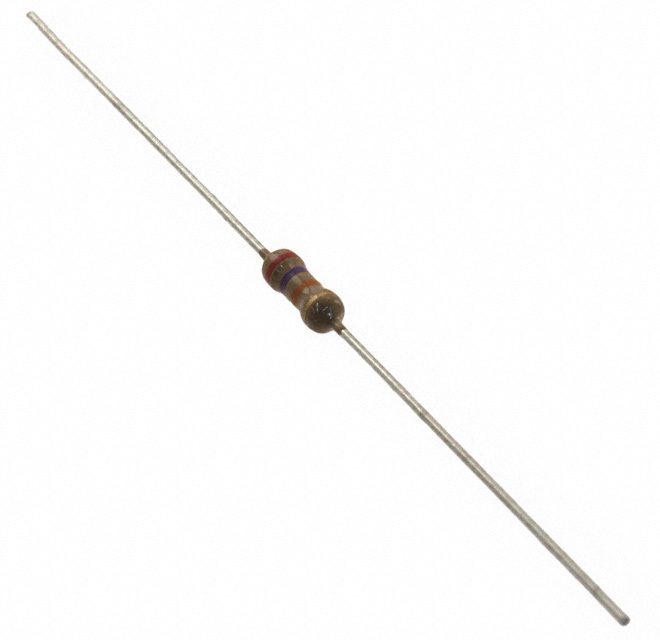
| 10 | 10k 옴 저항 | 1 | 저항 |
| 11 | 270 옴 저항 | 3 | 저항 |
| 12 | 100 옴 저항 | 1 | 저항 |
| 13 | 전선 | 1 | 강선 |
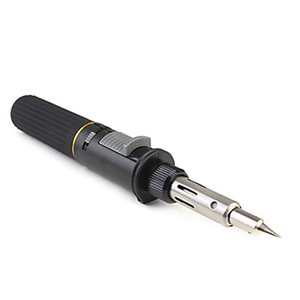
| 14 | 인두기 | 1 | 인두 |
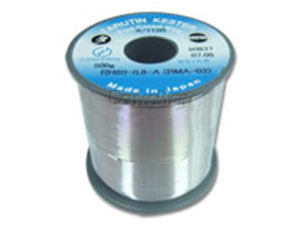
| 15 | 납 | 1 | 납 |
| 16 | 글루건 | 1 | 다용도 전동 공구 |
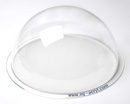
| 17 | 반구형 플라스틱 | 1 | 연질 플라스틱 |
| 18 | 가위 | 1 | 가위 |
| 19 | 칼 | 1 | 칼 |
| 20 | 부직포 | 1 | 부직포 |
| 부품명 | 아두이노 미니 | FTDI 232r USB | RGB LED | 피에조 부저 | 슬라이드 스위치 |
| 파트 | 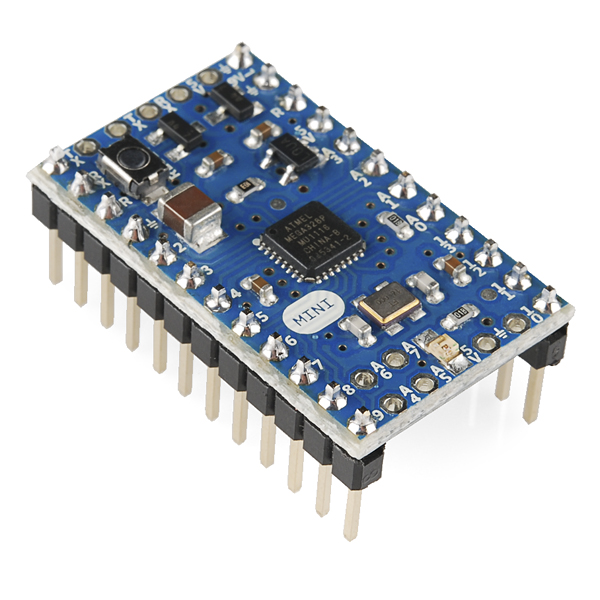 x1 x1 |
 x1 x1 |
 x1 x1 |
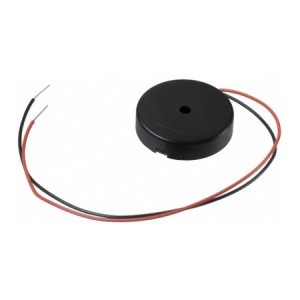 x1 x1 |
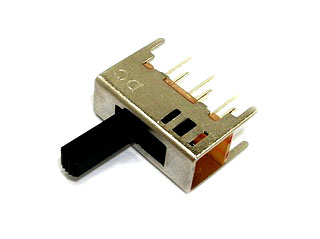 x1 x1 |
| 부품명 | 가변저항 | 푸시버튼 | 리튬전지 | 리튬전지 충전모듈 | 10k 옴 저항 |
| 파트 | 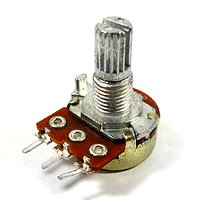 x1 x1 |
 x1 x1 |
 x1 x1 |
 x1 x1 |
 x1 x1 |
| 부품명 | 270 옴 저항 | 100 옴 저항 | 전선 | 인두기 | 납 |
| 파트 | x1 |
x1 |
 x1 x1 |
 x1 x1 |
 x1 x1 |
| 부품명 | 글루건 | 반구형 플라스틱 | 가위 | 칼 | 부직포 |
| 파트 | 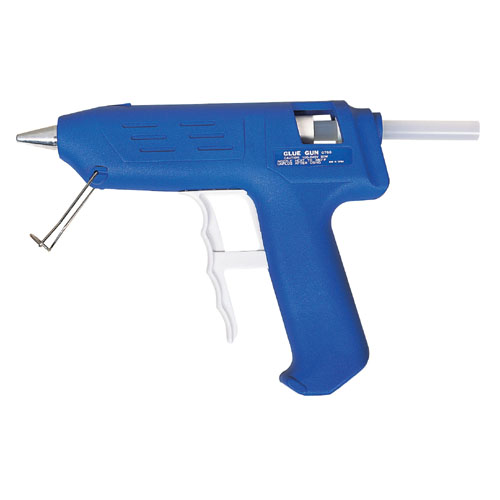 x1 x1 |
 x2 x2 |
 x1 x1 |
 x1 x1 |
 x2 x2 |
하드웨어 Making
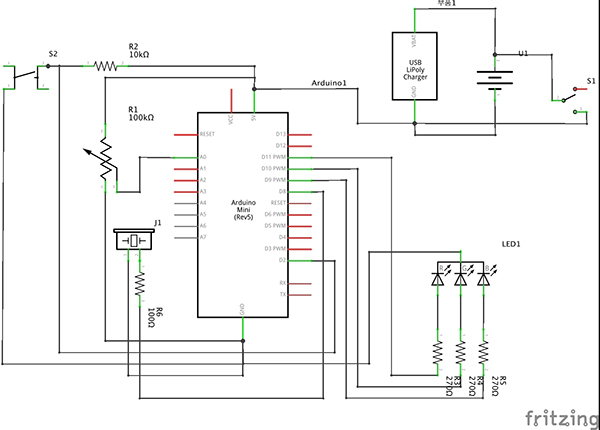
회로도
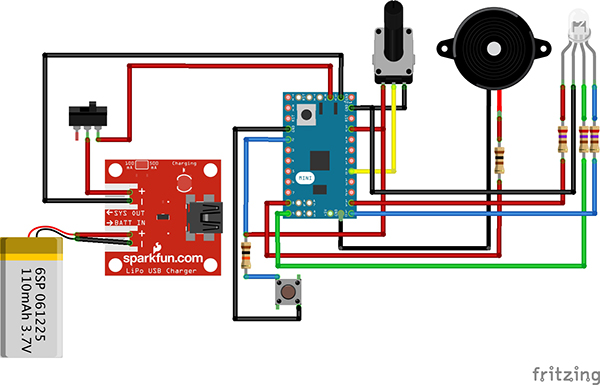
브레드보드 레이아웃
하드웨어 만들기
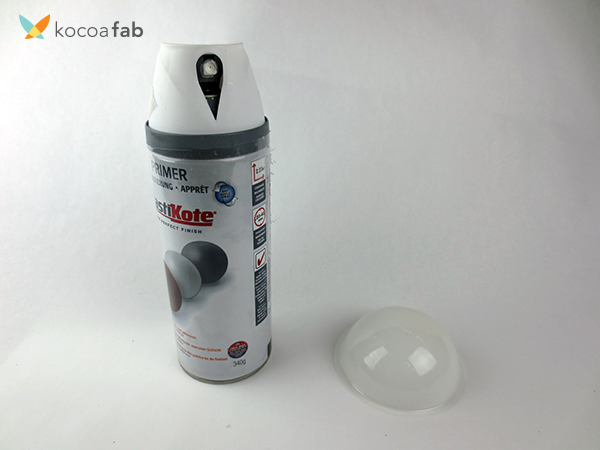
플라스틱 반구중 1개는 안쪽을 흰색 무광 스프레이로 엷게 도색해 주세요.
LED의 광원을 가리고 빛을 산란시켜 주는 역할을 합니다.
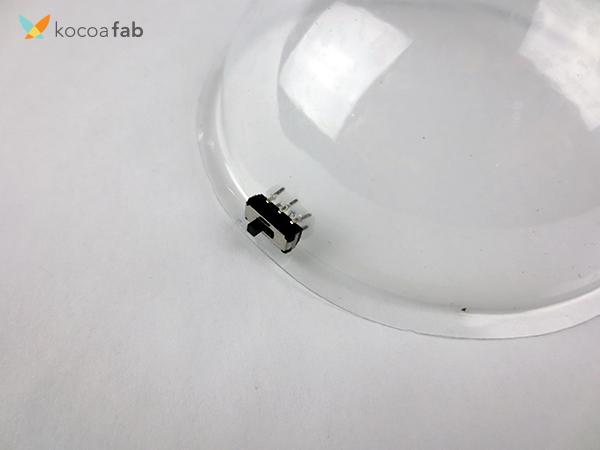
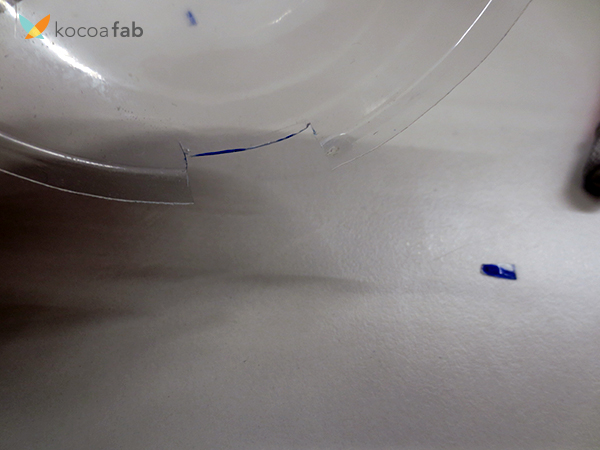
나머지 반구에 슬라이드 스위치를 사진과 같이 고정합니다.
칼로 작은 구멍을 간격에 맞추어 뚫고, 눌러 끼우듯 고정해 주시면 됩니다.

다음으로 리튬 충전 모듈은 반구의 하단부에 위치하도록 마킹을 하고,
적절한 크기를 가위로 잘라주세요.
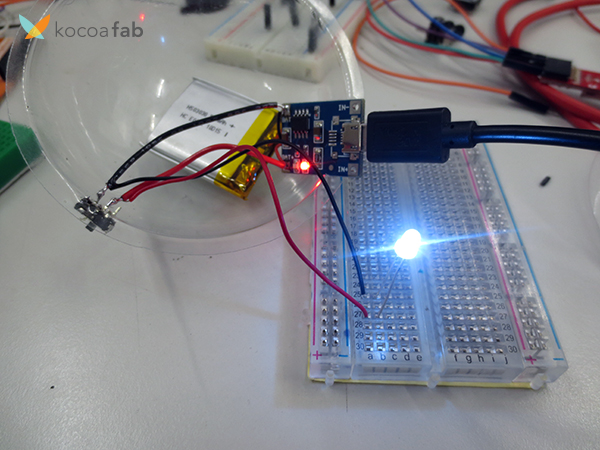
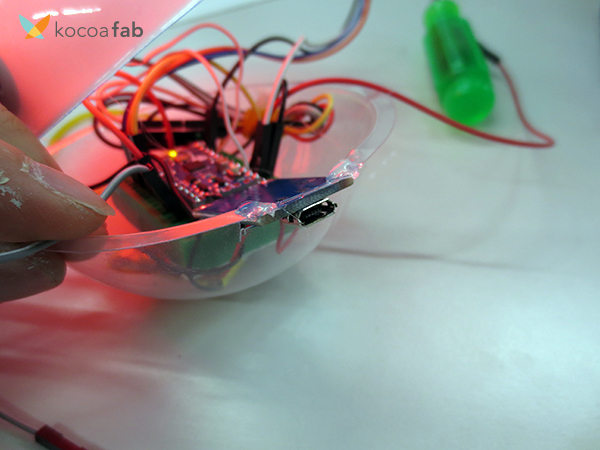
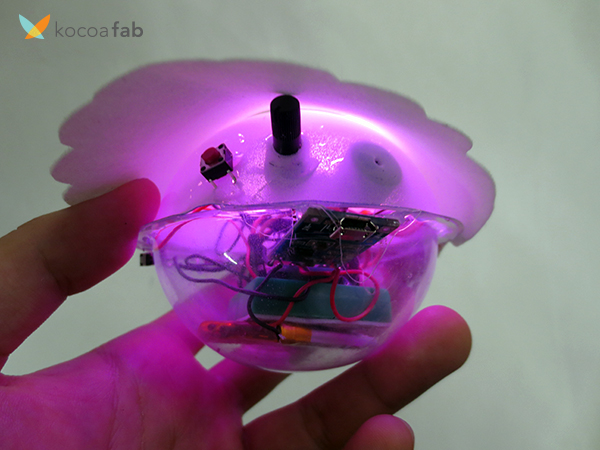
납땜을 하여 리튬전지와 충전 모듈 그리고 스위치를 연결합니다.
연결한 뒤 정상작동 여부를 확인하기 위해 LED로 테스트해보세요.
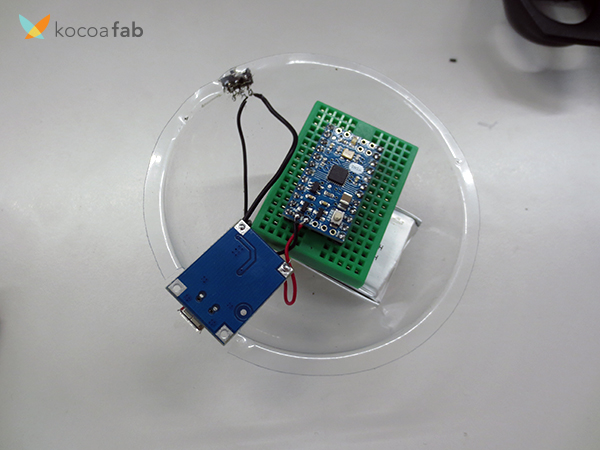
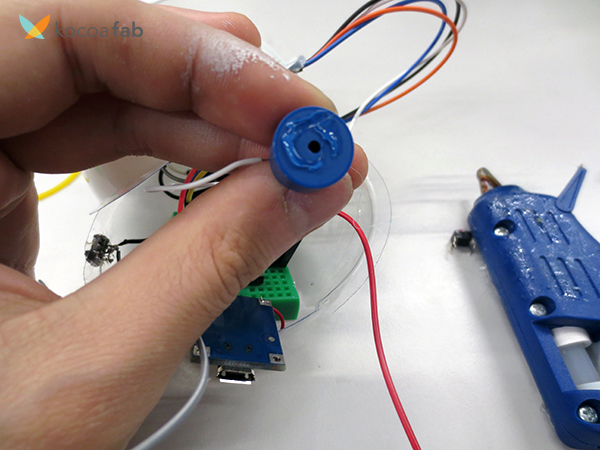
미니브레드보드를 사용하거나 직접 연결하여 스위치와 충전모듈을 아두이노미니에 연결합니다.
자세한 연결법은 회로도와 브레드보드 레이아웃을 참고해 주세요.
(하드웨어를 연결하기전에 아래의 사진을 참고하여 아두이노 미니에 소스코드를 업로드 해 주세요.)
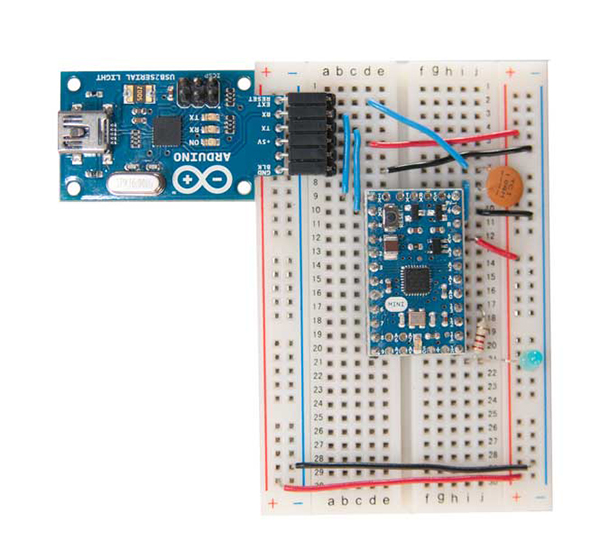
사진 : 아두이노 미니 업로드 방법 - arduico.cc
충전모듈을 하단부에 글루건으로 고정해 줍니다.
열에 의해 플라스틱 반구가 일그러질수 있으니 주의하세요 !
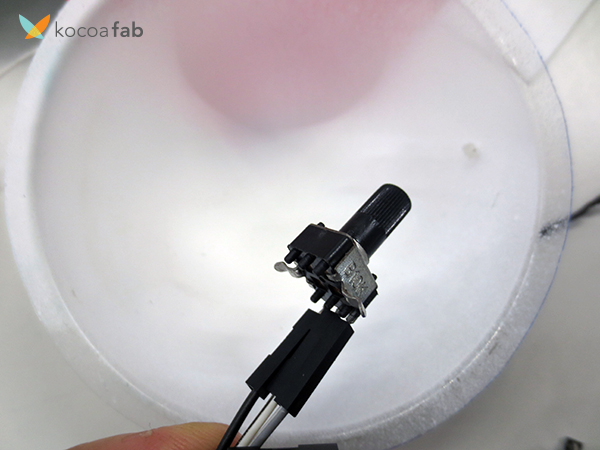
다음은 가변저항을 연결해 보겠습니다.
편의상 점퍼케이블을 이용하였습니다.
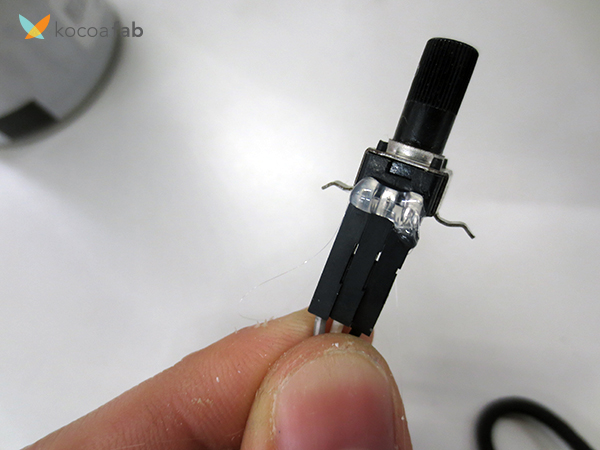
점퍼케이블은 잘 빠질수 있으니 글루건으로 살짝 고정해 주었습니다.
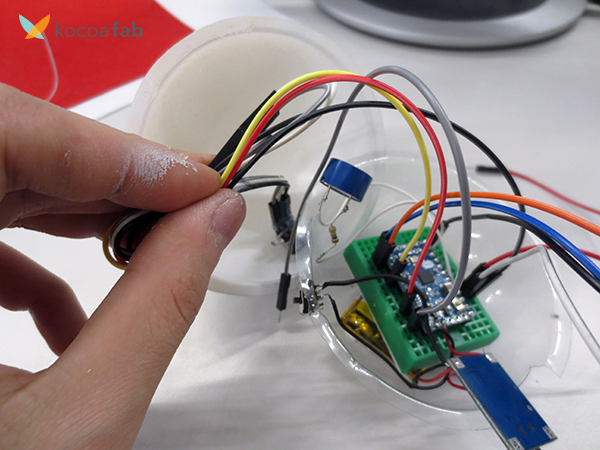
남은 전선은 깔끔하게 묶어 고정합니다.
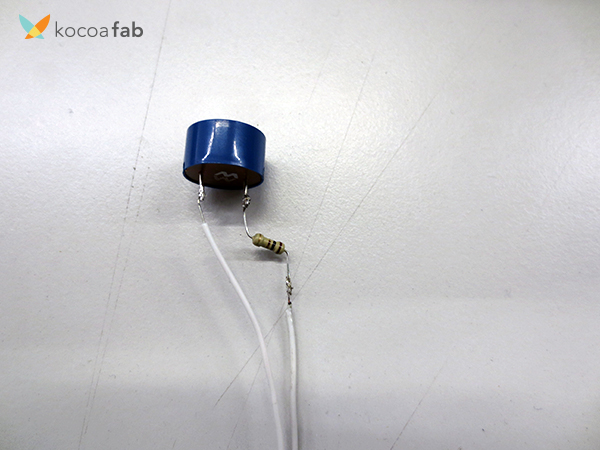
다음으로 피에조 부저입니다.
피에조부저의 +극과 100옴을 연결한뒤 전선과 연결합니다.
캡쪽에 글루건을 발라 반구 전면부에 고정합니다.
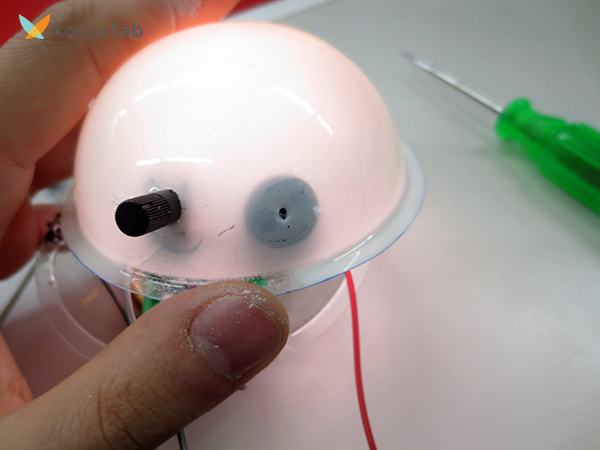
전면부에 가변저항과 피에조부저를 고정한 모습입니다.
칼로 적당한 크기의 구멍을 내어 가변저항을 고정하였고,
피에조부저는 소리가 밖으로 잘 나올수 있도록 작은 구멍을 내었습니다.
흔들리는 부분은 글루건으로 고정해 줍니다.
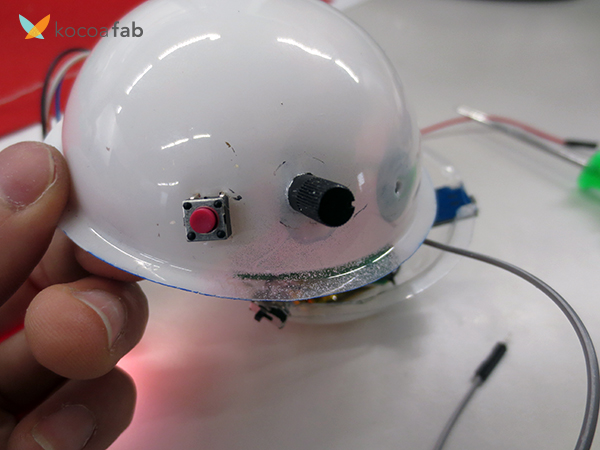
이와같은 방식으로 푸시버튼도 연결해 줍니다.

마지막으로 LED를 연결하여 전면부 상단에 고정하여 줍니다.
글루건으로 견고하게 고정하여 주세요.
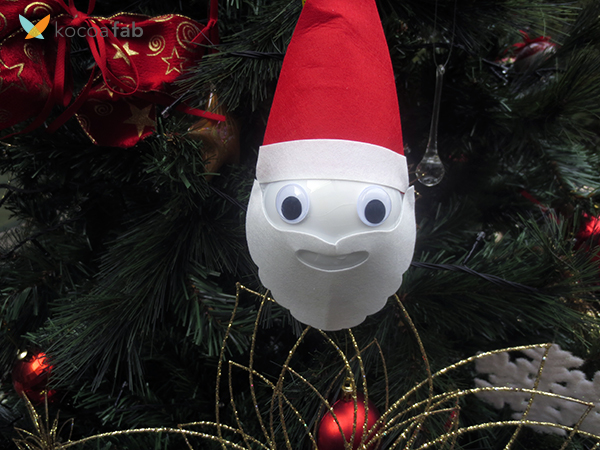
연결이 끝나면, 두개의 반구를 서로 겹쳐 고정해 줍니다.
저는 만나는 부분에 글루건을 사용하여 고정하였습니다.
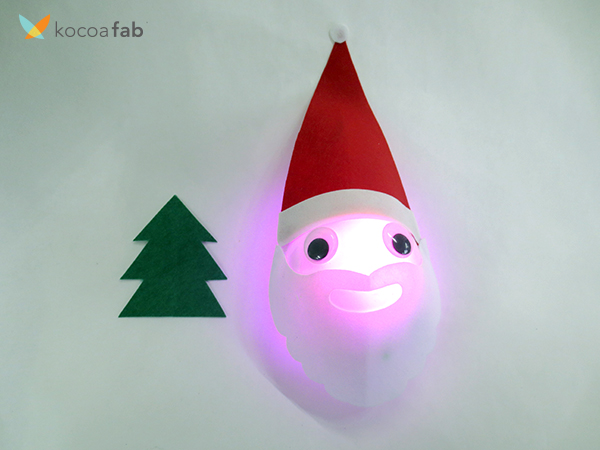
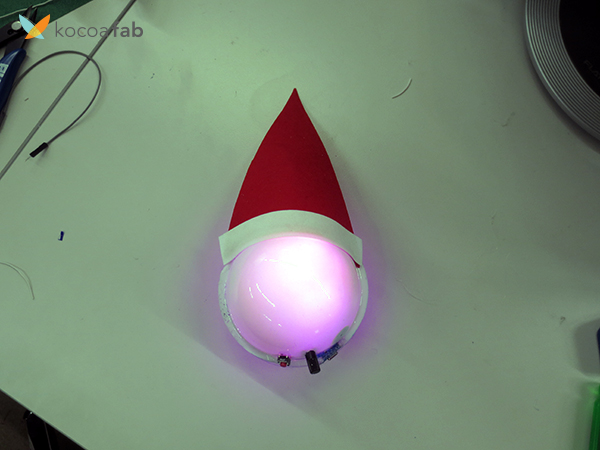
부직포를 이용하여 산타클로스 모자와 콧수염을 오려 붙여주었습니다.
개성있는 모습의 산타를 만들어 보세요 !
푸시버튼을 누르면 다음곡을 재생하고,
가변저항을 돌리면 멜로디의 템포(빠르기)를 조절할수 있습니다.

최종 완성 모습입니다.

메리 크리스마스 :)
소프트웨어 Coding
먼저 pitches.h 헤더파일을 생성해 줍니다.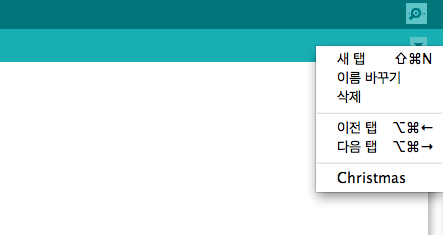
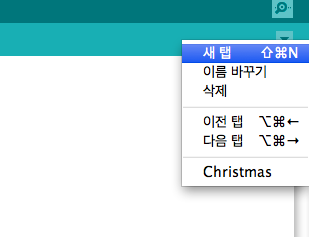
1. 새로운 스케치를 생성하고, 저장을 한뒤 시리얼 모니터 아이콘 하단의 작은 삼각형 메뉴를 눌러 새탭을 생성합니다.
2. 새탭의 이름을 Pitches.h로 입력합니다.

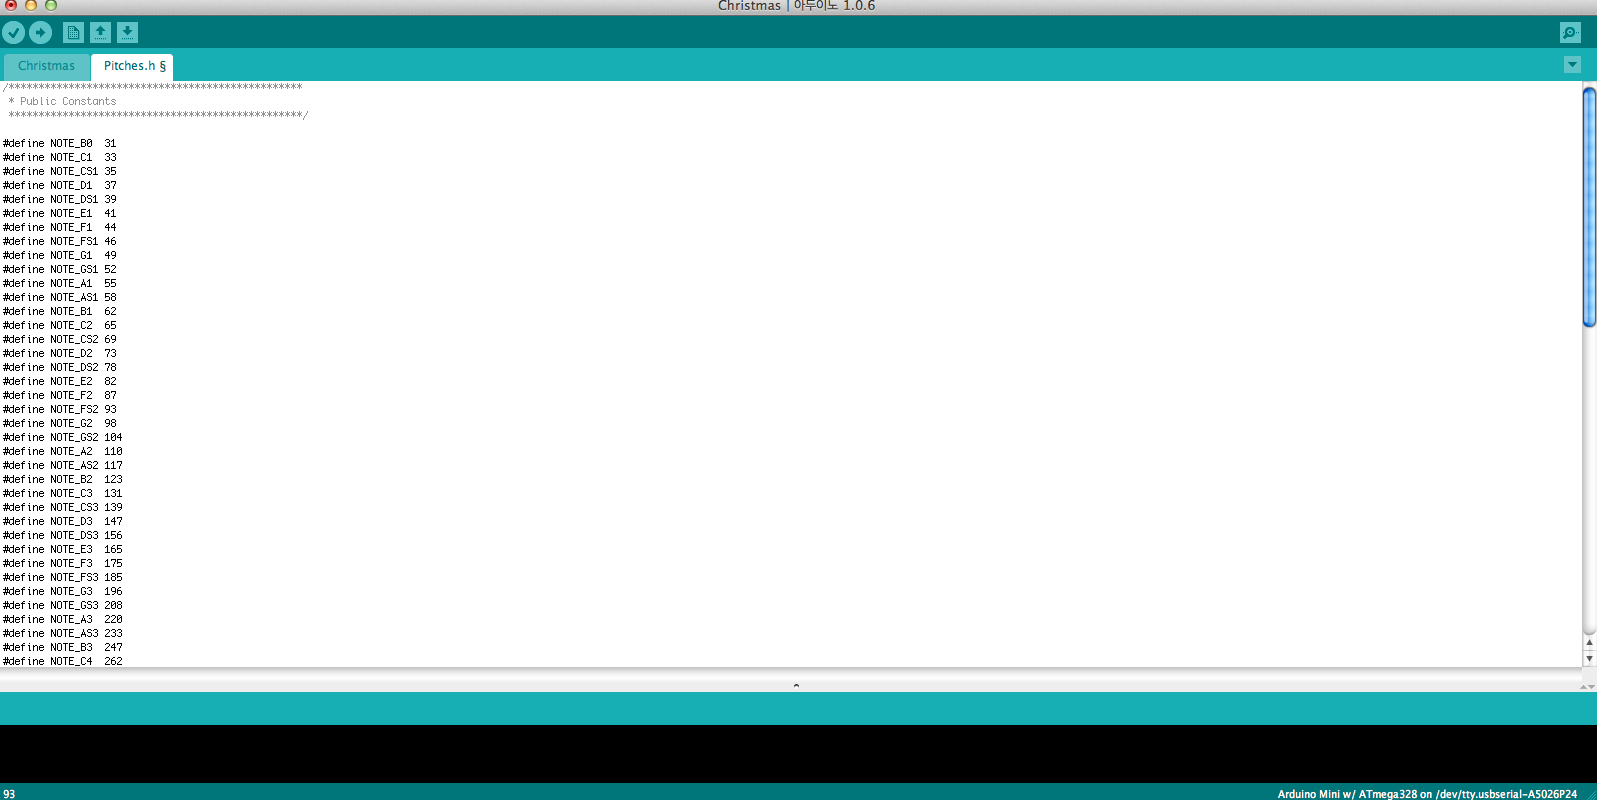
3. 새로운 탭에 아래의 코드를 복사+붙여넣기 해주세요.
/*************************************************
 * Public Constants
 *************************************************/

#define NOTE_B0  31
#define NOTE_C1  33
#define NOTE_CS1 35
#define NOTE_D1  37
#define NOTE_DS1 39
#define NOTE_E1  41
#define NOTE_F1  44
#define NOTE_FS1 46
#define NOTE_G1  49
#define NOTE_GS1 52
#define NOTE_A1  55
#define NOTE_AS1 58
#define NOTE_B1  62
#define NOTE_C2  65
#define NOTE_CS2 69
#define NOTE_D2  73
#define NOTE_DS2 78
#define NOTE_E2  82
#define NOTE_F2  87
#define NOTE_FS2 93
#define NOTE_G2  98
#define NOTE_GS2 104
#define NOTE_A2  110
#define NOTE_AS2 117
#define NOTE_B2  123
#define NOTE_C3  131
#define NOTE_CS3 139
#define NOTE_D3  147
#define NOTE_DS3 156
#define NOTE_E3  165
#define NOTE_F3  175
#define NOTE_FS3 185
#define NOTE_G3  196
#define NOTE_GS3 208
#define NOTE_A3  220
#define NOTE_AS3 233
#define NOTE_B3  247
#define NOTE_C4  262
#define NOTE_CS4 277
#define NOTE_D4  294
#define NOTE_DS4 311
#define NOTE_E4  330
#define NOTE_F4  349
#define NOTE_FS4 370
#define NOTE_G4  392
#define NOTE_GS4 415
#define NOTE_A4  440
#define NOTE_AS4 466
#define NOTE_B4  494
#define NOTE_C5  523
#define NOTE_CS5 554
#define NOTE_D5  587
#define NOTE_DS5 622
#define NOTE_E5  659
#define NOTE_F5  698
#define NOTE_FS5 740
#define NOTE_G5  784
#define NOTE_GS5 831
#define NOTE_A5  880
#define NOTE_AS5 932
#define NOTE_B5  988
#define NOTE_C6  1047
#define NOTE_CS6 1109
#define NOTE_D6  1175
#define NOTE_DS6 1245
#define NOTE_E6  1319
#define NOTE_F6  1397
#define NOTE_FS6 1480
#define NOTE_G6  1568
#define NOTE_GS6 1661
#define NOTE_A6  1760
#define NOTE_AS6 1865
#define NOTE_B6  1976
#define NOTE_C7  2093
#define NOTE_CS7 2217
#define NOTE_D7  2349
#define NOTE_DS7 2489
#define NOTE_E7  2637
#define NOTE_F7  2794
#define NOTE_FS7 2960
#define NOTE_G7  3136
#define NOTE_GS7 3322
#define NOTE_A7  3520
#define NOTE_AS7 3729
#define NOTE_B7  3951
#define NOTE_C8  4186
#define NOTE_CS8 4435
#define NOTE_D8  4699
#define NOTE_DS8 4978
아래의 코드를 아두이노에 업로드 합니다.
#include "pitches.h"
#define SONG1_SIZE 24
#define SONG2_SIZE 14
// notes in the melody 1:
int melody1[] = {
  NOTE_D3, NOTE_B3, NOTE_A3, NOTE_G3, NOTE_D3,
  NOTE_D3, NOTE_D3, NOTE_D3, NOTE_B3, NOTE_A3, NOTE_G3, NOTE_E3, 0,
  NOTE_E3, NOTE_C4, NOTE_B3, NOTE_A3, NOTE_FS3, 0 ,
  NOTE_D4, NOTE_D4, NOTE_C4, NOTE_A3, NOTE_B3
};
// notes in the melody 2:
int melody2[] = {
NOTE_F4, NOTE_E4, NOTE_D4, NOTE_C3, NOTE_AS3, NOTE_A3, NOTE_G3, NOTE_F3,
  NOTE_C4, NOTE_D4, NOTE_D4, NOTE_E4, NOTE_E4, NOTE_F4
};
// note durations of melody 1: 4 = quarter note, 8 = eighth note, etc.:
int noteDurations1[] = {
  4, 4, 4, 4, 2.5,
  8, 8, 4, 4, 4, 4, 2.5, 2,
  4, 4, 4, 4, 2.5, 2,
4, 4, 4, 4, 1};
// note durations of melody 2: 4 = quarter note, 8 = eighth note, etc.:
int noteDurations2[] = {
  2, 2.5, 8, 1.5, 4, 2, 2 ,1.5,
  4, 1.8, 4, 1.8, 4, 1};
//Pins
int redPin = 11;
int greenPin = 10;
int bluePin = 9;
int button = 2;
//control variables
int counter = 0;
int pressed = 0;
boolean playsong =false;
//song temp variables
int songSizeS;
int *noteDurationS = 0;
int *melodyS=0;
//speed control variables
int sensorValue = 0;
float tempo = 0;

// initialization
void setup() {
  //setup pins
  pinMode(redPin, OUTPUT);
  pinMode(greenPin, OUTPUT);
  pinMode(bluePin, OUTPUT);
  pinMode(button, INPUT);
  //light up to green at the beginning
   mapColor(-1);
  //debug purposes
  Serial.begin( 9600 ); // optional
}

// main program
void loop() {
  //detect when the button was pressed
  if(digitalRead(button)  ==LOW)
  {
     pressed = 1;
  }
  //detect when the button was realesed
  if(digitalRead(button)  ==HIGH && pressed == 1)
  {
    counter++;
    pressed = 0;
    playsong =true;//variable to control when to start the song

//decide which song plays
  if( counter % 2 == 0 )
  {
      songSizeS = SONG1_SIZE;
      noteDurationS = noteDurations1;
      melodyS = melody1;
   }
  else
    {
      songSizeS = SONG2_SIZE;
      noteDurationS = noteDurations2;
      melodyS = melody2;
     }
   }
  //start the song if the button was pressed:
  if(playsong)
  {
      playsong =false;
      // iterate over the notes of the melody
      for (int thisNote = 0; thisNote < songSizeS ; thisNote++)
      {
         //sensor value from the potentiometer mapped to range of 1 - 3 speed values
         sensorValue =analogRead(A0);
         tempo = sensorValue * (3.0 / 1023.0); Serial.println(tempo);
         // to calculate the note duration, take one second
        // divided by the note type.
        //e.g. quarter note = 1000 / 4, eighth note = 1000/8, etc. int noteDuration = 1000/noteDurationS[thisNote];
        int noteDuration = 1000/noteDurationS[thisNote];
        tone(8, melodyS[thisNote],noteDuration);
        //light up the rgb-led depending of the note
        mapColor( melodyS[thisNote] );
        // to distinguish the notes, set a minimum time between them.
        // the note's duration * tempo
        int pauseBetweenNotes = noteDuration * tempo;
        delay(pauseBetweenNotes);
        // stop the tone playing:
        noTone(8);
        //light up the led to initial state (green color)
        mapColor(-1);
     }
  }
}

//function that maps the note to a certain color
// it combines the color of RGB to produce a different one
void mapColor(int note)
{
  switch(note)
  {
  case NOTE_C3:
  case NOTE_C4:
    analogWrite(redPin, 0);
    analogWrite(greenPin, 255 );
    analogWrite(bluePin,   255);
    break;
  case NOTE_D3:
  case NOTE_D4:
    analogWrite(redPin, 0);
    analogWrite(greenPin, 0 );
    analogWrite(bluePin,   255);
    break;
  case NOTE_E3:
  case NOTE_E4:
    analogWrite(redPin, 255);
    analogWrite(greenPin, 0 );
    analogWrite(bluePin,   0);
    break;
  case NOTE_F3:
  case NOTE_F4:
    analogWrite(redPin, 0);
    analogWrite(greenPin, 255 );
    analogWrite(bluePin,   0);
    break;
  case NOTE_G3:
  case NOTE_G4:
    analogWrite(redPin, 255);
    analogWrite(greenPin, 0);
    analogWrite(bluePin,   255);
    break;
  case NOTE_A3:
  case NOTE_A4:
    analogWrite(redPin, 255);
    analogWrite(greenPin, 255 );
    analogWrite(bluePin,   0);
    break;
  case NOTE_B3:
  case NOTE_B4:
    analogWrite(redPin, 0);
    analogWrite(greenPin, 0 );
    analogWrite(bluePin,   0);
    break;
  case  0://it represents end state or silence
    analogWrite(redPin, 255);
    analogWrite(greenPin, 255 );
    analogWrite(bluePin,   255);
    break;
  case -1:// it represents initial state
    analogWrite(redPin, 255);
    analogWrite(greenPin, 0);
    analogWrite(bluePin,   255);
    break;
  default://other notes
    analogWrite(redPin, 105);
    analogWrite(greenPin, 255 );
    analogWrite(bluePin,   100);
    break;
  }
}
기술문서
- 부품목록
- 회로도
- 브레드보드 레이아웃
- 스케치


hihyo
 피에조부저,아두이노미니,크리스마스멜로디볼,크리스마스장식,크리스마스,캐롤,RGBLED
