
Weather Lamp 만들기
2016-07-06 10:25:55
개요
다음 컨텐츠에 대한 아이디어가 떠오르지 않아 고민하던 끝에 기존에 올라와 있던 프로젝트를 리메이크 해보기로 했습니다.
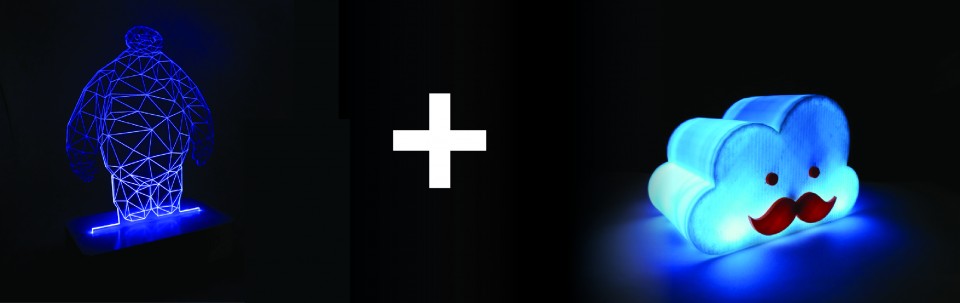
이번 프로젝트는 Klant님의 두 개 작품에 영감을 받아 리메이크한 프로젝트입니다.
일명 구름조명 + 아크릴램프 = Weather Lamp 만들기 랄까요! 하하하하하하
구름조명의 기능과 아크릴 램프의 제작 방식을 합체!!!!했다고 보시면 됩니다.
이번 프로젝트는 손재주가 없는 분들도 사포로 문질문질해주시면 쉽게 따라하실 수 있습니다.
사진처럼 레이어만 시키는거라 생각보다 쉽습니다.
관련 튜토리얼
'DIY 아크릴 램프 만들기' - http://kocoafab.cc/make/view/649
'날씨 정보를 알려주는 무드 램프 만들기' - http://kocoafab.cc/make/view/564
'아두이노에서 WiFi와 기상청의 RSS를 이용하여 날씨정보 읽어오기' - http://kocoafab.cc/tutorial/view/595
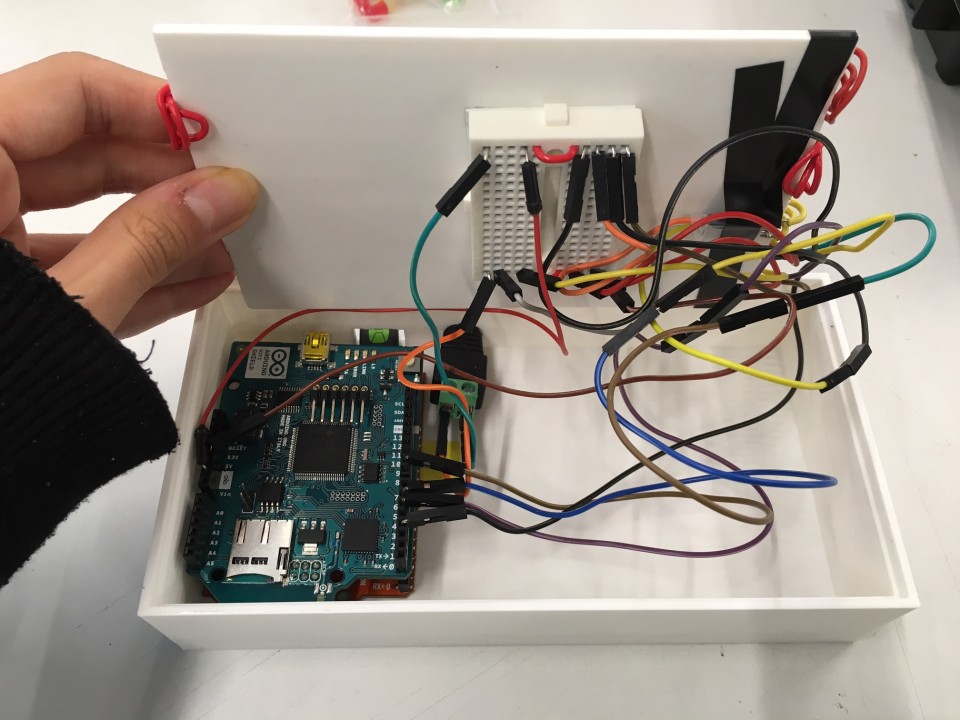
부품 설명
| NO | 부품명 | 수량 | 상세 설명 |
| 1 | 오렌지 보드 | 1 | |
| 2 | 와이파이 쉴드 | 1 | |
| 3 | 점퍼케이블 | 23 | M/M JUMPER 케이블 |
| 4 | Neopixel Strip LED | 32 | |
| 5 | 브레드 보드 | 1 | |
| 6 | 아크릴 | 4 | 반으로 잘라서 8장 |
| 7 | 사포 | 1 | 스폰지 / 천 사포 |
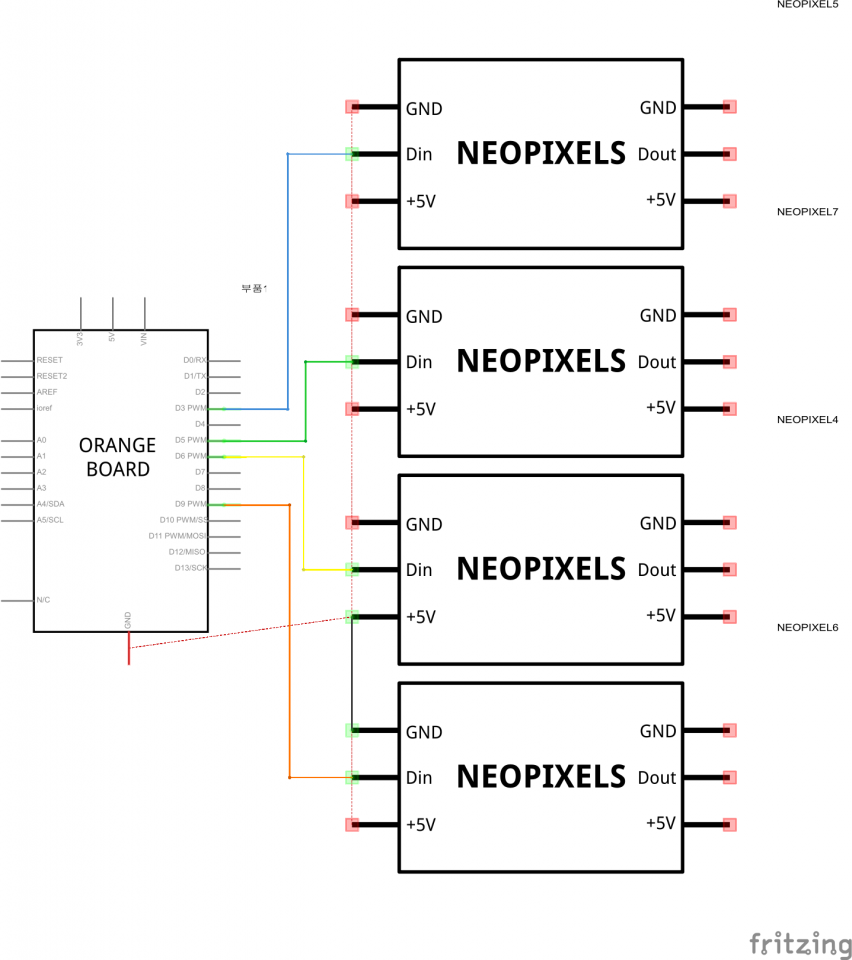
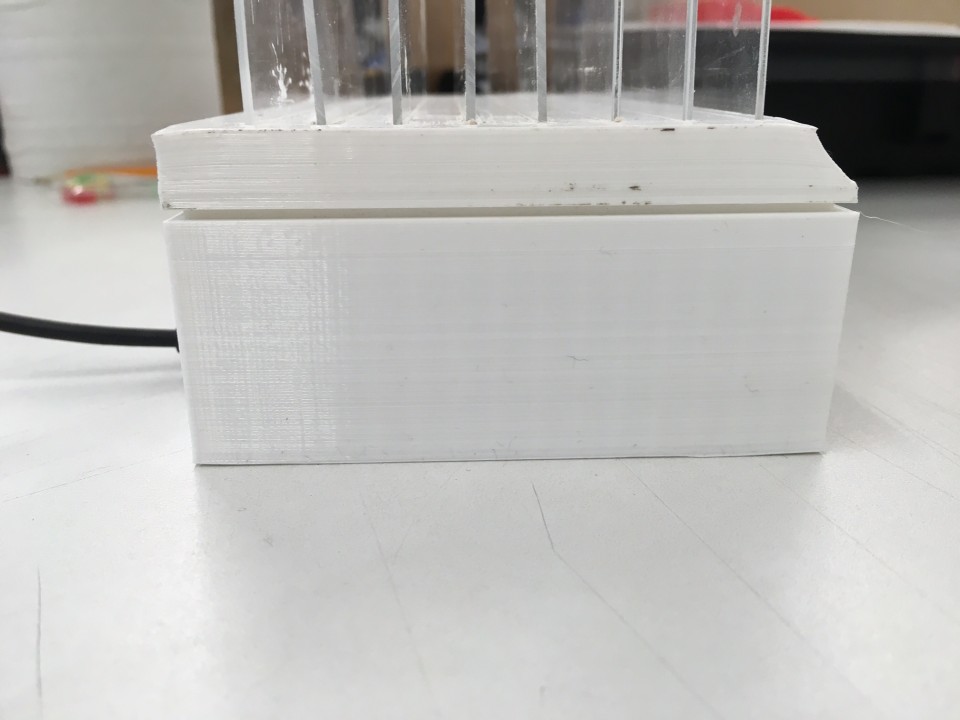
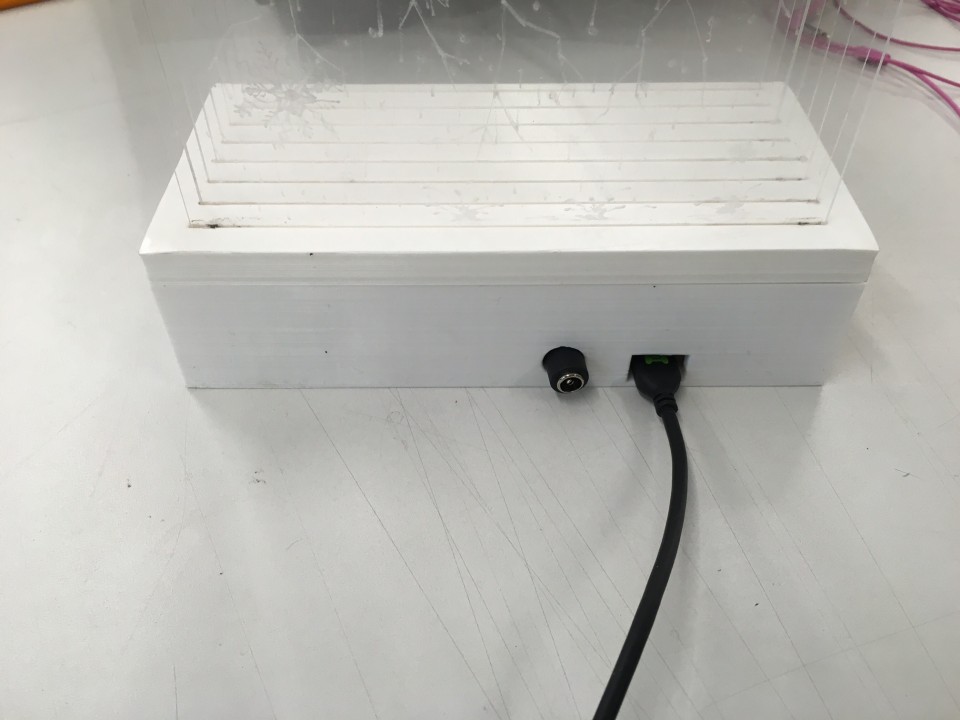
하드웨어 Making
브레드보드 레이아웃

회로도(스케메틱)
소프트웨어 coding
#include <SPI.h>
#include <WiFi.h>
#include <Adafruit_NeoPixel.h>

char ssid[] = "ssid";       //와이파이 SSID
char pass[] = "password";   //와이파이 password

//인스턴스 변수 초기화
WiFiServer server(80);
WiFiClient client;

IPAddress hostIp;
uint8_t ret;

//initialize LED strip
Adafruit_NeoPixel strip = Adafruit_NeoPixel(20, 3, NEO_GRB + NEO_KHZ800);     //백그라운드 LED
Adafruit_NeoPixel strip1 = Adafruit_NeoPixel(4, 5, NEO_GRB + NEO_KHZ800);     //날씨 LED_비
Adafruit_NeoPixel strip2 = Adafruit_NeoPixel(4, 6, NEO_GRB + NEO_KHZ800);     //날씨 LED_번개
Adafruit_NeoPixel strip3 = Adafruit_NeoPixel(4, 9, NEO_GRB + NEO_KHZ800);     //날씨 LED_눈


int temp = 0;

String weather_str = "";
String wt_temp = "";
String wt_wfKor = "";
String wt_wfEn = "";
String wt_reh = "";

boolean SuccessCall = false;

unsigned long lastConnectionTime = 0;
const unsigned long postingInterval = 20L * 1000L; //interval 시간

void setup() {
  //각 변수에 정해진 공간 할당
  Serial.begin(115200);

  //LED strip
  strip.begin();
  strip1.begin();
  strip2.begin();
  strip3.begin();
  colorWipe(strip.Color(255, 255, 255), 50); //배경 LED on
  strip1.show();

  delay(10);
  //WiFi연결 시도
  Serial.println("Connecting to WiFi....");
  WiFi.begin(ssid, pass);  //WiFi가 패스워드를 사용한다면 매개변수에 password도 작성

  server.begin();
  Serial.println("Connect success!");
  Serial.println("Waiting for DHCP address");
  //DHCP주소를 기다린다
  while (WiFi.localIP() == INADDR_NONE) {
    Serial.print(".");
    delay(300);
  }

  Serial.println("\n");
  printWifiData();
  connectToServer();
}

void loop() {
  if (client.connected()) {
    while (client.available() && !SuccessCall) {
      //라인을 기준으로 문자열을 저장한다.
      String line = client.readStringUntil('\n');
      //Serial.println(line);

      //시간
      int temp11 = line.indexOf("</hour>");
      if (temp11 > 0) {
        String tmp_str = "<hour>";
        String wt_hour = line.substring(line.indexOf(tmp_str) + tmp_str.length(), temp11);
        Serial.print("hour is ");
        Serial.println(wt_hour);
      }

      //온도
      int temp = line.indexOf("</temp>");
      if (temp > 0) {
        String tmp_str = "<temp>";
        String wt_temp = line.substring(line.indexOf(tmp_str) + tmp_str.length(), temp);
        Serial.print("temperature is ");
        Serial.println(wt_temp);
      }

      //날씨 정보
      int wfEn = line.indexOf("</wfEn>");
      if (wfEn > 0) {
        String tmp_str = "<wfEn>";
        String wt_twfEn = line.substring(line.indexOf(tmp_str) + tmp_str.length(), wfEn);
        Serial.print("weather is ");
        Serial.println(wt_twfEn);

        if (wt_twfEn == "Rain") {
          colorWipe(strip.Color(0, 0, 255), 50);
          colorWipe1(strip1.Color(0, 0, 255), 50);
          colorWipe2(strip2.Color(0, 0, 0), 50);
          colorWipe3(strip3.Color(0, 0, 0), 50);
        }

        else if (wt_twfEn == "Lightning") {
          colorWipe(strip.Color(255, 255, 255), 50);
          colorWipe1(strip1.Color(0, 0, 0), 50);
          theaterChase2(strip2.Color(255, 150, 0), 50);
          //colorWipe2(strip2.Color(255, 150, 0), 50);
          colorWipe3(strip3.Color(0, 0, 0), 50);
        }

        else if (wt_twfEn == "snow") {
          colorWipe(strip.Color(100, 155, 255), 50);
          colorWipe1(strip1.Color(0, 0, 0), 50);
          colorWipe2(strip2.Color(0, 0, 0), 50);
          colorWipe3(strip3.Color(100, 155, 255), 50);
        }
        else {
          colorWipe(strip.Color(255, 255, 255), 50);
          colorWipe1(strip1.Color(0, 0, 0), 50);
          colorWipe2(strip2.Color(0, 0, 0), 50);
          colorWipe3(strip3.Color(0, 0, 0), 50);
        }
      }

      //습도
      int reh = line.indexOf("</reh>");
      if (reh > 0) {
        String tmp_str = "<reh>";
        String wt_reh = line.substring(line.indexOf(tmp_str) + tmp_str.length(), reh);
        Serial.print("Humidity is ");
        Serial.println(wt_reh);
        SuccessCall = true;
      }
    }
  }
  if (millis() - lastConnectionTime > postingInterval) { //interval 시간이 충족되었다면
    connectToServer(); //데이터 호출
  }

}

//서버와 연결
void connectToServer() {
  Serial.println("connecting to server...");
  SuccessCall = false;
  String content = "";
  if (client.connect(hostIp, 80)) {
    Serial.println("Connected! Making HTTP request to www.kma.go.kr");
    //Serial.println("GET /data/2.5/weather?q="+location+"&mode=xml");
    client.println("GET /wid/queryDFSRSS.jsp?zone=1165053000 HTTP/1.1");
    //위에 지정된 주소와 연결한다.
    client.print("HOST: www.kma.go.kr\n");
    client.println("User-Agent: launchpad-wifi");
    client.println("Connection: close");

    client.println();
    Serial.println("Weather information for ");
    lastConnectionTime = millis();
  }
  //마지막으로 연결에 성공한 시간을 기록
}


void printHex(int num, int precision) {
  char tmp[16];
  char format[128];

  sprintf(format, "%%.%dX", precision);

  sprintf(tmp, format, num);
  Serial.print(tmp);
}

void printWifiData() {
  // Wifi쉴드의 IP주소를 출력
  Serial.println();
  Serial.println("IP Address Information:");
  IPAddress ip = WiFi.localIP();
  Serial.print("IP Address: ");
  Serial.println(ip);

  //MAC address출력
  byte mac[6];
  WiFi.macAddress(mac);
  Serial.print("MAC address: ");
  printHex(mac[5], 2);
  Serial.print(":");
  printHex(mac[4], 2);
  Serial.print(":");
  printHex(mac[3], 2);
  Serial.print(":");
  printHex(mac[2], 2);
  Serial.print(":");
  printHex(mac[1], 2);
  Serial.print(":");
  printHex(mac[0], 2);
  Serial.println();
  //서브넷 마스크 출력
  IPAddress subnet = WiFi.subnetMask();
  Serial.print("NetMask: ");
  Serial.println(subnet);

  //게이트웨이 주소 출력
  IPAddress gateway = WiFi.gatewayIP();
  Serial.print("Gateway: ");
  Serial.println(gateway);

  Serial.print("SSID: ");
  Serial.println(WiFi.SSID());

  ret = WiFi.hostByName("www.kma.go.kr", hostIp);

  Serial.print("ret: ");
  Serial.println(ret);

  Serial.print("Host IP: ");
  Serial.println(hostIp);
  Serial.println("");
}

int getInt(String input) {
  int i = 2;

  while (input[i] != '"') {
    i++;
  }
  input = input.substring(2, i);
  char carray[20];
  //Serial.println(input);
  input.toCharArray(carray, sizeof(carray));
  //Serial.println(carray);
  temp = atoi(carray);
  //Serial.println(temp);
  return temp;
}

///////////////////////////function LED strip/////////////////////////////////

void colorWipe(uint32_t c, uint8_t wait) {
  for (uint16_t i = 0; i < strip.numPixels(); i++) {
    strip.setPixelColor(i, c);
    strip.show();
    delay(wait);
  }
}

void colorWipe1(uint32_t c, uint8_t wait) {
  for (uint16_t i = 0; i < strip1.numPixels(); i++) {
    strip1.setPixelColor(i, c);
    strip1.show();
    delay(wait);
  }
}

void colorWipe2(uint32_t c, uint8_t wait) {
  for (uint16_t i = 0; i < strip2.numPixels(); i++) {
    strip2.setPixelColor(i, c);
    strip2.show();
    delay(wait);
  }
}

void theaterChase2(uint32_t c, uint8_t wait) {
  for (int j=0; j<10; j++) {  //do 10 cycles of chasing
    for (int q=0; q < 3; q++) {
      for (int i=0; i < strip2.numPixels(); i=i+3) {
        strip2.setPixelColor(i+q, c);    //turn every third pixel on
      }
      strip.show();

      delay(wait);

      for (int i=0; i < strip2.numPixels(); i=i+3) {
        strip2.setPixelColor(i+q, 0);        //turn every third pixel off
      }
    }
  }
}

void colorWipe3(uint32_t c, uint8_t wait) {
  for (uint16_t i = 0; i < strip3.numPixels(); i++) {
    strip3.setPixelColor(i, c);
    strip3.show();
    delay(wait);
  }
}
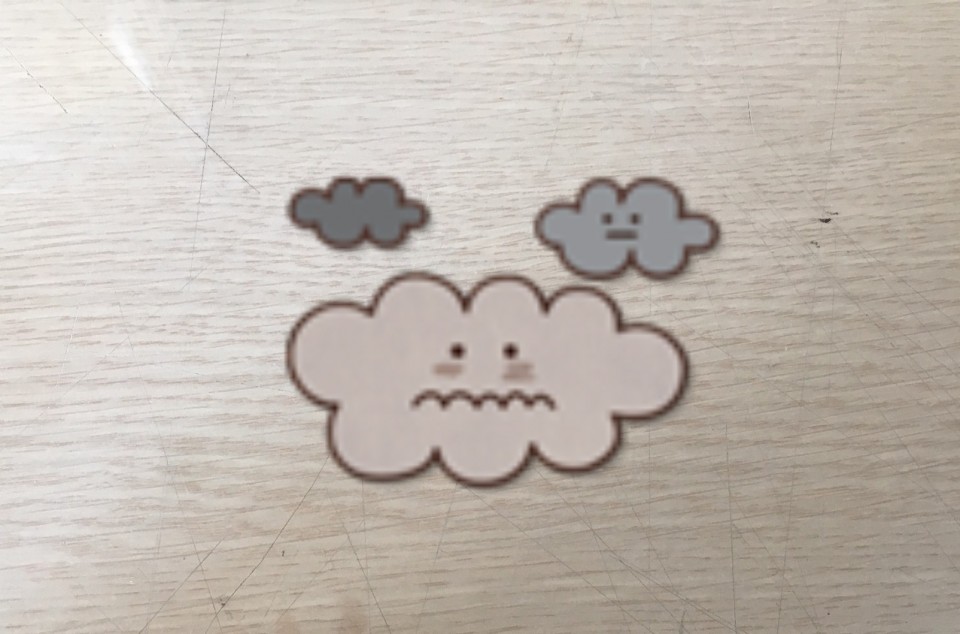
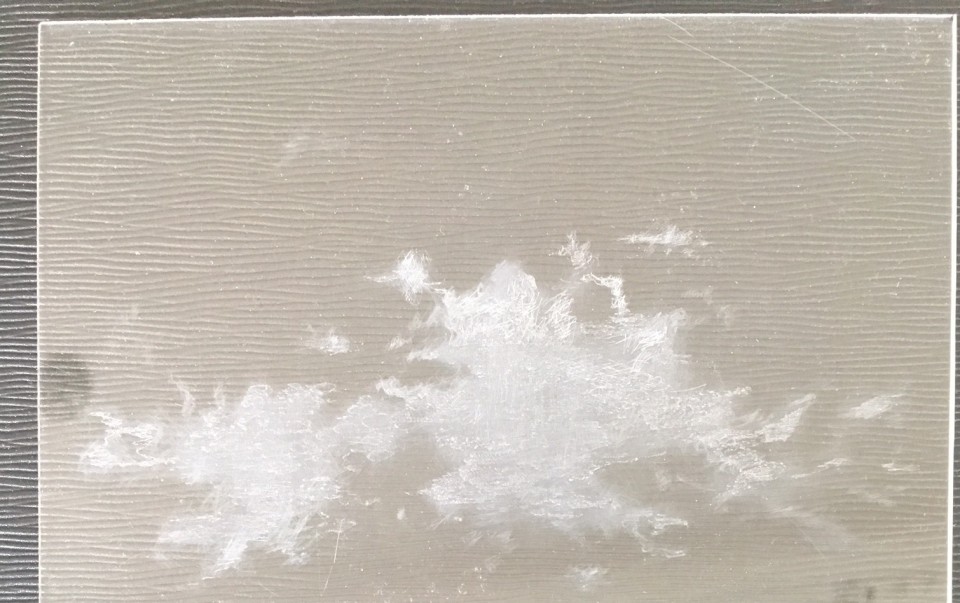
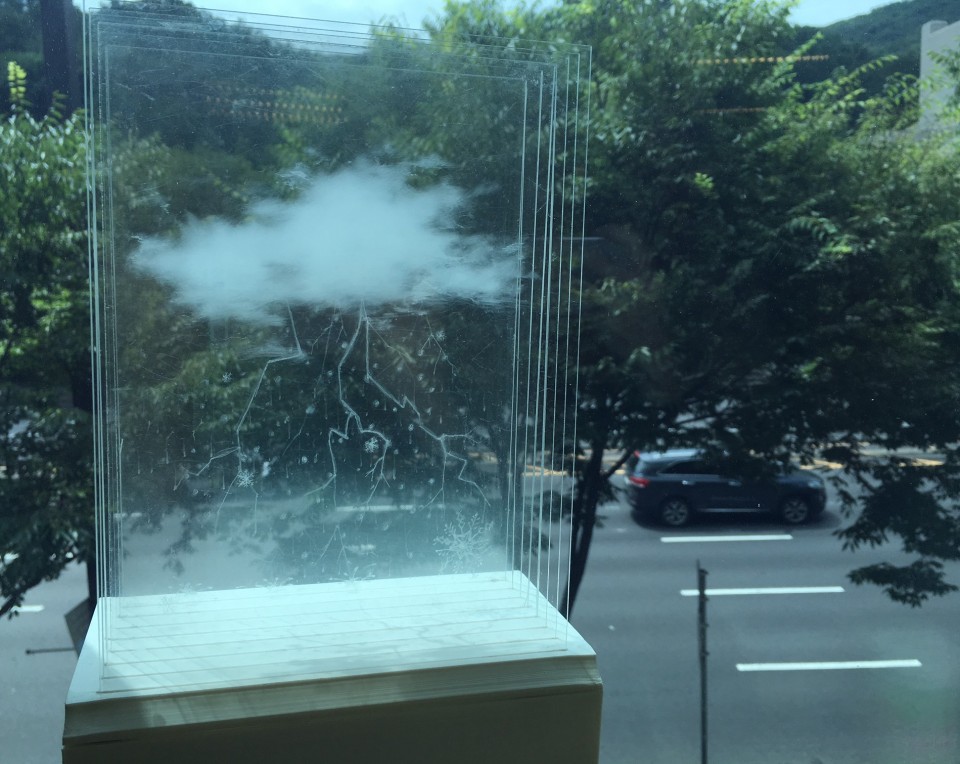
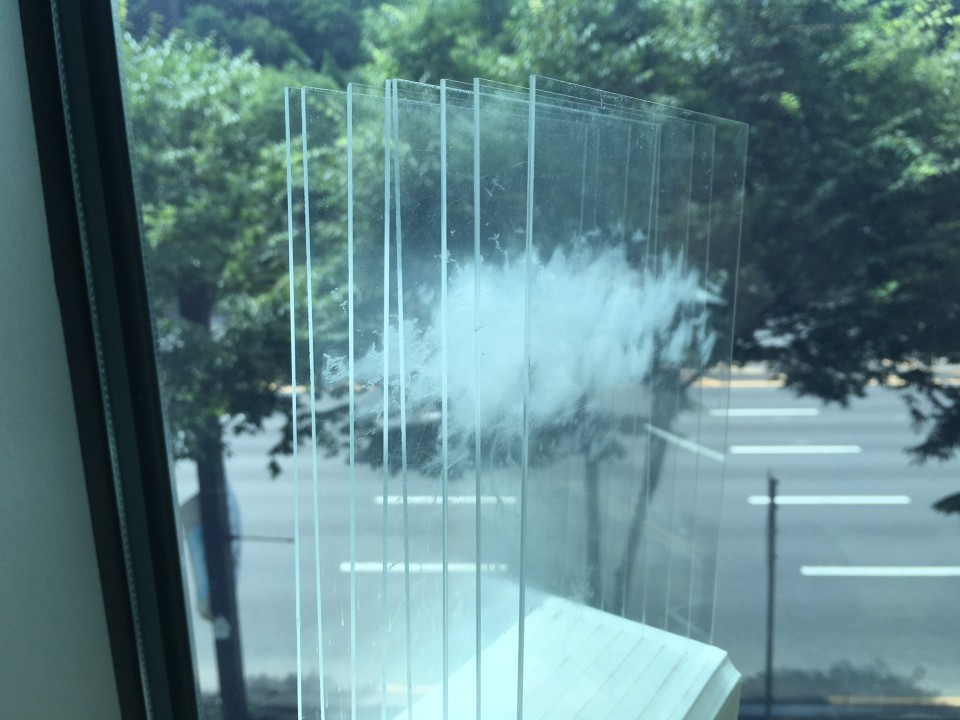
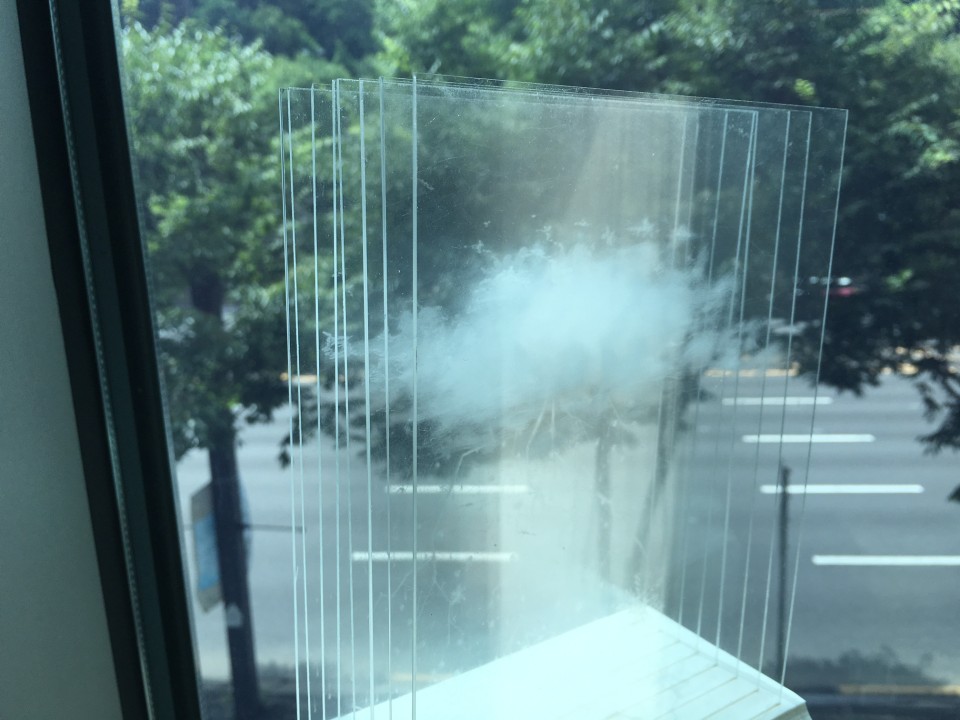
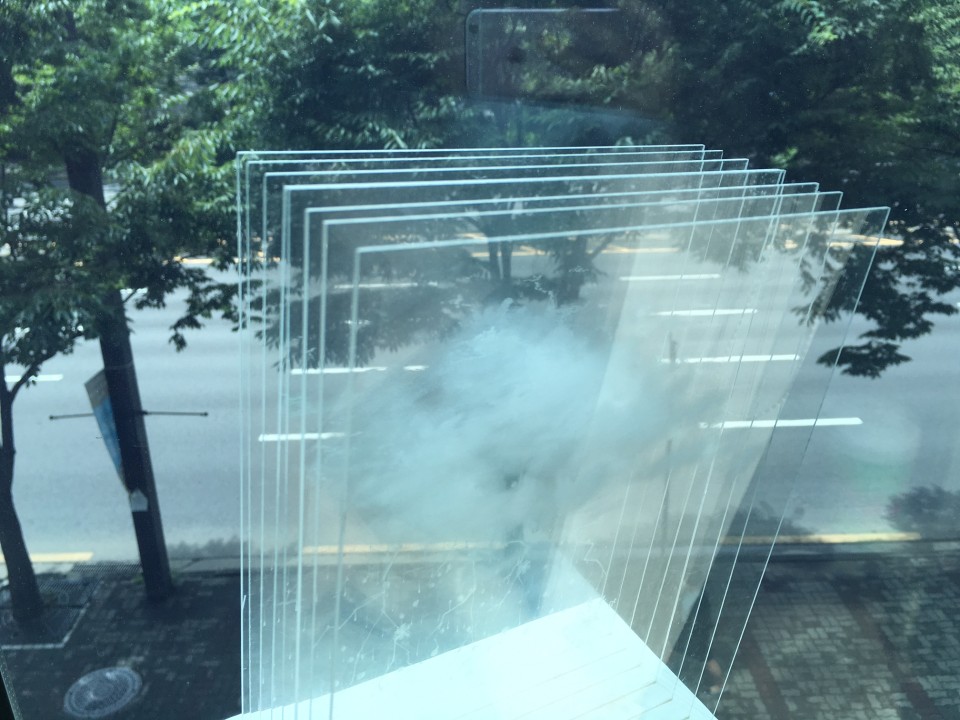
구름조명 + 아크릴램프 = Weather Lamp 만들기
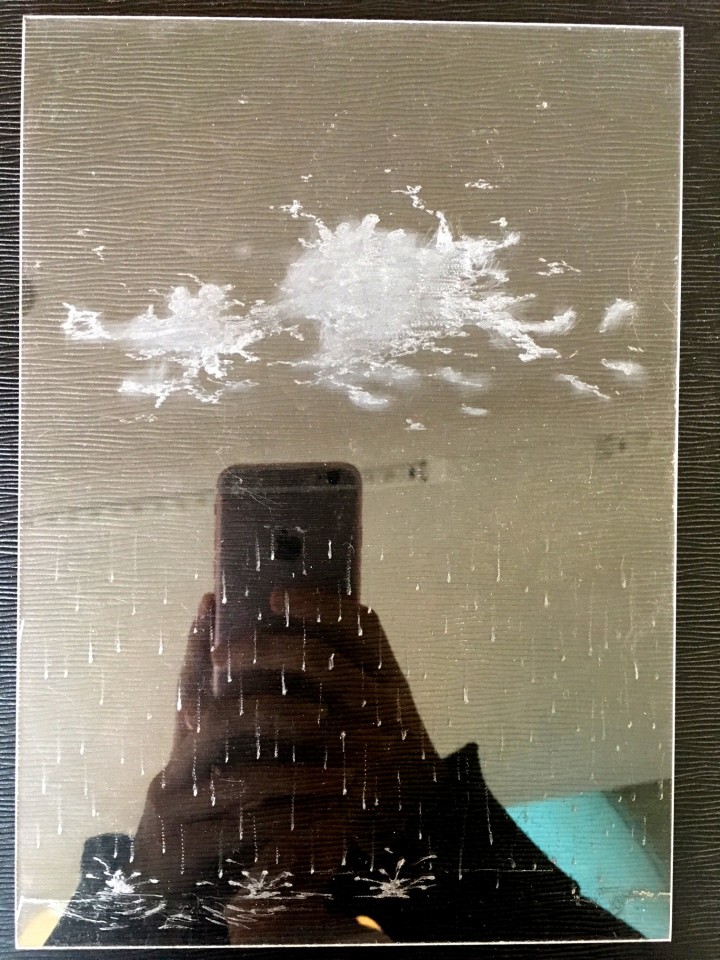
아크릴에 구름을 그려줄거에요~!
그리고 싶은 구름모양을 아크릴 뒤에 겹쳐주시고 비슷하게 따라 하시면 돼요.
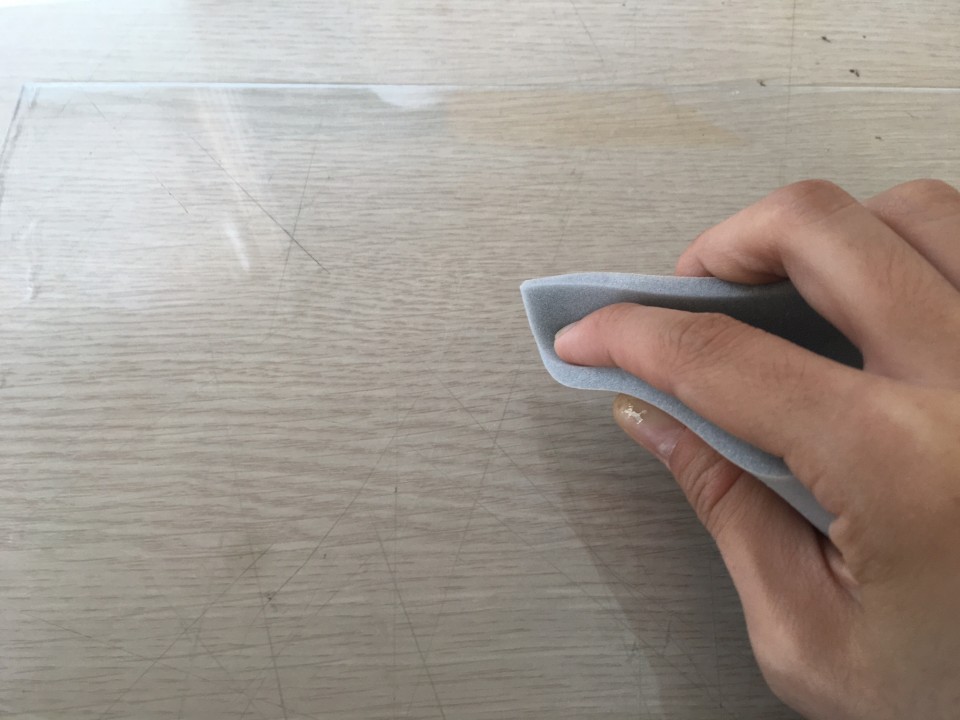
구름에 사포작업을 하실 때에는 비닐을 작업 영역만 벗겨주세요 다 벗기지 마세요.

하실 때 이 프로젝트의 핵심!
1. 구름 사진에서 진한 부분은 여러 번 겹치게 연한 부분은 많이 안 겹치게 한다.
2. 위의 구름 사진처럼 형체가 명확하면서 주변에 흩어져 있는 작은 구름들을 연출해주면 더 진짜 구름처럼 됩니다.
3. 뒤에 있는 구름은 뒤에 끼워주시고 앞에 있는 구름은 앞에 끼워주시면 자연스럽게 거리감이 생기니 거리감을 주고 싶은 구름들은 끼우는 방식을 바꿔보세요.
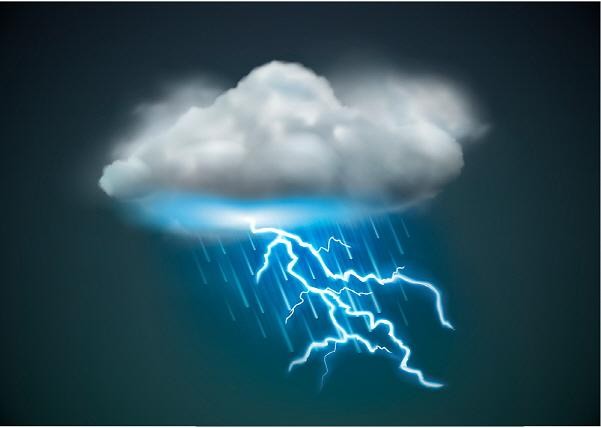
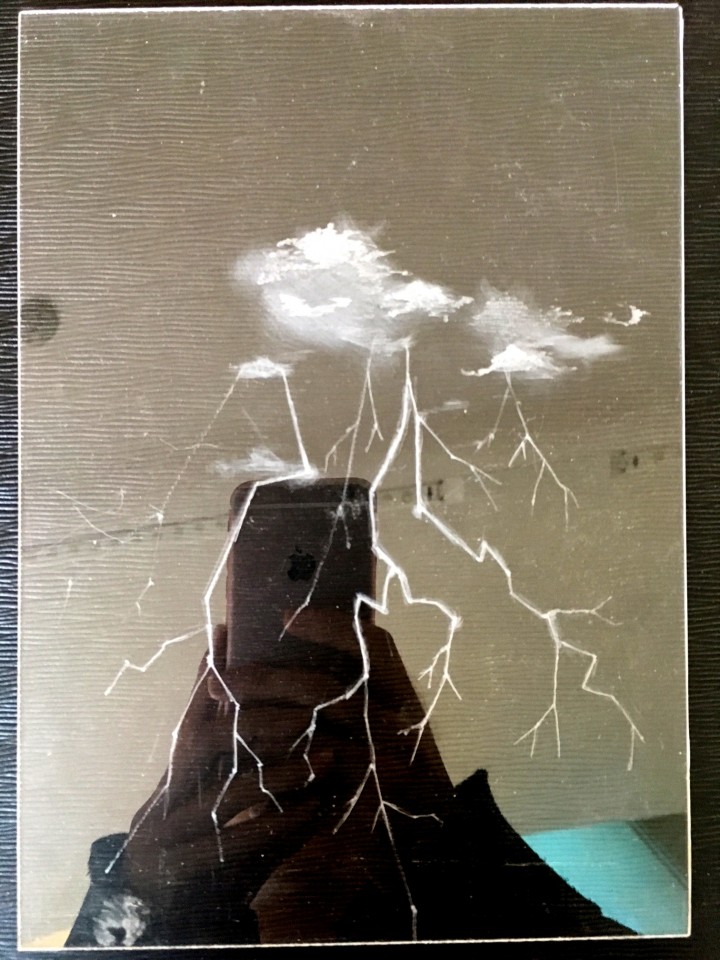
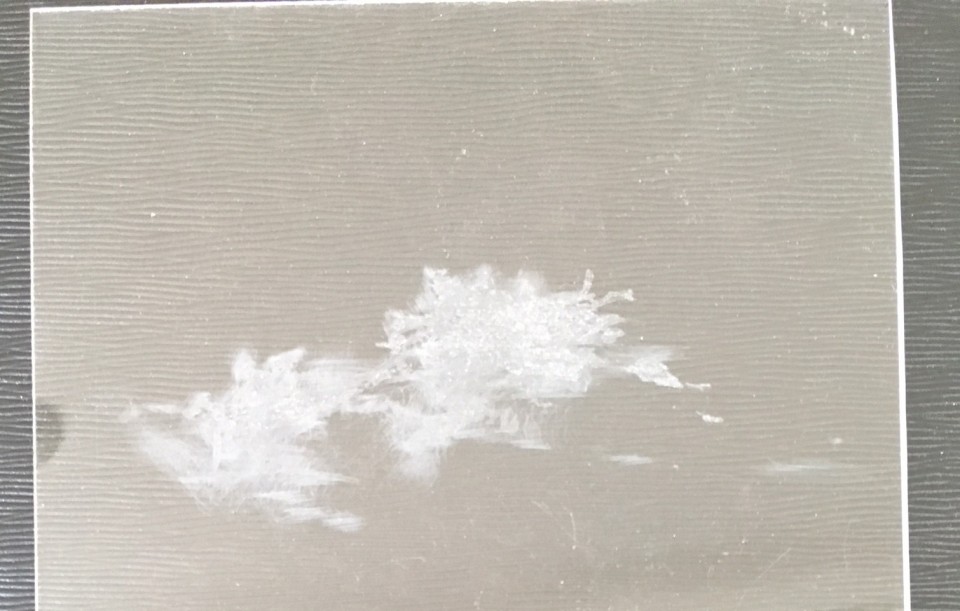
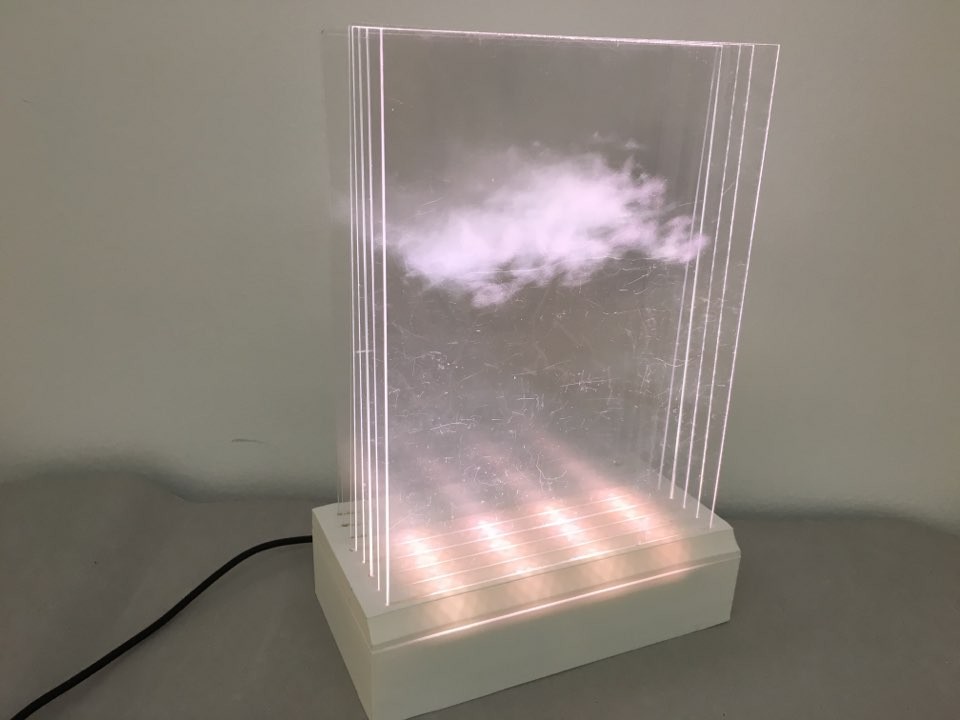
4. 번개 날씨를 알려주는 부분은 위의 그림의 구름 밑(빛나는 부분)에 쪽만 스크래치를 내주세요.
조명을 비춰주면 밑 부분이 번쩍!!!하는 것처럼 연출이 됩니다.
이제 시작해 볼까요??
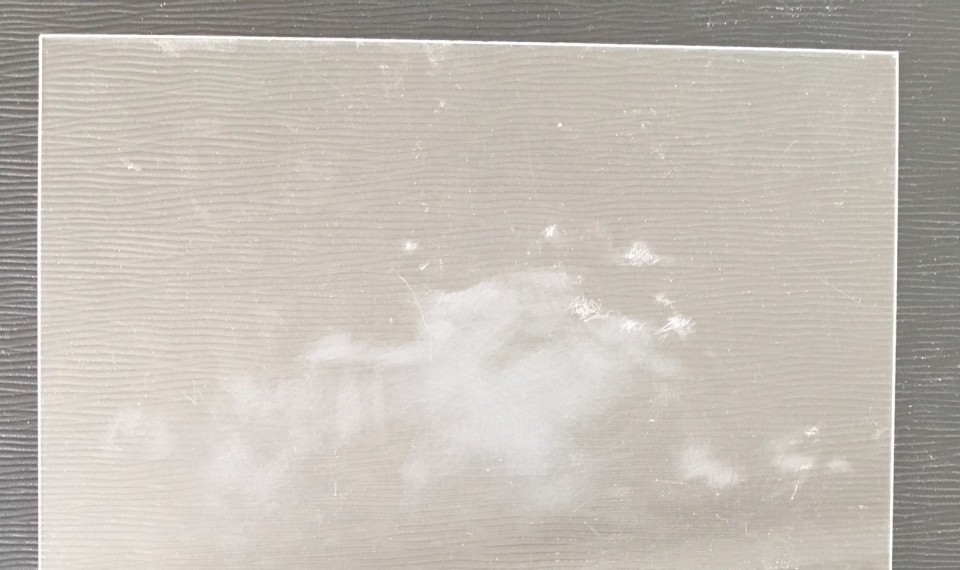
먼저 사포로 전체적인 구름모양을 잡아주시고 작은 구름먼저 그려보겠습니다.
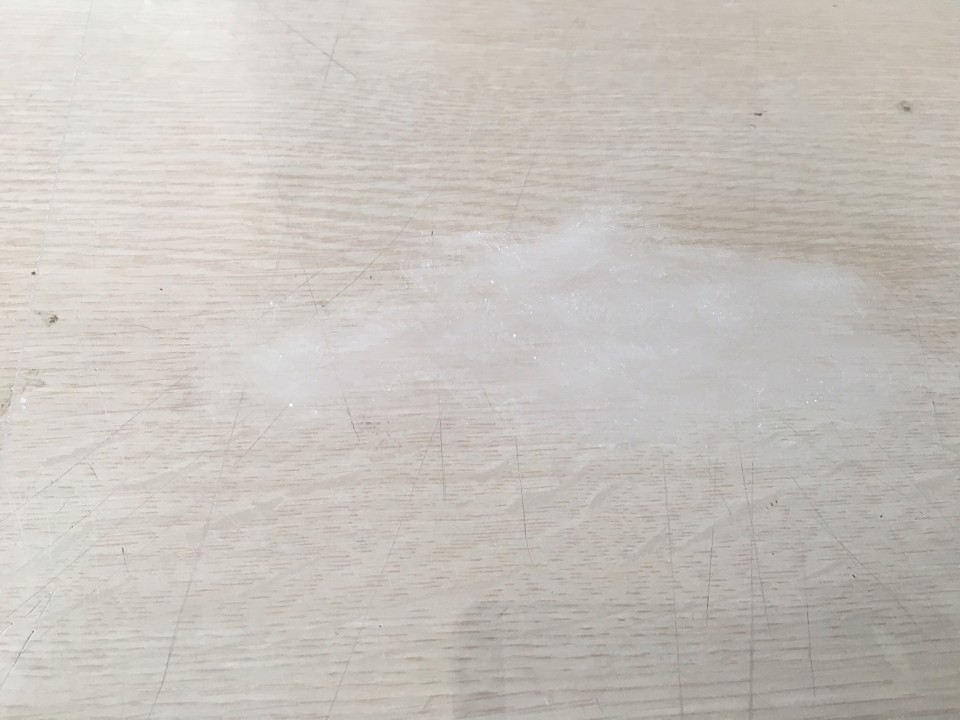
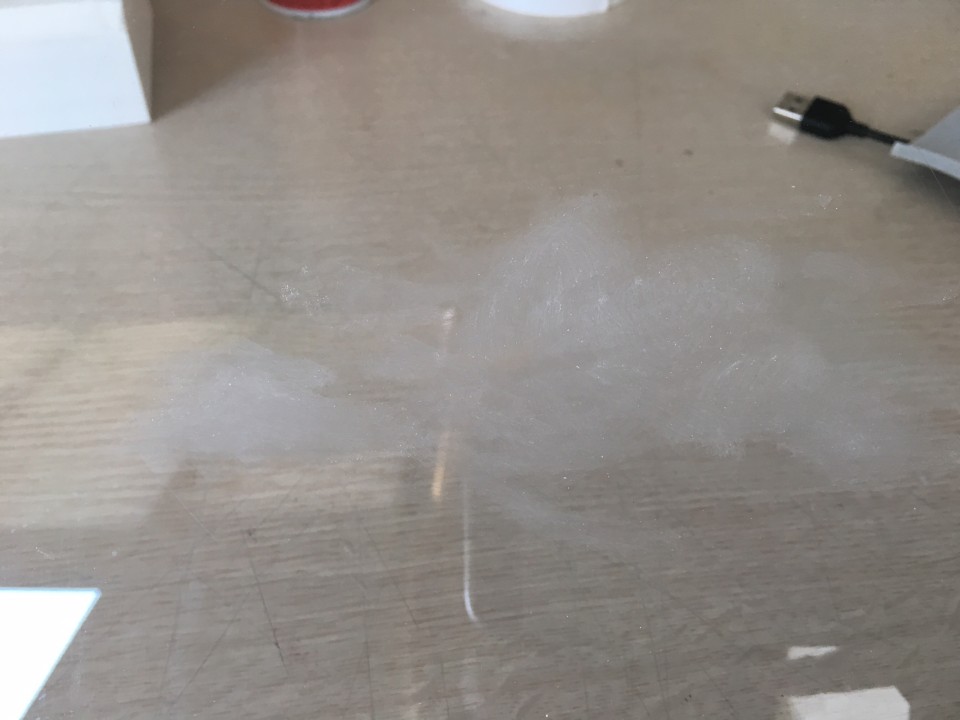
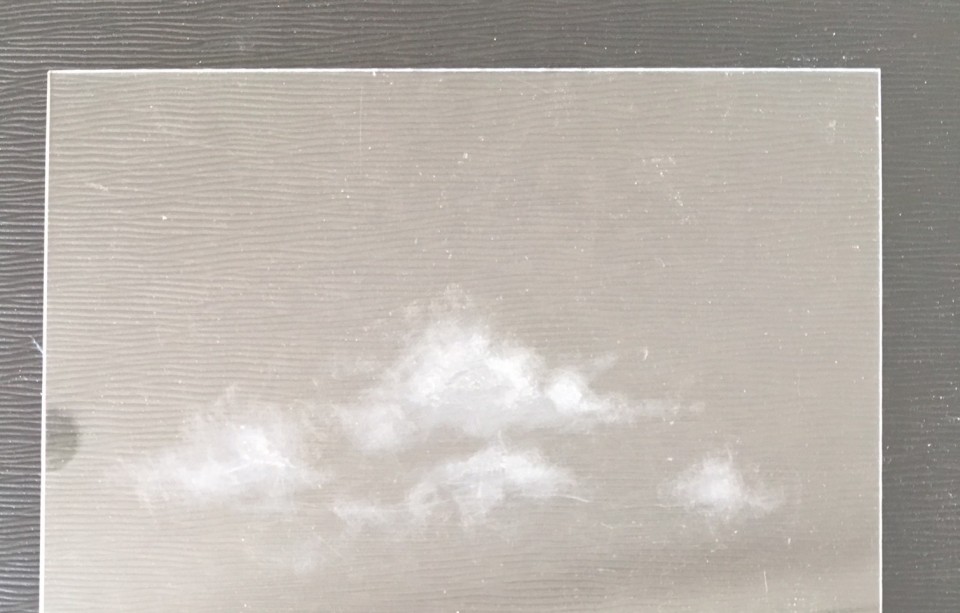
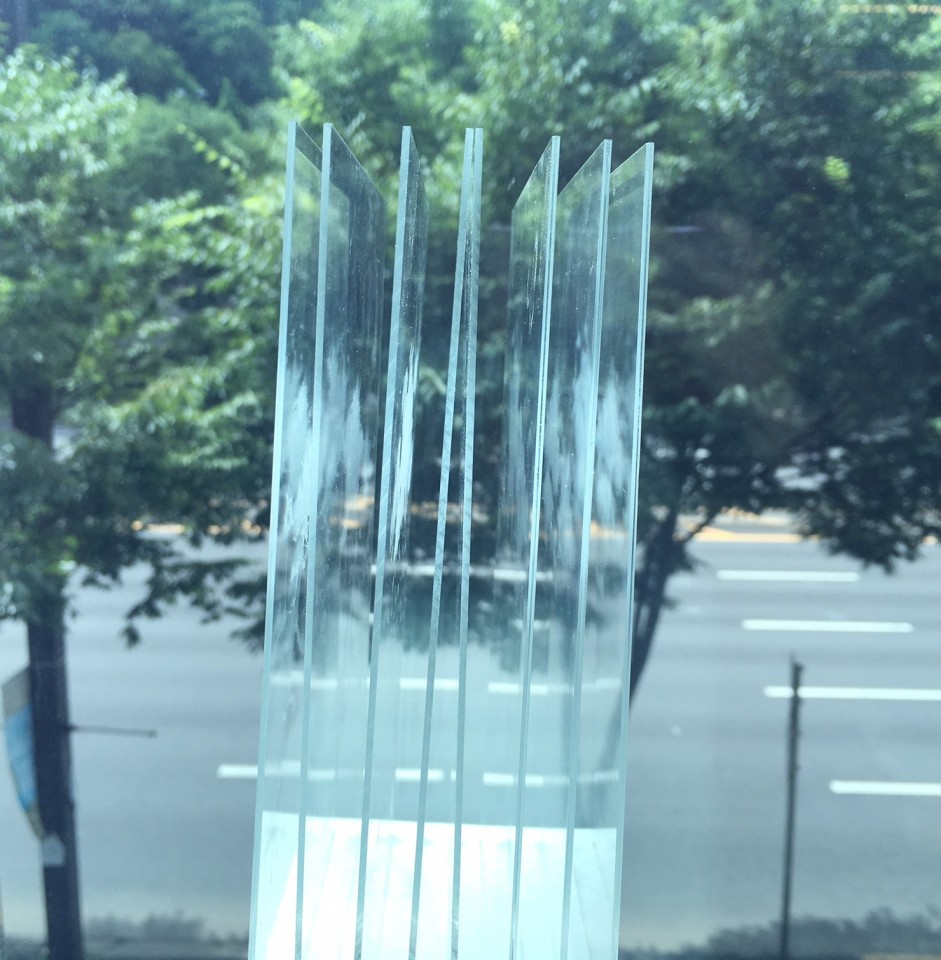
아래 사진은 제가 구름모양 스크래치를 낸 아크릴 판을 제일 뒷 쪽부터 찍은 사진 입니다.
↑
위의 그림은 맨 앞쪽의 아크릴 판입니다. 아크릴판 여러 개로 구름을 입체적으로 표현할 것이기 때문에 앞쪽의 아크릴 판에 구름을 그릴 때는 구름의 면적이 좁아진다고 생각하시면서 구름을 작게 그려주세요.
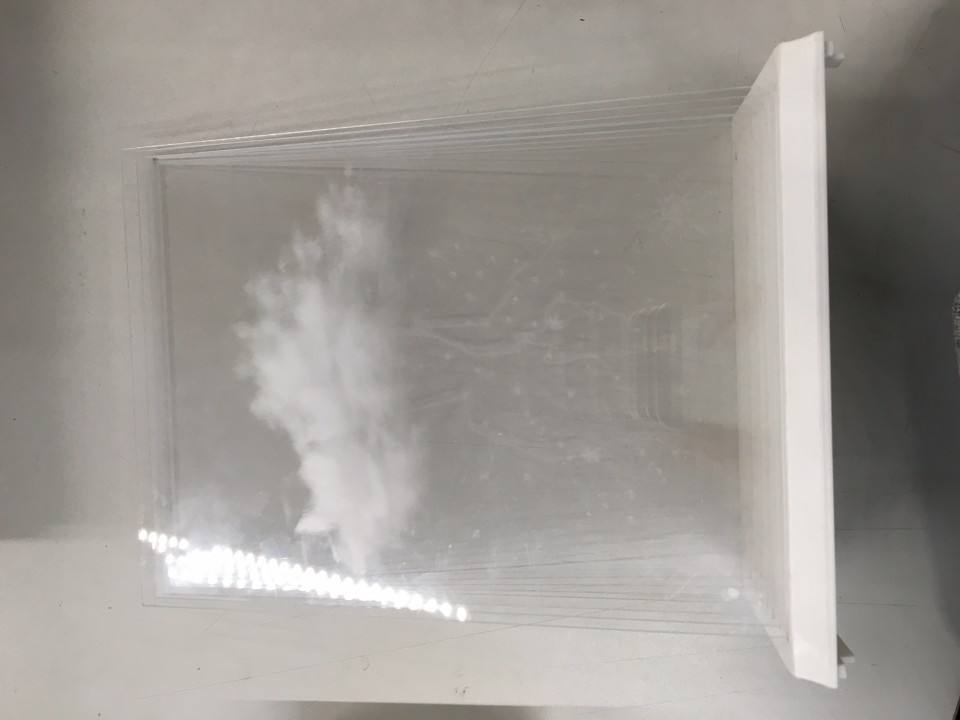
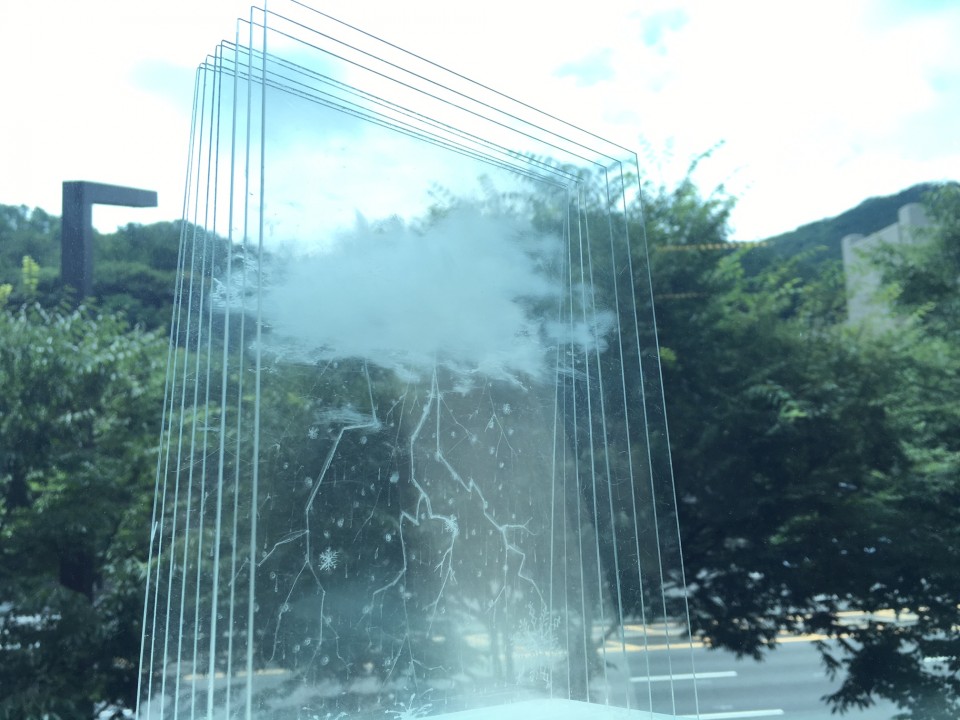
다 겹쳐놓으면 이런 느낌입니다. 실제로 보면 느낌이 더 좋은데 사진을 못 찍으니 이렇게 밖에 안보이네요ㅜㅜㅜㅜㅜㅜ
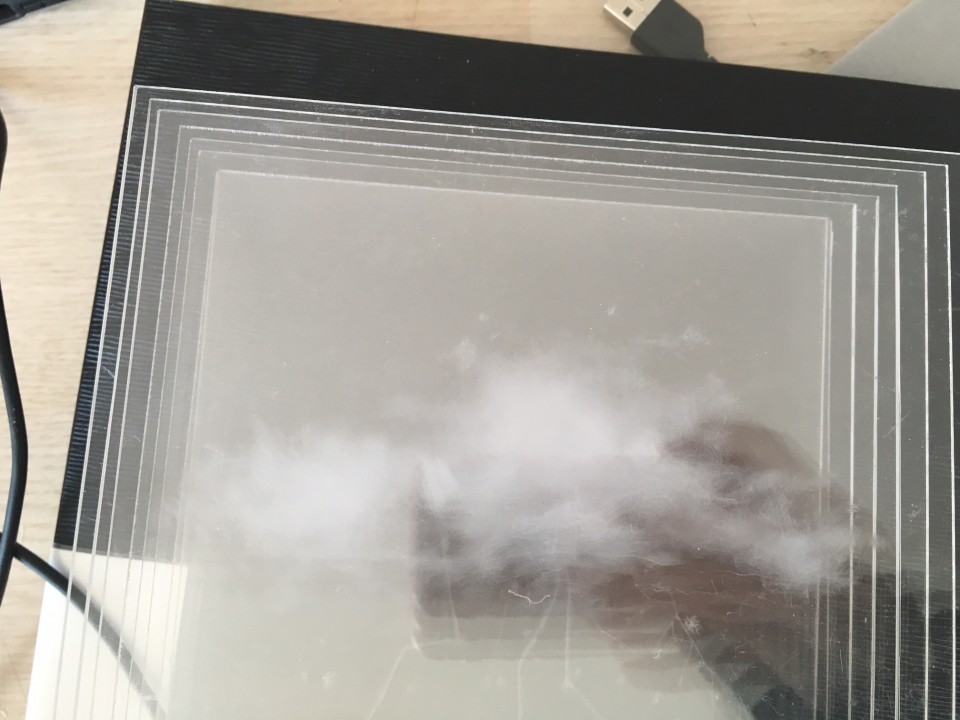
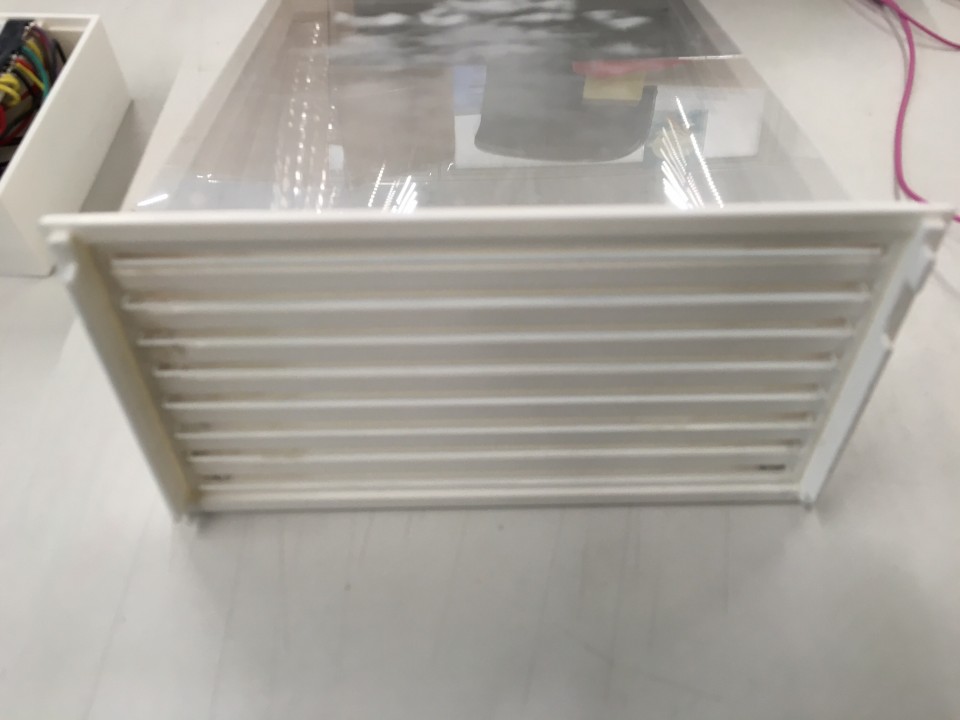
밑 부분은 이런식으로 아크릴 판을 끼우듯이 되어있습니다.
각각의 아크릴 간격은 띄워져 있어야 합니다! 그래야 더 구름 같이 보이니까요~~~!
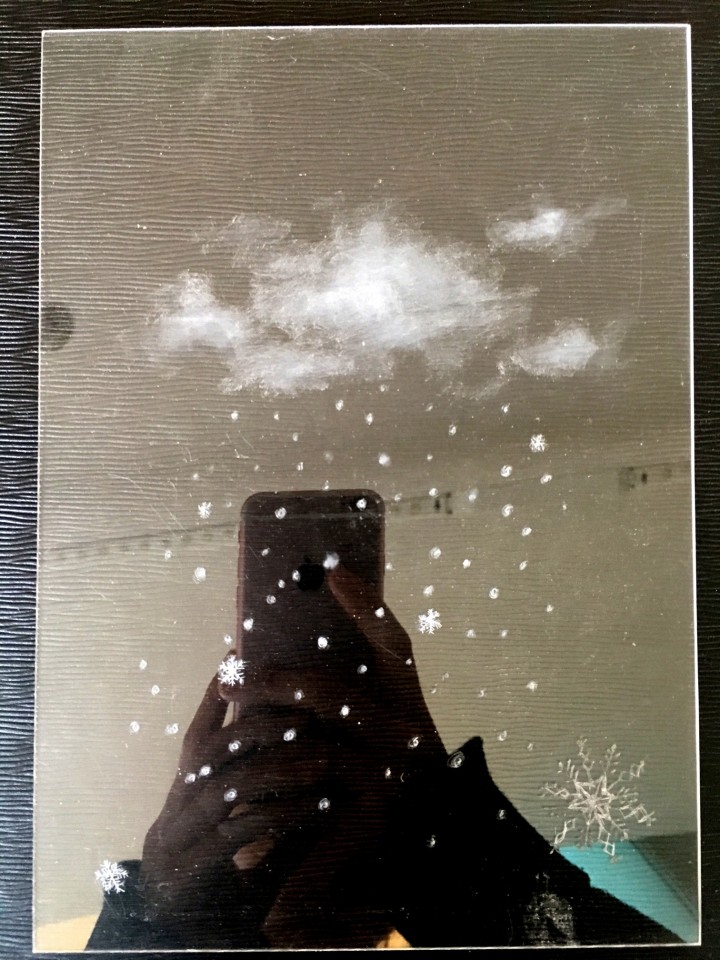
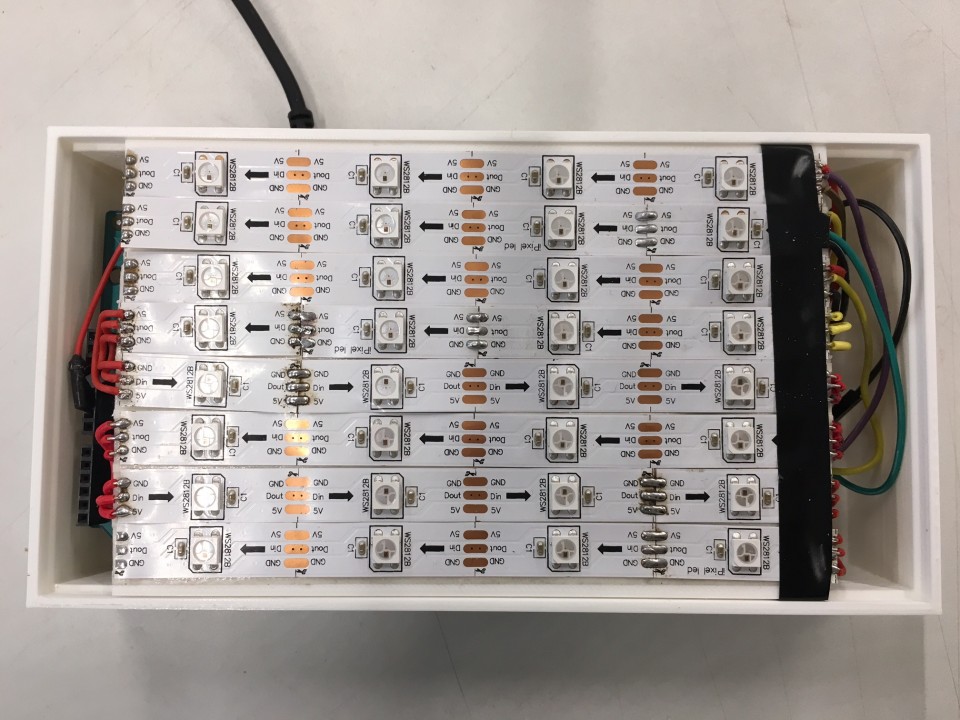
LED는 일반 구름 4*5 / 눈 4*1 / 번개 4*1 / 비 4*1 이렇게 작업했습니다.
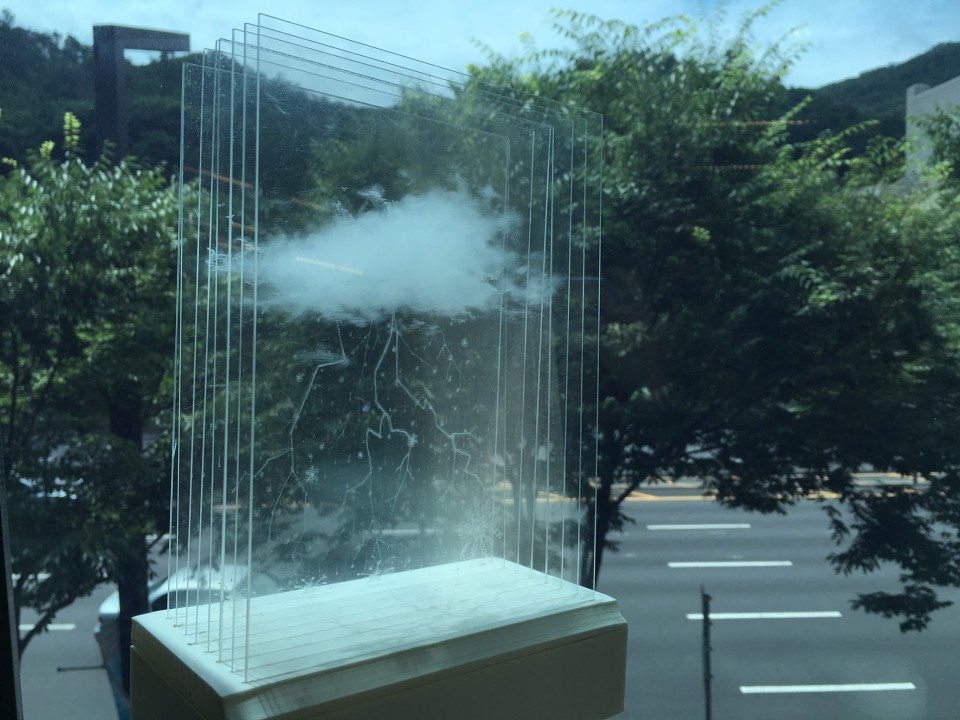
이렇게 보니 입체적으로 보이게 만든 구름이 평평해보이네요ㅜㅜ 하하하하하.........
저도 앞쪽으로 올수록 구름을 점점 작게 그리는 것을 못해서 그런거 같네요
구름을 아크리판에 그리는 것이 처음 해보는 Maker한테는 어렵게 느껴지실 수도 있지만 사포질을 살살 돌돌돌돌돌 돌리면서 하시면 쉽게 할 수 있어요!
그냥 사포질 하듯이 쭉쭉 긁어내면 안돼요!! 무조건 원을 그리듯이 사포로 살살 문질러야 합니다.
비를 그릴 때는 아크릴 판에 미세한 스크래치를 내야하는 만큼 사포를 뾰족하게 말아서 일자로 쭉 긁어주시면 됩니다.
그래도 사포로 안될거 같다 싶으면 송곳!!!!! 저는 송곳으로 비를 그렸습니다. 송곳도 안되면 아크릴칼로 해도 되겠네요~^^
구름 그리는 작업을 하실 때에는 손을 무조건!! 조심하시고, 중간중간 물티슈로 아크릴 판을 닦아서 구름 형체를 확인하시면서 하면 좋습니다.
동영상
모델링 파일

** 모델링 파일 및 컨텐츠에 대한 내용을 코코아팹 외부에 사용할시 출처를 정확히 밝혀주시기 바랍니다.


염소할배

